Showing posts with label dyeing without dye. Show all posts

Wednesday, March 29, 2017

Dyeing Without Dye

I wanted to name the post "Taming the Uglies" but figured if someone wanted to use the search engine on my blog the best would be what I used.

Most of us have wool we don't particularly care for and wonder why we bought it.  Yet wool can always be changed by over dyeing with dye, marrying wool in a pot with soapy water or sandwiching different colors of wool together, twisting and tying before putting in a pot of soapy water.  I've done all those techniques at one time or another and have posted the results on this blog.  So here are the subjects of today's efforts.

Top left above is a plaid which I have never used as the white is too white. Bottom far right is a pinky red and is a reversible and it is too pink for my taste and would have preferred a more barn red.  Although was sure that would not happen in this experiment.


Was hoping by marrying all them together would soften the white in the top left, bleed out some of the red in the other wool and wanted the green, black and blue to dull the pinky red. 

Basic Instructions:  I presoaked the wool with very warm water with Ivory (no bleach) soap.   The pot of wool was then placed on my range with high heat until it was steaming but NOT boiling.  The temp was turned down low so that it would simmer NOT boil for at least an hour. 

From time to time I'd push and turn the wool in the pot to help release some color.  Slowly the color would get a bit darker.  When I was confident there was no more color to be released put in about half cup of white vinegar as the mordant so the wool would absorb and keep the color.  Again I moved the wool about in the pot and let it simmer about 15 minutes more.  

The pot of wool cooled down on the range with NO heat while I ran my errands.  Then rinsed the wool, spun out the remainder of moisture in  my washer and put in the dryer under low temperature with a couple fluffy towels.  Thought about hanging to dry outside but it was rather cloudy outside.

As one would expect there was no significant change in the dark plaids and just subtle changes in the other.
Above you can see the white was tamed as it did absorb some of the red and dark.  So could see me using that in a pinch for something.  The pinky red did absorb some of the dull of the plaid.  It was a fun experiment to show you who have never dyed wool before.  But in all honesty these need some serious 'intervention' before they will be on my good list line up.  Me thinks one day they will be in a pot with some dye as I've more yardage of both those uglies.

Hope you have a great Wednesday evening.  Now back to work on my Goat.

Saundra

Monday, March 14, 2016

Confetti Dyeing

The other day while perusing my favorite blogs I came upon Gayle's blog post at The Middle Sister.  Among the eye candy of projects being worked on saw someone's confetti dye job.  So that made me want to share with my readers how they too can do it.

Actually the last time I dyed with snippets was back in 2011 (just checked my blog archives) but I've gained some new followers so maybe this will be new to some of you. Here were those results on a pink piece of wool and a white piece of wool.  Picture doesn't look right so maybe I didn't use a flash.
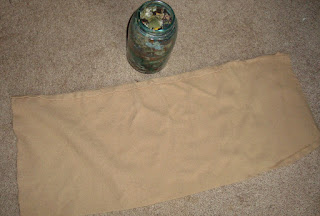
This time decided to use a piece of beige wool skirt.  You can sprinkle the snippets on a damp or wet piece of wool. But starting with wet wool is always best to be sure the wool is completely saturated with water. You can squeeze out the bulk but at least the core of the wool would be wet.  My snippet jar was in need of emptying anyway so thought it a great time for a tutorial.
While spreading the snippets it was fun to see the ends which were snipped off the end of a loop for various rugs I'd hooked.  Some wool in there were back to last September when I was hooking Nantucket Broom Ride.
Next you would roll up the piece or pieces of wool and tie it together.  I used the selvage of some cotton fabric which I keep in the laundry room for such things.
Then into a pot of water with a mild detergent (without bleach) to bleed out the dye in the snippets.  I simmered this for maybe 15 minutes, then put a glug of white vinegar in the pot and continued simmering another 15 minutes.

The pot then went from kitchen stove to laundry room wash tub for the heat to drop then hand squeezed the water from the roll.  The roll was then taken outside, untie and free the snippets to be available for any birds who needed fill in a nest.
This is the inside roll result.  There's a little color and the dark browns added a nice touch since I do primitives.
And below is the outside of the roll.  You can tell because the left edge is rather bland since there were no snippets on the outside of the rolled wool.
This was fun to do again and think this tan wool may be used in something in the future.  Thanks Gayle, and your friend for inspiring me to do this again.

So if there are any of you wanna-be-a-dyers out there, this would be a good fun experiment.  This and always the marrying of wool to get a primitive dark or other colors.  

Hope you had a good Monday everyone.  Now I'm going back to hooking daffodils.

Saundra  

Saturday, April 25, 2015

Marbelizing Results are In

For those of you who have never done marbleizing, you will be quite surprised by the results and how color can be achieved without dyes.  The picture below shows you what the original light peach color of the wool used in the sandwich looked like before and after the process.  And I've folded the wool so you can see how each side of that wool changed color depending on wools chosen for the outside layer.
On the above photo to the left I used the brighter blue wool and olive green, with peach between.  The wool on the right was the same light peach and on one side of the sandwich was golden brown and the other side was a navy blue.  And, do you remember in yesterday's post there was a narrow strip of a brighter navy at one end?  You can see what that did to the wool, look at the top of the wool on the right (above).

These are the wools which were used for the peach to the left in the above photo.  Notice too, both sides of the olive wool changed colors also.  The darker half was rolled against the blue, also that olive changed rolled against the bright blue as well.  Interesting, eh?
Below shows both sides of the golden brown and both sides of the navy used for the other sandwich.  I put both rolls in the same pot, and yes they were squished in tightly.  You can see how the bleeding collected in certain areas.
Wish I could say this was planned, but it wasn't.  The picture below shows that my beer wool color has been chosen.  Whatever it was that I'd had planned for my son's beer previously, has changed.  This is it. 
If you want to see the wool pre dye pot, just scroll down to yesterday's blog post.  For those of you who want to try this I'd love to see you post results on your blog.  Since I don't have everyone's blog on my side bar sure hope I find out who tried it so I can see pictures. 

If you think of a question while in the process or if I've left questions in your mind feel free to ask.  Remember tho, if you are a NO-REPLY blogger I won't be able to reply to your e-mail if you post the question on my blog.  But will be able to answer if you write me personally.

Have fun playing and Good Luck.

Saundra