Showing posts with label sewing on cotton binding before hooking. Show all posts

Monday, June 5, 2017

A Follower Wants To Know....

A follower wants to know just how this sewn on binding thing works so will try to clear it up for you.  As mentioned yesterday I don't always bind this way ~ it all depends on what I want for the rug.  

Sometimes I whip edges with wool fabric or wool yarn, have used wool covered cording and wool on the back, also used the standard woven cotton rug binding and this way when wanting to hang on the wall.  

The traditional cotton binding is only 1 1/4" wide.  Reason that I like using a heavy stock fabric (like a cotton twill) for the cotton binding is that I can cut it 3 1/2" wide for a more substantial coverage and sew a sleeve at the top.  I rip straight of the grain for this system.

You may need to refer to yesterday's post to clarify the first steps taken, however, these are those lines drawn on yesterday's post.
In the photo below you can see the two rows of straight stitch and the zig zag connecting those rows.  This is 1 1/4" away from the edge of the pattern, which would be the last hooked row of the pattern.  Except sewing the binding on now is much easier than trying to sew up close and personal AFTER it is hooked. 

In the photo above and the one below you can also see that black line which is drawn 1/4" away from the edge of the design.  So you would lay your binding fabric facing away from your hooking area so that when it is stitched on it would fold toward the back of the rug.  
You need to place the binding fabric up to the edge of the newly drawn 1/4" mark, pin it in place and stitch 1/4" away from that edge.  That is the standard sewing edge and if you know your way around a sewing machine you should be aware where the sewing foot would rest to accomplish that.  Here is a visual.
And another.
Below is another view where I've pulled back the edge so you can see where it was stitched down and where the 'sewing edge' is.
Below is another view and you may have noticed that I use four pieces of fabric for the top, bottom and sides.  Luckily the twill was wide enough to accommodate the length so it didn't need to be pieced.
When Folded outward I am free to hook up to the binding.  Talk about getting close to the binding so the foundation doesn't show......
Actually in the photo below I am using #9 wool strips and am hooking in two holes away from the binding fabric and not the hole right next to it.  But is is still hooked close and no foundation will show.
s

Sunday, June 4, 2017

EEK, I Almost Forgot

Yesterday late afternoon while hooking on the blackbird (crow, raven) thought I'd start hooking at the top and around the corners.  All of a sudden realized my pre-binding stitching wasn't done.  What a fiasco that would be with the size of this rug to do after it was all hooked.  So stopped hooking and worked a little more on wool whipping Magdalena's Goat.  Am SO hoping to finish that binding task tonight.

So first thing over coffee this morning was the sewing task.  From the edge I drew a line 1 1/8" away from what would be the last row of hooking.  Then did two rows of straight stitching 1/4" away from each other with a row of zig zag connecting the two rows.  This way it prevents the linen foundation from unraveling and I want to be sure the edges are secure.
Next I drew a 1/4" line from where the last row of hooking as a sewing guide on where to attach the fabric.  Yeah, I know, I know there is some controversy as to whether it should or shouldn't be done before the rug is finished.  I don't do it all the time unless I know for sure how it will be bound AND, no other changes will be made.
As I knew my plan of action I did make some changes so was good to go with sewing the binding fabric on.
If you notice at the very bottom I extended the length of the rug about another 2" for more separation between the last rung of the 'tree branches' and the bottom feather.  Plus wanted a somewhat larger feather ~ not that much larger but wanted it to have the same impact and bordering effect as the top bird and the side feathers.

As previously mentioned tonight will be wool whipping time with a glass of pinot noir ~ that should make the pain of the whipping a little more palatable don't ya think?

Happy Sunday.... the rain will visit here again after 10 p.m. tonight.

UPDATE:  My blogger friend Lauren (Rugs and Pugs) keeps me in check to ensure proper information is provided my readers.  

She suggested I post the dimensions of the pattern.  Actually, if the pattern is enlarged I've usually kept the size visible in the photos. However, for those of you who can't read thru the changes in the photo above or didn't notice the dimensions in the previous post, the original size was 35 X 43.  With the increase it will now be about 35 x 45.

It is great to have an editor who isn't on my payroll ~ thanks Lauren.   

Saundra

Thursday, February 2, 2017

Sewing on Binding Tape or Fabric

A follower asked me to explain how I do the sewing on of binding tape.  I'm cheating here and using an old blog post which was done in 2013.  The method is the same whether using regular binding tape, wide binding tape or cotton.  


There are numerous ways to bind a rug and I have done several of them but not all. So far I have whipped with wool yarn, whipped with wool strips, wool covered cord, regular cotton binding tape, cotton and with this extra wide cotton binding tape. They have it in numerous colors but you need to buy the whole roll which can be costly unless you have a guild or other friends who would be willing to share the cost.


I only do this if there are no plans to enlarge the border or design.  The first thing I do before hooking is sew two rows of straight stitching and 1 row of zig zag stitching about 1 1/4" away from the edge of the design.  I do this because it is much easier to put this stay stitching in before the rug becomes cumbersome and heavy.  I like for the trimmed edge to be secure from fraying.  You may also notice that I mark the corners at an angle to reduce the bulk for when the corners are mitered.  That corner is also about 1 1/4" away from the design.
Next thing was to draw a line 1/4" away from the rug design; which would leave 1" beyond as the remaining foundation.  Actually, when using cotton fabric I leave a wider allowance for stability between the hooked piece and the binding.  

Next, lay the binding tape along that edge (yes, I'm using another design as an example as I hadn't anticipated doing this tutorial earlier.  Anyway, when butted up to the drawn edge I know that my 1/4" seam allowance will sew along the edge of the design and can hook up to the binding tape. Voila, part of the undesirable binding part of the work is already done.
Then you hook the rug, trim away the excess backing and mitre the corners of the backing.  
I sewed the binding tape to each side of the rug and extended a smidgen beyond the real dimensions of the rug at the corners so there would some excess, better to have a little binding extra than have it be too short.
Next the cotton binding is turned to the back and the corners mitered as well.  I play with it for a few moments, do some preliminary pinning and folding to see how much bulk I can afford to trim off.  Go SLOWLY, as you can always trim away more later, because if you trim off too much you may end up being short.  This photo shows where I'm folding.
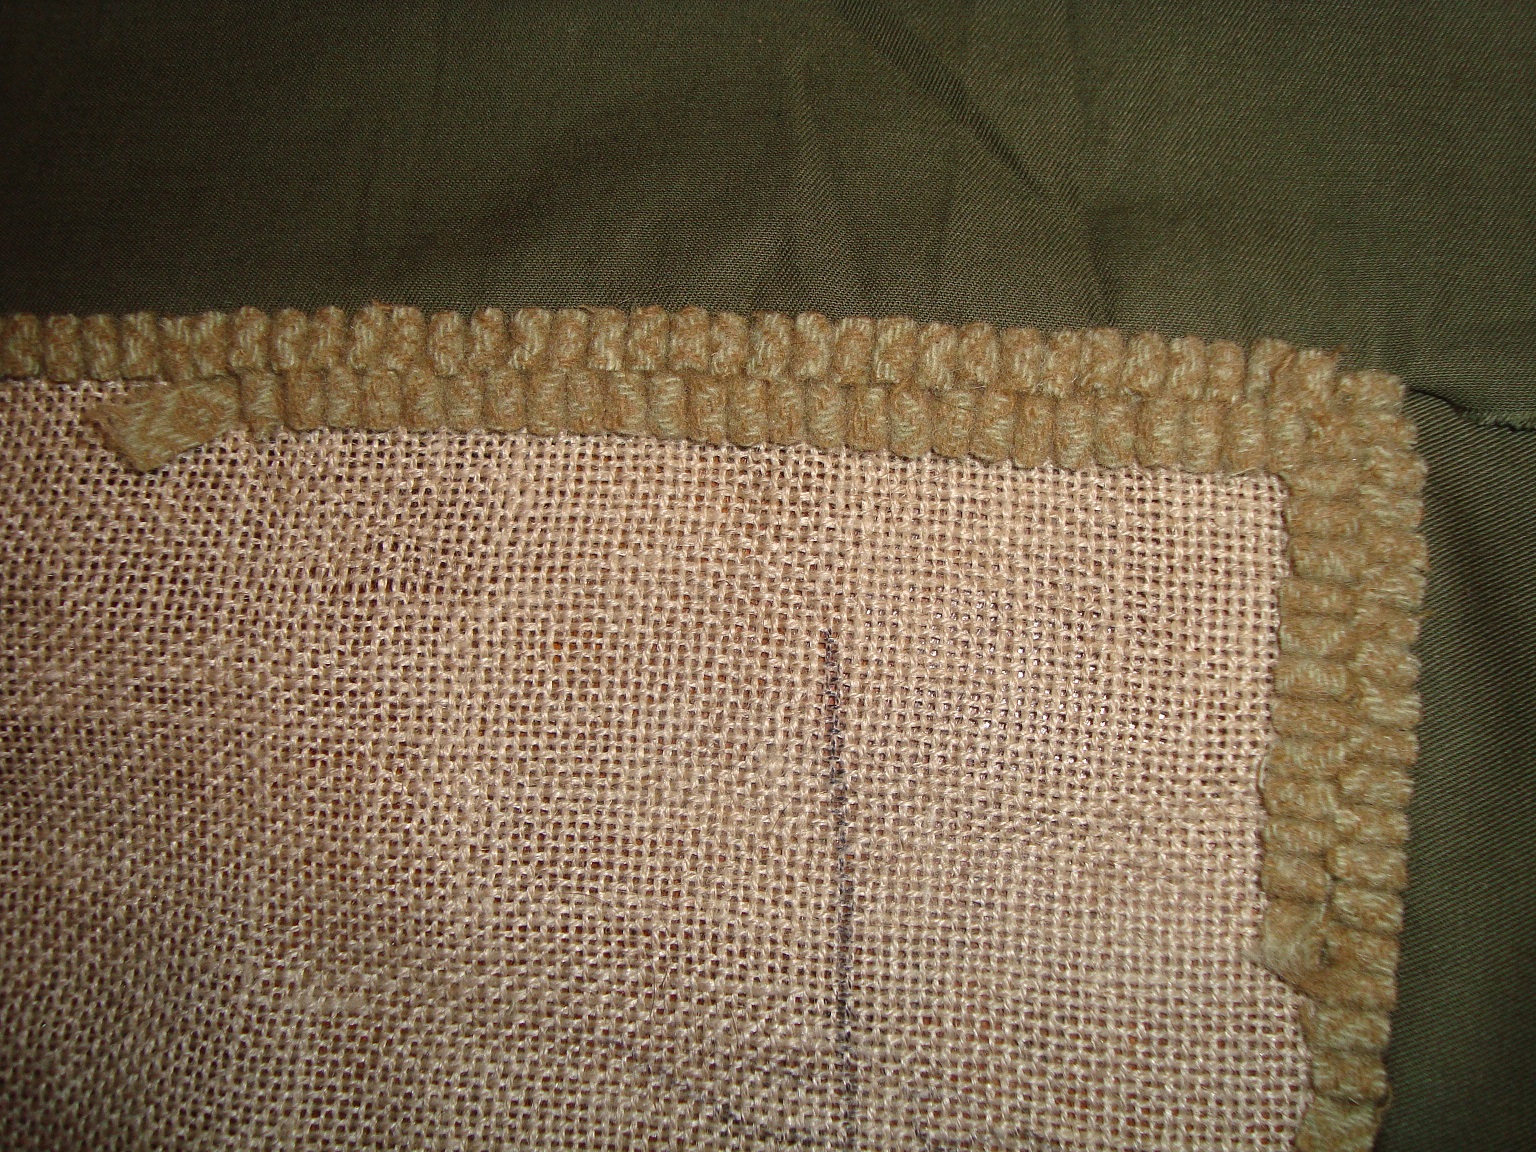
Here you can see I have trimmed a little off to reduce the bulk in the corner when the cotton biding is mitered.
And here is what the one end looks like after mitering the corners and sewing down the one end.  
The other sides need to be stitched down and then the rug will get another steaming.  

FYI, there is probably numerous topics the new hookers might like to know. which have previously been discussed on my blog.  An easy way to see what I posted or if it was covered, scroll all the way up to the top left of my blog. There is a small window there working as a search engine.  You could easily research my blog by doing that yourself using basic wording.  To find this and other blog posts I typed in "sewing on binding tape" and several posts popped up for viewing.

Tomorrow I'll have my hooked rug to show you (I think).  Thanks for visiting and have a great evening.

Saundra