Showing posts sorted by relevance for query binding a rug. Sort by date Show all posts

Tuesday, June 20, 2017

Types of Rug Binding

Just another minor detour from my hooked items theme.  There have been two recent inquires from two different folks wanting more information about binding rugs.

Although I've posted binding information several times on the blog before, newly joined folks may not have seen them.  THERE IS a way to do a 'search' on my blog using key words to find what you want.  At the top left on my blog is a white block where I just typed in "binding a rug" and this is the information which popped up:
http://woodlandjunction.blogspot.com/search?q=binding+a+rug 

Yet, wanting to please my readership (lost one today...wonder why?) thought I'd show you different ways I've bound rugs.  In the beginning I used only the 1 1/4" binding tape.  I was taught to do a row of straight stitching 1/4" away from the last row of hooking and then 1" away from that do two rows of straight stitching 1/4" apart with a row of zig zag stitching connecting the two.  Then you could trim the foundation knowing it is protected from raveling.  When the binding tape is attached it protects the foundation from further harm.
At rug camps I learned other ways to bind using complimentary wool. The colors of this wool on the lion below goes well with the inside colors.  It was cut on the bias, covered a cord and sewn down the appropriate length to cover the edge of the rug.
This is what the back looks like.  I felt the edge of the bias wool needed protection so did a zig zag to prevent it from raveling.  
Also have done several rugs using a wool whipped edge.  Most recent was the Magdalena Goat.  The formula for 'how much yarn' is that it takes 12" of yarn to whip 1".  Bless Kris Miller of Spruce Ridge Studios  for reminding me when I had a brain fart once.  
Now another question rises to the top, right?  You're wondering if you need to use binding tape if you whip.  Some people do but it isn't necessary.  The object of binding tape is to protect the foundation and whipping the edge does that.  The Magdalena Goat it is crisp, clean and no loose edges of foundation to be seen so did not use binding tape.  

I have also used cotton fabric in wide widths such as this.  I felt that the stripe would lend itself to a complimentary look if an edge were to show.  The Cherries and Candy Stripe piece is for my harvest table and not the floor so wouldn't see traffic.
Another binding technique was used on the Chicken Challenge rug below.  It was taught by Betsy Reed in a class.  If you would like to see it demonstrated on a previous blog post you can see it HERE.
NOW speaking of the traffic ~ this is the rug which was at my front door for 14 years.  Below is the back side and was also a wool covered cord with the self-binding a the back.  The wool was the same Dorr #44 used for the background.  This wool was cut straight of grain rather than bias.  Note the more squared corners than in the bias border previously. 
Below you can see how the walking of 14 years at the front door wore down the wool. The foundation is still perfectly fine and glad I pulled it off the floor when I did.  Plans are now to repair the edge with wool whipping around the cord all the way around.  I won't put it back at the front door again but it is too special to me to let it fade away.  This was my precious first hooking project and want to preserve it for my family.
There are additional binding techniques which I have not tried ~ one is the crochet edge and the other is with a braided edge.

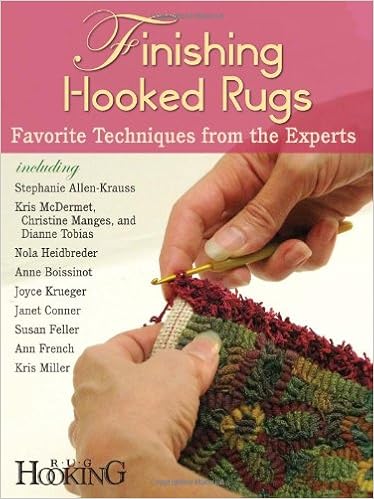
Several booklets are available to teach about binding and other basics but I can give you two sources.  One is called Finishing Hooked Rugs ~ a publication from Rug Hooking Magazine.
Another is by Kris Miller which also gives basics of rug hooking.
Have a great evening everyone; for those of you who 'may' be looking forward to more of my hooked rugs perhaps I'll begin again tomorrow.


Saundra

Friday, January 18, 2013

The Adventurous Experiences of Wee Folk

Okay, Okay, here is my Wee Folk.  And yes, it is a wool covered cord.  But I am TOTALLY happy now.  Yes, I took one step forward and two steps back but will explain all this.  Oh, and it isn't really more narrow on one end than the other it must be that my camera was tilted to the side as I make sure that I hook on the straight of the grain.
Any way, you've all heard the comment...." just sleep on it" I'm sure.  With all internal questions and angst I've had with the binding of the rug I awoke one morning at O'dark 30 (yeah there is a movie title now but in military speak it means in the !#@*& dark of night.  Anyway, my realization was that to do the binding method whether yarn or wool strips would jeopardize the edge of the rug.  And here is why.
Notice the pre-whipping on the left, which, by the way, was done lightly, makes a huge gap between the hooked rug and the whipped edge.  And now look what it is like after I pulled out the wool yarn.
That gap is even bigger.  So I realized what I was doing was making a 'perferated edge' which might rip off the end of my precious rug with wear or additional stress.  

I've successfully bound rugs with yarn or wool strips with backing which is more sturdy.  And THAT was the issue here.  While this pattern WAS hooked on good linen it wasn't quite as heavy as the Dorr Natural Linen therefore I didn't want to use the whipping technique on this rug. 

Here is a picture of the two linens ~ Dorr Natural Primitive Linen is on the left and the thinner linen Wee Folk was drawn on (producer unknown) is on the right.  Also, remember the one on the right is BLEACHED.
It might well be that this situation of 'a backing deciding the binding technique' would never had happened had I chosen a different method.  IF this rug had been bound with a regular cotton binding or the wool covered cord in the very beginning, I'd have  never realized that a backing can choose its binding technique.  This was an eye opener for me and one I will consider in the future so that I don't waste time trying a binding technique which won't work for the foundation.

The Wee Folk pattern I hooked was drawn from the original Vermont Folk Art and not the current owner Hooked On Ewe.   Don't get me wrong, this linen was just great to hook on and the rug will live a long life now that it has been bound in a way which is best for this type of backing.  So this is a lesson to be learned when you are trying to figure out how to bind a rug.  You may WANT to bind a rug a certain way, but what does the  foundation call for?

IF you are interested in hooking this design ( I love this Wee Folk rug) the patterns are now being offered by Hooked on Ewe.  And whether you have a pattern on this linen foundation from the former company or not, just choose your method of binding suitable to work with the foundation.

AGAIN, the linen used in hooking the Wee Folk was great, it just needed a particular binding method.  Click HERE if you would like to see a previously posted tutorial on how to do the wool covered cord style binding.

Thanks for visiting, have fun hooking and be kind to one another.

Saundra

Thursday, June 5, 2014

Something I learned from Barb...

...Barb Carroll, that is.  While I cannot remember all the subtle things I've learned from Barb over the years of classes there are two which really hit home after this last rug camp. 

First was Rug Binding.  UGH!  Not my favorite thing to do and not sure if I know anyone who enjoys it.  AND, my friends, if you admit you LIKE binding you might end up getting some offers for that task so be careful. 

Moving right along, while being taken on a mini tour at Woolley Fox I knelt down to look at the binding of her beautiful rug Santa Fe Crossing and realized there was a way she did the binding which not only was whipped with wool but allowed the last row of hooking to show instead of the wool whipped edge.  HUH?  Why didn't I absorb this from her book before?  Perhaps I just skipped thru that part thinking I knew it all.  There is a lot to learn in this booklet so contact Woolley Fox to get your copy of this book if they are available.
So this week I started binding The Cat's Meow rug trying to do it the way Barb's rug was done but with the wool yarn I have on hand.  This is the back of the rug where I'm grabbing almost 1/4" of cotton binding and whipping it sorta between the rows of hooking. 
This is a great way to bind a rug so gets a lot of protection from use BUT the whipping isn't seen from the front where the backing is rolled forward and whipped so it is wool yarn seen from the front. 

That is exactly what hit me in the head when seeing Barb's binding method on Sante Fe Crossing.  So thought I'd give it a try on my rug.  Above this the back of the rug with the whipped wool protection and here is the front where it is wool hooking showing.  VOILA.
The other thing I learned this class was about the last row of hooking around MY rug.  Surely every rug is different, but this is what she taught me about MY class rug Magdalena's Farm. 

Barb will always go to the student's wool first for the student's rug since those are the colors he or she likes.  Usually I know first off if I want a light or dark background.  This time I didn't care and told Barb that.  This way she could color plan to her heart's content with freedom knowing it could be light or dark and I'd be happy.  Based on the colors I took to camp Barb chose primitive black.  Sounded great to me!

So she told me to use a wool called Woodland Junction (yes, my name sake from Heavens to Betsy) along the entire edge so it would give the appearance of the rug being scuffed and worn beyond the other primitive black background.  Here is what Woodland Junction looks like along the edge in this section.
Below is what Woodland Junction looks like in the other corner of the rug.  Yeah, it does look like there was a little more wear there and would definitely add to the old look of the rug.  Woodland Junction wool is the only thing I'm using along the last row of hooking AND, it is also being used inside the rug here and there just for the dusty and worn look.  Sounds like a keeper for that antique primitive black background.  It was recently RE-milled by Betsy so you better grab it now because it may be a while before it is milled again. 
Maybe tomorrow I'll have some real progress to show you on Magdalena's Farm rug.  I could have shown you what it looks like now but I'm saving it until there's more hooked.

Have a great night and be kind to one another.

Saundra

Thursday, February 2, 2017

Sewing on Binding Tape or Fabric

A follower asked me to explain how I do the sewing on of binding tape.  I'm cheating here and using an old blog post which was done in 2013.  The method is the same whether using regular binding tape, wide binding tape or cotton.  


There are numerous ways to bind a rug and I have done several of them but not all. So far I have whipped with wool yarn, whipped with wool strips, wool covered cord, regular cotton binding tape, cotton and with this extra wide cotton binding tape. They have it in numerous colors but you need to buy the whole roll which can be costly unless you have a guild or other friends who would be willing to share the cost.


I only do this if there are no plans to enlarge the border or design.  The first thing I do before hooking is sew two rows of straight stitching and 1 row of zig zag stitching about 1 1/4" away from the edge of the design.  I do this because it is much easier to put this stay stitching in before the rug becomes cumbersome and heavy.  I like for the trimmed edge to be secure from fraying.  You may also notice that I mark the corners at an angle to reduce the bulk for when the corners are mitered.  That corner is also about 1 1/4" away from the design.
Next thing was to draw a line 1/4" away from the rug design; which would leave 1" beyond as the remaining foundation.  Actually, when using cotton fabric I leave a wider allowance for stability between the hooked piece and the binding.  

Next, lay the binding tape along that edge (yes, I'm using another design as an example as I hadn't anticipated doing this tutorial earlier.  Anyway, when butted up to the drawn edge I know that my 1/4" seam allowance will sew along the edge of the design and can hook up to the binding tape. Voila, part of the undesirable binding part of the work is already done.
Then you hook the rug, trim away the excess backing and mitre the corners of the backing.  
I sewed the binding tape to each side of the rug and extended a smidgen beyond the real dimensions of the rug at the corners so there would some excess, better to have a little binding extra than have it be too short.
Next the cotton binding is turned to the back and the corners mitered as well.  I play with it for a few moments, do some preliminary pinning and folding to see how much bulk I can afford to trim off.  Go SLOWLY, as you can always trim away more later, because if you trim off too much you may end up being short.  This photo shows where I'm folding.
Here you can see I have trimmed a little off to reduce the bulk in the corner when the cotton biding is mitered.
And here is what the one end looks like after mitering the corners and sewing down the one end.  
The other sides need to be stitched down and then the rug will get another steaming.  

FYI, there is probably numerous topics the new hookers might like to know. which have previously been discussed on my blog.  An easy way to see what I posted or if it was covered, scroll all the way up to the top left of my blog. There is a small window there working as a search engine.  You could easily research my blog by doing that yourself using basic wording.  To find this and other blog posts I typed in "sewing on binding tape" and several posts popped up for viewing.

Tomorrow I'll have my hooked rug to show you (I think).  Thanks for visiting and have a great evening.

Saundra

Saturday, September 6, 2014

Binding Barb Style

There are several different styles of binding techniques which have been posted about here in the past.  Since I'm binding Magdalena's Farm rug thought it was about time to do another tutorial of sorts. 

I've been very fortunate to have had many camps with Barb at Woolley Fox and when we were treated to a home tour took the opportunity to check out the bottom of her rugs to see how they were bound.  Oh yes I did girlfriend (as I swirl my head around like a teenager)!  Bold of me, right?  Well a girl just needs to see first hand how the master does it.

Barb has a booklet which gives all the information about hooking, cutting wool, hooks, etc., a very good beginner book.  It also shows how she binds her rugs.  Hopefully it is still in print since I'm posting about it here.  By the way, there is a free pattern insert inside too.
In the book Barb demonstrates how she uses wool yarn to whip on the underside of the rug by catching the foundation and the cotton binding. Must admit that Mz. Barb is more liberal with her wool yarn than me but mine does the job ~ hers is more lush.  Neither her way nor my way is seen from above and does not detract from the wool rug above.  That is the beauty of this style.
My yarn has variegated colors which are also in the rug itself.  But again, it isn't seen from the top of the rug but makes a nice statement when you flip it over.
Now, the hidden secret I learned while snooping under Barb's rug is that extra step.  One which I've known about since looking at her binding but haven't tried until now.  If you look closely at the picture above as well as the one above that, you will see a gentle running stitch down the middle of the cotton binding.  Now why didn't I ever think about doing that? 

If you think about it, that would make the cotton binding more stable when doing the inside stitching step.  It would also prevent the cotton binding from wrinking and fraying more easily.  Yes, it is yet another step for a task none of us like (binding a rug), but it does have its good points.  This is the first time I've gone that "extra step" yet wanted to let you all know about it.

For sure this last binding project will be done in time for Cape May.  Today I even made rug labels for several of the last rugs I've hooked this year.  While they may not all be attached to the back in time for Cape May show I do have something special to show you about making rug labels.

Hey, you ain't seen nutten yet.  Wait til I post about my rug labels tomorrow.  Okay, okay, some of you gals are far more computer and label savvy than me so you may know more, but today I got better than I was yesterday. 

Have a great evening everyone and be ready for the cool down tomorrow.  Personaly, I can't wait.

Saundra

Thursday, May 8, 2014

Binding a Rug with Cotton Binding 101 part 1

To me, this mat called for a cotton rug binding rather than whipping with wool or yarn.  Sounds like a piece of cake but there really is more to it, particularly if you are hooking a round chair pad or rounded corners.  Today's demonstration will be with the circle mat just hooked.  This is what it looks like at this posting ~ not finished with the binding but want to show you the whole process. 
LESSON #1.
Newbies there are revelations here which you may want to learn.  For instance cotton rug binding WILL bleed and if you have put a lot of hard work into hooking a project it could be compromised if you don't take precautions.  Just think about all the work on a rug and someone comes in out of the rain or snow and gets your rug wet?  Oh, not on the floor so you're safe?  Maybe not.  Suppose someone spills some ice tea or glass of water on a mat on the table?

So I'm using black cotton binding (looks grey with the flash) and unrolled several yards so that I could bleed it out. I poured in a little detergent (NOT with bleach). 
And then I started running warm water into the basin. Hey, I'd just turned on the water at this point and look at the red that is bleeding out of the binding.
A little while after the basin was filled, but before heating, it looked like this.
An idea hit me that since there was all this free dye why not use it to my advantage, right?  So went to my repurposed finds and these pieces of skirt had too much white for my liking so in the pot it went. 
 Here it is being submerged into the dye pot and that yellow you see is a reflection of the light above my range and the flash.
The wool and binding was married for quite some time as I stirred and tugged to move the wool around.  Finally the cotton binding was removed and I put in some white vinegar to set the color in the wool.
Meanwhile, I rinsed the cotton binding and hung it on the clothesline outside.  When I prewashed the WOVEN cotton fabric for the binding on the Chicken Challenge rug it was my plan for the cotton to get knotted, raveled and tangled to add to the primitive look.  But didn't want the regular cotton binding tangled so hung it on the line.
Would you believe there was this much dye left over AFTER?
Alrighty then.... this is what I started with...
 ...and this is what it looked like after being in the cotton dye residue. 
 
I didn't realize how long this would be and by now everyone is getting bored or restless.  So LESSON #2 will continue tomorrow.

Have a great evening everyone.  We had one gloriously warm day today and hope you all had the same.

Saundra

Saturday, March 15, 2025

BOUND and LABELED

As you have probably noticed, I don't have a permanent style of binding my rugs.  Each seems to be different and show me what it wants.  Actually, the purpose of binding a rug was intended to protect the edge of the foundation from fraying.  Animals Great and Small appeared to need a whipped edge.  The wool yarn chosen was one by Ali Strebel which had all similar colors that appeared in the rug.  Ali will special dye wool for you if you send a photo of your rug or colors to be in your rug.

It is nice to display the rug in my living room where I can see it every day.  It will be on the floor as there is no more room on my walls in there right now unless something else comes down.  But it is nice to see it completed and visible every day.

As you can see I cannot get a straight photo, ever, and it is always the right side that droops.  Guess it drops when using the right hand to push the button.
Below is a photo of the label, which has a photo of the original antique rug.  You can also see the colors of the wool better in this photo.  Notice too, the back of the rug and spacing between rows.  In a previous post I mentioned hooking 4 holes away from the previous row.  Depending on other variables it could be 3 spaces.
Although the purpose of binding a rug is to protect the edge from fraying, some folks choose to add a cotton binding just above the whipped edge too.  Why?  Heck, I hate binding to begin with so why would I overkill the protection and the task?  Anyway, just my thoughts on that topic.

Happy hooking and back to the Deer rug I'm working on.

Saundra


Tuesday, November 14, 2017

Braiding the Betsy Way

I've had a few classes with Betsy and each time she demonstrates the braided edge technique promise myself to do that soon.  Said that to myself again at this class.  While I was taking still photos of the process another student was recording it.  She was to have sent a copy but never received it.  Not sure if my computer isn't reading her software or what the problem is.  So, here goes my still photos.

Betsy trims the foundation backing 2" away from the last row of hooking and does a running stitch all the way around securing it to the bottom of the rug.  
Betsy said all the rugs have turned out just fine with the tacking down of the foundation fabric.  Yet, I'm so anal would have to serge the edge before doing the running stitch.... that's just me.
In the photo above Betsy is showing how the gold wool binding hides the join seam and protects the foundation from unraveling (the other rug).

For the wool braid Betsy uses 2" ripped straight of grain strips.  It can be three of the same color or a mixture of the wool used in the piece to be braided. 
Again, they are straight of grain and NOT bias.  You would need 2 1/2 times the length of the perimeter of the rug to cover with a braided edge.  To lengthen strips the two pieces of 2" strips are placed at an angle to form an F and stitched cross-ways to get the look below.  Sorry, thought I'd captured a picture of the before but if you are a sewer you already know.  If not, then google 'joining strips of fabric diagonally'.
Here is what it looks like when the strips are stitched together.  One continuous strip of wool to use for binding.  As the sewing is at an angle it doesn't make a thick bulk at one spot and makes the transition of thickness ever so slight.
Below is how Betsy starts the braid... she pins the 3 strips of colors chosen and pins them together.

Then using a braiding attachment at the edge of the table starts the braid with a taught edge.  As the braid forms in length will move the braid thru the metal clamp and continues.  When I braid mine will probably go the cheap route and use an industrial clamp since I won't do a lot of braiding.  Who knows, maybe after I start will choose to buy a clamp so it works right.
After get the length of braiding needed, it is then ready to attach to the edge of the rug.  Betsy uses craft button thread which is a heavy duty thread.  She catches the edge of the foundation and bottom edge of the braid.
Betsy starts in the middle of the long side of a rug and goes around until it meets in the center.
Below is another example of how she uses the wool binding to protect and conceal the foundation and braided edge.  Her join is neat on the bottom and hard to detect.
 
Below notice how she pinches the butted edge together, using the same threat will stitch closed going back and forth until it is secure.   Slowly and strategically she snips away at the edges of the join to be sure only the top parts lay over the raw edge of the wool.

Then she stitches the protective flap which hides those trimmed parts of the braid.  The next step would be to stitch on the wool binding to hide the foundation which is still showing underneath the rug.
Below is a butted edge of a rug, can you see where the join is?  Me either and I was there.  
OMG, Betsy had SO MANY in progress samples to provide her students a step-by-step example of every stage.  When I grow up I don't want to be a rug hooking teacher.  I'd rather go to rug camp and play.  

Betsy, Loved your class and hope to see you again soon.

Saundra