Unfortunately I needed to leave camp a day early and just before the throw down of camp rugs. So was unable to take any pictures myself. Was hoping other camp participants might have snapped a few to send me. Seems Cathy Clark was the only person who had taken photos. Thanks for sending these to me Cathy.
Sorry I don't know who hooked the frogs on lily pads but will add names if someone emails me.
Also don't know who hooked the rugs above. However, I do know it was Lois Moore hooking the mermaid rug below.
Pumpkins were a popular design for Betsy's class and appears two were totally finished. One at the bottom was done by Pat Harris who did hand torn strips I think. She then started a crow mat which is partially seen in another photo below.
Cathy Clark was also working on a pumpkin rug; not sure who it was that started and finished the squirrel and way in the back is a rabbit being hooked by Cheri Reid.
Again I don't know who hooked the rugs above. But below is that part of a crow Pat Harris started in class.
The pumpkin mat above was started and finished by first time hooker Donna Tate-Steinbiss, Donna, you did an awesome job!!! Then she purchased a few more patterns and wool to do them. And started one in class ~ you go girl!
Will show you what I worked on in Betsy's class maybe tomorrow. Haven't done a lot of hooking this week.
Happy Sunday.
Saundra
I love replicating antique adaptation rugs but also design my own. Looking at old rugs in Early American Life magazine was my inspiration to learn to hook.
Showing posts with label Betsy Reed class. Show all posts
Sunday, November 19, 2017
Tuesday, November 14, 2017
Braiding the Betsy Way
I've had a few classes with Betsy and each time she demonstrates the braided edge technique promise myself to do that soon. Said that to myself again at this class. While I was taking still photos of the process another student was recording it. She was to have sent a copy but never received it. Not sure if my computer isn't reading her software or what the problem is. So, here goes my still photos.
Betsy trims the foundation backing 2" away from the last row of hooking and does a running stitch all the way around securing it to the bottom of the rug.
Betsy said all the rugs have turned out just fine with the tacking down of the foundation fabric. Yet, I'm so anal would have to serge the edge before doing the running stitch.... that's just me.
In the photo above Betsy is showing how the gold wool binding hides the join seam and protects the foundation from unraveling (the other rug).
For the wool braid Betsy uses 2" ripped straight of grain strips. It can be three of the same color or a mixture of the wool used in the piece to be braided.
Again, they are straight of grain and NOT bias. You would need 2 1/2 times the length of the perimeter of the rug to cover with a braided edge. To lengthen strips the two pieces of 2" strips are placed at an angle to form an F and stitched cross-ways to get the look below. Sorry, thought I'd captured a picture of the before but if you are a sewer you already know. If not, then google 'joining strips of fabric diagonally'.
Here is what it looks like when the strips are stitched together. One continuous strip of wool to use for binding. As the sewing is at an angle it doesn't make a thick bulk at one spot and makes the transition of thickness ever so slight.
Below is how Betsy starts the braid... she pins the 3 strips of colors chosen and pins them together.
Then using a braiding attachment at the edge of the table starts the braid with a taught edge. As the braid forms in length will move the braid thru the metal clamp and continues. When I braid mine will probably go the cheap route and use an industrial clamp since I won't do a lot of braiding. Who knows, maybe after I start will choose to buy a clamp so it works right.
After get the length of braiding needed, it is then ready to attach to the edge of the rug. Betsy uses craft button thread which is a heavy duty thread. She catches the edge of the foundation and bottom edge of the braid.
Betsy starts in the middle of the long side of a rug and goes around until it meets in the center.
Below is another example of how she uses the wool binding to protect and conceal the foundation and braided edge. Her join is neat on the bottom and hard to detect.
Then she stitches the protective flap which hides those trimmed parts of the braid. The next step would be to stitch on the wool binding to hide the foundation which is still showing underneath the rug.
Below is a butted edge of a rug, can you see where the join is? Me either and I was there.
OMG, Betsy had SO MANY in progress samples to provide her students a step-by-step example of every stage. When I grow up I don't want to be a rug hooking teacher. I'd rather go to rug camp and play.
Betsy, Loved your class and hope to see you again soon.
Saundra
Betsy trims the foundation backing 2" away from the last row of hooking and does a running stitch all the way around securing it to the bottom of the rug.
In the photo above Betsy is showing how the gold wool binding hides the join seam and protects the foundation from unraveling (the other rug).
For the wool braid Betsy uses 2" ripped straight of grain strips. It can be three of the same color or a mixture of the wool used in the piece to be braided.
Again, they are straight of grain and NOT bias. You would need 2 1/2 times the length of the perimeter of the rug to cover with a braided edge. To lengthen strips the two pieces of 2" strips are placed at an angle to form an F and stitched cross-ways to get the look below. Sorry, thought I'd captured a picture of the before but if you are a sewer you already know. If not, then google 'joining strips of fabric diagonally'.
Here is what it looks like when the strips are stitched together. One continuous strip of wool to use for binding. As the sewing is at an angle it doesn't make a thick bulk at one spot and makes the transition of thickness ever so slight.
Below is how Betsy starts the braid... she pins the 3 strips of colors chosen and pins them together.
Then using a braiding attachment at the edge of the table starts the braid with a taught edge. As the braid forms in length will move the braid thru the metal clamp and continues. When I braid mine will probably go the cheap route and use an industrial clamp since I won't do a lot of braiding. Who knows, maybe after I start will choose to buy a clamp so it works right.
After get the length of braiding needed, it is then ready to attach to the edge of the rug. Betsy uses craft button thread which is a heavy duty thread. She catches the edge of the foundation and bottom edge of the braid.
Betsy starts in the middle of the long side of a rug and goes around until it meets in the center.
Below is another example of how she uses the wool binding to protect and conceal the foundation and braided edge. Her join is neat on the bottom and hard to detect.
Below notice how she pinches the butted edge together, using the same threat will stitch closed going back and forth until it is secure. Slowly and strategically she snips away at the edges of the join to be sure only the top parts lay over the raw edge of the wool.
Then she stitches the protective flap which hides those trimmed parts of the braid. The next step would be to stitch on the wool binding to hide the foundation which is still showing underneath the rug.
Below is a butted edge of a rug, can you see where the join is? Me either and I was there.
OMG, Betsy had SO MANY in progress samples to provide her students a step-by-step example of every stage. When I grow up I don't want to be a rug hooking teacher. I'd rather go to rug camp and play.
Betsy, Loved your class and hope to see you again soon.
Saundra
Saturday, November 11, 2017
Happier Times at Rug Camp
Time to turn my mood to something more positive and remember the fun of rug camp before having to leave. But first would like to thank all those gals (and Eric) who helped gather my class equipment while I checked out of the hotel room. Also, thank you all for the condolence emails. I personally responded to those who I could reach, but thanks to the No-Reply bloggers who also sent warm messages. Okay, now to the fun part.
This was a class with Betsy Reed who is standing in the back making her rounds.
Below is a picture with Cathy and Donna chatting. This was Donna's very first rug camp and first experience hooking. Her sister Pat is in the grey hoodie. Sometimes other hotel guests would hear all the laughter and venture into the room. Whereupon Donna proudly said it was her first time rug hooking and..."if she could do it anybody can". Donna did a fantastic job and completed her first piece. She started her second and even purchased some patterns and wool from Betsy to have something to do during the winter. You go Donna!!!!!
Betsy had some new items which I hadn't seen at her last camp I attended; love this chicken pillow.
And here is a view of the patchwork back with wool applique eggs and embroidered patch EGGS.
A house pillow, and wouldn't that make a great housewarming gift to someone or even for you?
If you think the front was cool, just look at the patchwork back.
The Scardy Cat pattern had to come home with me and added to the pattern stash. Think I'll hook it as a mat for Halloween decoration instead of a pillow.
An elephant pillow....uh, think this pattern is already in my my stash too.
Look how well defined this basket and flowers pattern is hooked. Wonderful on my blog but even better in person.
A Tree of Life rug design.
Another primitve and cute pattern of Betsy's with a braided edge. I have never taken the time to do a braided edge but think the time is getting near.
I love the primitive dull colors in this star mat Betsy hooked. It is a rather sizable mat and could be a small floor rug. Sorry the carpet in the room is so distracting
This was a class with Betsy Reed who is standing in the back making her rounds.
Below is a picture with Cathy and Donna chatting. This was Donna's very first rug camp and first experience hooking. Her sister Pat is in the grey hoodie. Sometimes other hotel guests would hear all the laughter and venture into the room. Whereupon Donna proudly said it was her first time rug hooking and..."if she could do it anybody can". Donna did a fantastic job and completed her first piece. She started her second and even purchased some patterns and wool from Betsy to have something to do during the winter. You go Donna!!!!!
Betsy had some new items which I hadn't seen at her last camp I attended; love this chicken pillow.
And here is a view of the patchwork back with wool applique eggs and embroidered patch EGGS.
A house pillow, and wouldn't that make a great housewarming gift to someone or even for you?
If you think the front was cool, just look at the patchwork back.
The Scardy Cat pattern had to come home with me and added to the pattern stash. Think I'll hook it as a mat for Halloween decoration instead of a pillow.
An elephant pillow....uh, think this pattern is already in my my stash too.
Look how well defined this basket and flowers pattern is hooked. Wonderful on my blog but even better in person.
Cute Halloween Hat pillow by Betsy.
A pumpkin pillow with a proddy edge.A Tree of Life rug design.
Another primitve and cute pattern of Betsy's with a braided edge. I have never taken the time to do a braided edge but think the time is getting near.
I love the primitive dull colors in this star mat Betsy hooked. It is a rather sizable mat and could be a small floor rug. Sorry the carpet in the room is so distracting
And the back of the star mat below....me believes those were the wools used to hook the star too.
Since Blogger is doing strange things I must have used up all the space for photos on this post. There's more to share so will be sure to do another post soon.
SaundraTuesday, November 25, 2014
Magdalena's Olde Ducks
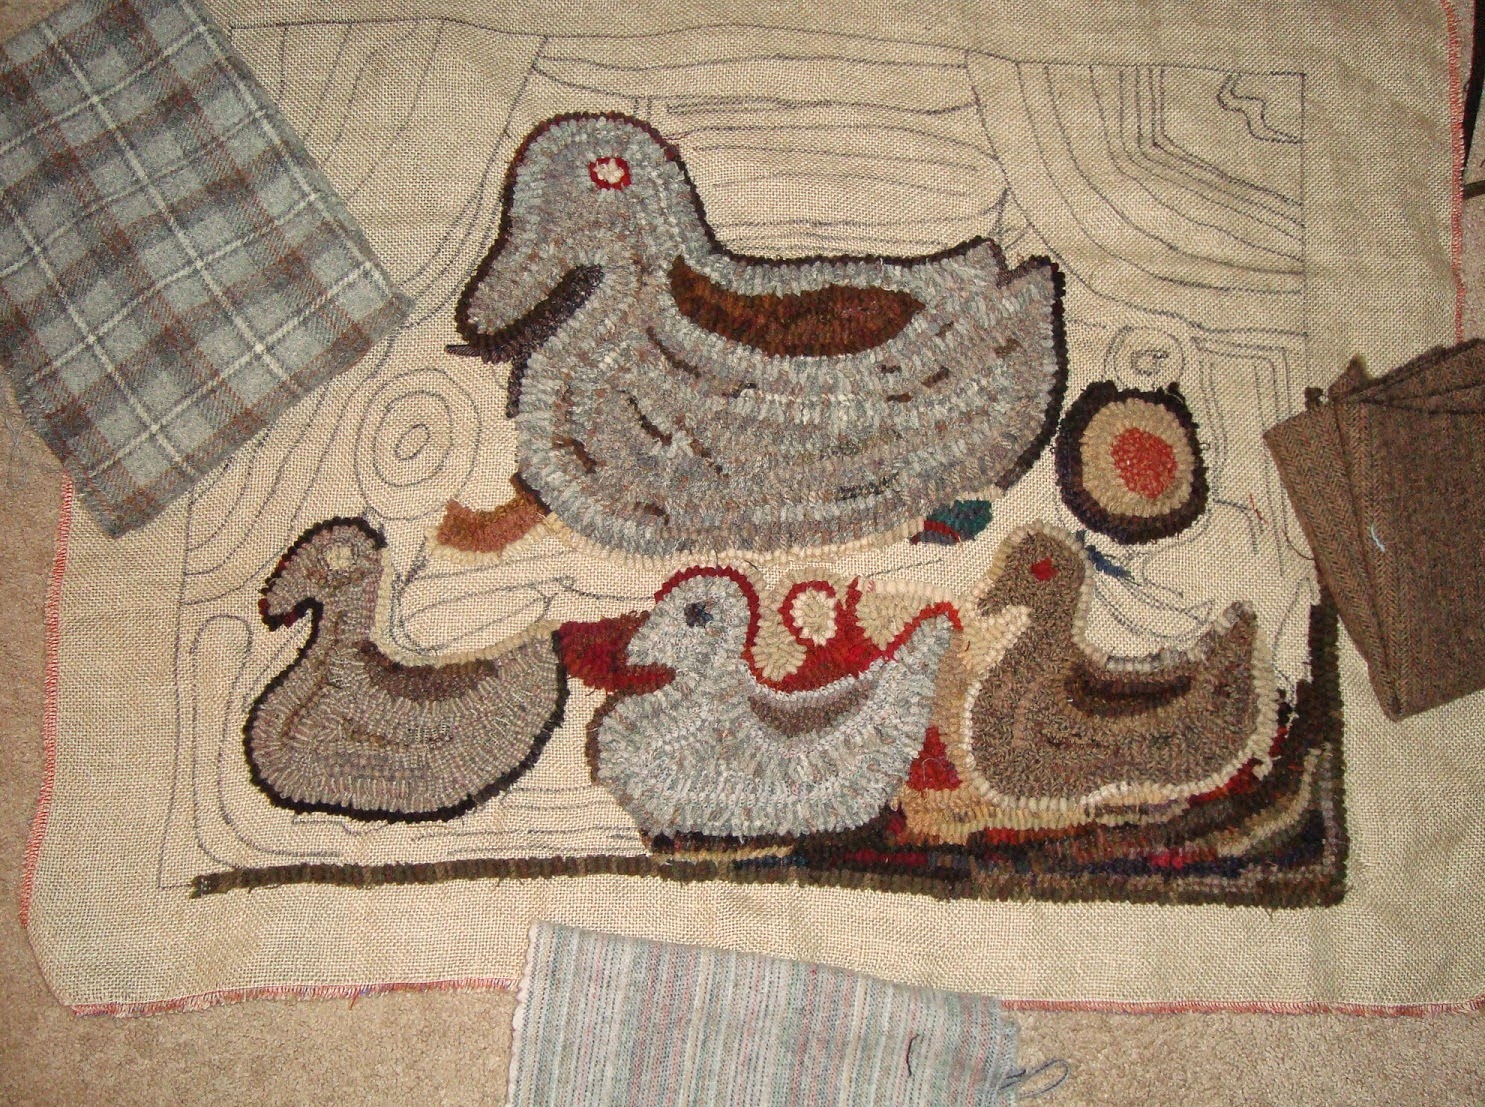
This is the rug started in the class with Betsy Reed in Ocean City, MD. It is a rug Magdalena hooked in the 1800's. As I was semi-following Magdalena's palate (but using what I had) didn't really need hand-holding but it sure was nice to be in Betsy's class to enjoy her company and her to give me input when I was stuck.
Here is a picture of where I am right now. Yeah, I know..... not much accomplished. But remember I also recently finished the cute Jolly snowman and bound the Folk Art Horse.
Anyway, the only wool cut so far for this rug was from the three pieces you see here. The rest of the wool is and will be from my worm bags to give the rug an aged look.
And oh my what a mess these individual bags become when they mingle. Magdalena used a lot of red, darks and lights in her rugs. I'm guessing that the Union Suit reds got used a lot when they no longer were functional.
I derive a lot of pleasure using my wool worms. But as mentioned above they usually end up I a hot mess knotted ball. That is because I'm a slob and lose control of my colors.
So how did Magdalena hook??? Did she hook a section with what fabric pieces she had at that moment? Did she hook the pieces as they became available? That would explain how she never ended up with a hot mess of a ball of wool worms.
Although I wouldn't want to live back in those harder times I sure would like to visit or be a fly on the wall for an overview of live back then. Hey, wouldn't that be fun for us hookers to be a part of a 'life back then' experience ?
Have a great evening everyone.
Saundra
Here is a picture of where I am right now. Yeah, I know..... not much accomplished. But remember I also recently finished the cute Jolly snowman and bound the Folk Art Horse.
Anyway, the only wool cut so far for this rug was from the three pieces you see here. The rest of the wool is and will be from my worm bags to give the rug an aged look.
And oh my what a mess these individual bags become when they mingle. Magdalena used a lot of red, darks and lights in her rugs. I'm guessing that the Union Suit reds got used a lot when they no longer were functional.
I derive a lot of pleasure using my wool worms. But as mentioned above they usually end up I a hot mess knotted ball. That is because I'm a slob and lose control of my colors.
So how did Magdalena hook??? Did she hook a section with what fabric pieces she had at that moment? Did she hook the pieces as they became available? That would explain how she never ended up with a hot mess of a ball of wool worms.
Although I wouldn't want to live back in those harder times I sure would like to visit or be a fly on the wall for an overview of live back then. Hey, wouldn't that be fun for us hookers to be a part of a 'life back then' experience ?
Have a great evening everyone.
Saundra
Wednesday, January 8, 2014
Betsy Class and Hearts and Swags Pillow Update
I'd hoped to have my pillow completed by tonight but sadly it isn't. Yet I did manage to get my trim attached. This was a technique that Betsy Reed showed us in her class this past November and it was instant love at first sight.
Below is a pattern Betsy offers. Notice how she made it look so old with the primitive stitched trim around the perimeter of the rug? And the unevenness of the sides? Yeah, I'm sure some of you don't care for it but to me it was wonderfully primitive as if the rug (or pillow) was in need of repair and....'she used what she had and did the best she could'. This is the first piece that caught my eye, mostly because of the trim.
Below is a photo of the left bottom side for a close up. Betsy went to the trouble of make the wobbly uneven sides just for that antique look.
Yeah, I'm sure some of you don't care for the look but to me it was very primitive and something I wanted to do. Okay, for my pillow didn't want the uneven sides but did like the trim vs. a fancy wool covered cord edge.
Betsy said to cut (rip) black (or whatever color you want) cotton fabric in 2 - 2 1/2" wide strips. First she said wash to remove sizing, bleeding and shrinking. Then it is put into a bath of brown dye to tone it down and give it age. Next the strips are tossed into the dryer , once dry then rolled into a ball. Yup, you read it here.....remove the knotted cotton strips and they achieve their natural wrinkles all wrapped into the cotton ball to be used later as a binding edge.
I started at the bottom of the pillow and left a tail at the opening. It doesn't show it well but the bottom left corner is just above the 5th whipped stitch. All four corners need to be stitched nicely to have a well shaped pillow. OH, forgot to mention that thread I'm using is crochet cotton which I've coffee/black walnut dyed to give it age.
Here is what the side of the pillow looks like and the flash is making the thread look lighter than it is.
I've still the pillow stuffing part to do, hopefully tomorrow. So there is more to this pillow project. If anyone has questions that I haven't addressed to this point, please write me at saundra125@comcast.net and I'll post next time.
Have a great evening, try to stay warm and toasty!
Saundra
Saturday, January 4, 2014
Santa and Deer Reappear
Today a few more loops were pulled on the background and do like the tan/brown texture background. And I love the choice of wool chosen for the antlers. It is a nubby textured wool that Barb totally loved and said she hadn't seen that wool in years. Lucky me stumbled upon a woman's blazer at the thrift store and since it was mostly wool purchased it. Can't remember what the other ingredient was but it was a natural fiber. Each time I take some to Barb's camp she uses it in part of my rug so thought I'd use it for the antlers here.
But, are you getting as bored watching my updates of progress as I am? The fun part of hooking this design is over and all that's left to hook are a couple more stick trees, background and border.
I think I need to make my antique adaptation of Hearts and Swags into a pillow and give myself something different and interesting to do. It will require me doing some outside the box thinking for the pillow back as I want to do it sorta different than Betsy taught us in class....BUT, using her technique. Ah, have I piqued your interest? Perhaps that will be my challenge for tomorrow.
Stay tuned, stay warm and take this winter time to relax and do what makes you happy.
Saundra
But, are you getting as bored watching my updates of progress as I am? The fun part of hooking this design is over and all that's left to hook are a couple more stick trees, background and border.
I think I need to make my antique adaptation of Hearts and Swags into a pillow and give myself something different and interesting to do. It will require me doing some outside the box thinking for the pillow back as I want to do it sorta different than Betsy taught us in class....BUT, using her technique. Ah, have I piqued your interest? Perhaps that will be my challenge for tomorrow.
Stay tuned, stay warm and take this winter time to relax and do what makes you happy.
Saundra
Wednesday, December 11, 2013
Pillow Wannabe
Back on my frame is Hearts and Swags, an antique adaptation that I started at Betsy Reed's class this past November. It was put aside once coming home from camp so that Long Island Farm could be finished as well as my girl Shadow's profile. So I'm back having fun doing the hand torn hooking, which is all new to me.
One thing I've noticed with the hand torn is that it tends to grow a little once you make that first snippet. Perhaps it is the angle of the tip of the scissor's position which causes the direction of the rip, but my torn strips aren't consistent. Maybe this adds to the primitive look, and for sure it doesn't cause any wear and tear on a cutter since I'm not using one. Also must say that it hasn't hurt my hand by either the ripping or the pulling loops. Yet, this is a rather smallish piece (20 x 20) plus the fact I stepped away from it for a while to hook the other rugs.
This piece is going to be a pillow, it will be my first hooked pillow and I'll not hook the backside but will use the patchwork technique Betsy taught us in class.
Have a great evening folks, Hard to believe it is just two weeks away from Christmas. Please be kind to one another as you find a parking space at the mall, stand in line at the register, etc. 'Tis the season where patience and time are short so kindness needs to be stronger. LUV ya'll.
Saundra (and Ben)
One thing I've noticed with the hand torn is that it tends to grow a little once you make that first snippet. Perhaps it is the angle of the tip of the scissor's position which causes the direction of the rip, but my torn strips aren't consistent. Maybe this adds to the primitive look, and for sure it doesn't cause any wear and tear on a cutter since I'm not using one. Also must say that it hasn't hurt my hand by either the ripping or the pulling loops. Yet, this is a rather smallish piece (20 x 20) plus the fact I stepped away from it for a while to hook the other rugs.
This piece is going to be a pillow, it will be my first hooked pillow and I'll not hook the backside but will use the patchwork technique Betsy taught us in class.
Have a great evening folks, Hard to believe it is just two weeks away from Christmas. Please be kind to one another as you find a parking space at the mall, stand in line at the register, etc. 'Tis the season where patience and time are short so kindness needs to be stronger. LUV ya'll.
Saundra (and Ben)
Tuesday, November 19, 2013
Rugs Started in Betsy's Class
Okay, now it's time to show some rugs being hooked in Betsy's class. My roomie Deb started with her pattern which is a NotForgottenFarm design (Lori Brechlin), and offered for sale by Spruce Ridge Studio. Deb took the liberty to draw a border around the design as she liked the wavy line and dots in the original drawing. Deb is hidden behind her rug but you can see Norma helping to hold it up for the class to see.
BTW, it was really nice seeing Norma having fun and playing in the sandbox with the rest of us instead of working hard at Rugs By The Sea rug camp she and Linda organize.
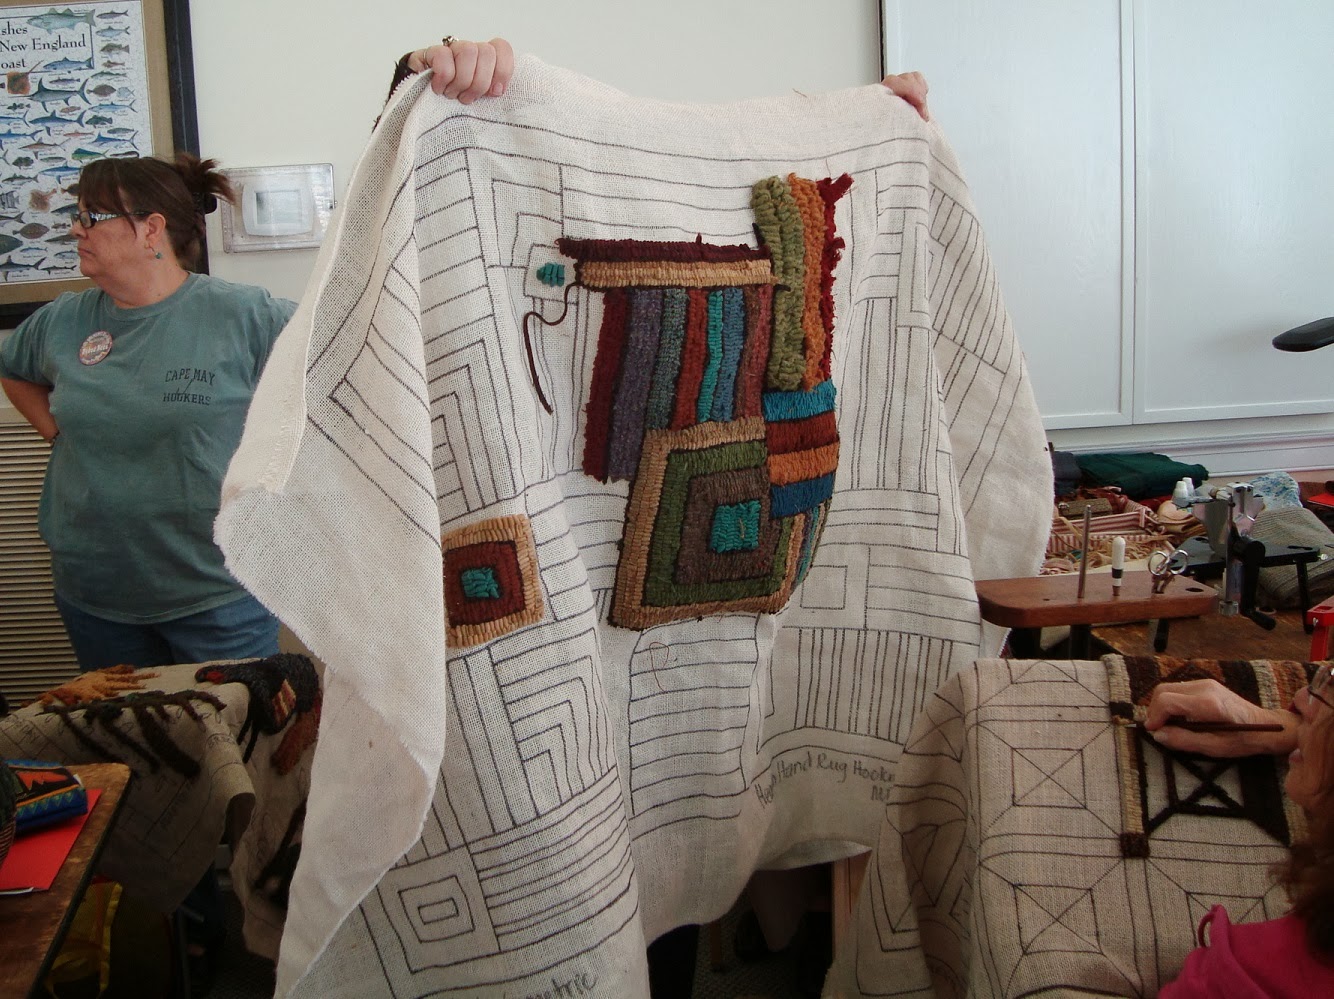
This is a geometric being hooked by Marsha.
Pam is hooking a design offered by Lucille Festa.
Phyllis worked on this one in class and I'm sorry but don't know the designer.
Oh dear, I can't remember who was hooking this one and I don't recognize those hands.
And then you saw mine when returning from camp and haven't worked on it since coming home. My plans are to finish Lucille's Long Island Farm first, THEN Shadow, and then have fun finishing up the hand torn started with Betsy. But this is what my camp rug looked like when I came home.
Have a great evening everyone.
Saundra
BTW, it was really nice seeing Norma having fun and playing in the sandbox with the rest of us instead of working hard at Rugs By The Sea rug camp she and Linda organize.
This is a geometric being hooked by Marsha.
Sarah Guiliiani designed and is hooking this beauty. Her strips are about 1" wide and it looks incredible. I asked permission to post it on my blog and told her I'd give a link to her web site but guess she forgot by the time she got home. I'll write her and send her the link to this so perhaps she'll write back and give it to me and I'll post it here in case you'd like to hook one too. Or perhaps you may see other designs you'd like.
Oh dear, I can't remember who was hooking this one and I don't recognize those hands.
The rug below is a design by Betsy Reed and is being hooked by Janice Russell.
Another design by Lucille Festa being hooked by Grace.
This pumpkin is yet another design by Betsy.
Someone in the class was hooking a rug as a gift so I promised to not post a picture of it and give away the secret. And then you saw mine when returning from camp and haven't worked on it since coming home. My plans are to finish Lucille's Long Island Farm first, THEN Shadow, and then have fun finishing up the hand torn started with Betsy. But this is what my camp rug looked like when I came home.
Have a great evening everyone.
Saundra
Subscribe to:
Posts (Atom)