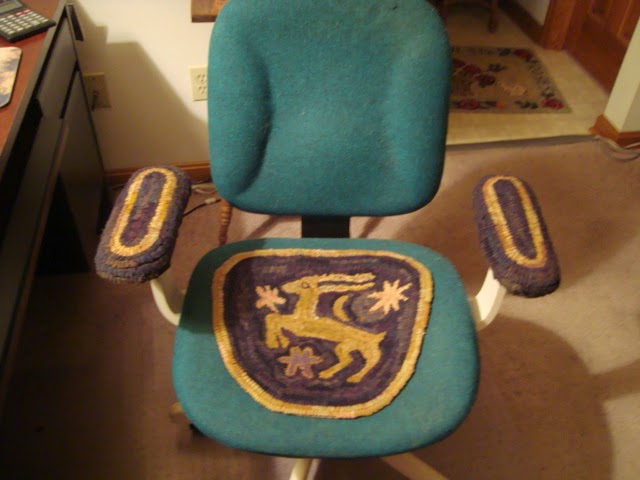
Over a week ago I showed you an antique rug that I wanted to hook in a small size for my harvest table. Everything was ready to go except there was that second thing which was bothering me (the first was the mama duck's beak).
See that worn arm rest? That is what has been bugging me each time I sit at the computer. So decided to hook arm rest covers to coordinate with the chair pad I'd hooked a few years earlier.
So, being thrifty (cheap), decided to use up some of my left over linen foundation which I refuse to throw away. Many times I've used these awkward pieces to hook flower pins, mug rugs, small swap pieces, etc.
To make the pattern I put a piece of paper around the arm rest, pressed it with my hands to get the shape. Then I drew it out on the long skinny piece of backing.
I knew it wouldn't fit on my Snapdragon frame so pulled out my smaller 'sit-upon' frame. See, each of my frames has a job and comes in handy.
Oops, it is still too small to fit on this one and hook comfortably so sewed my cotton fabric around the perimeter in order not to fight with the foundation. That fabric has been used over and over again as the stitch is the longest and easy to pull apart to use again.
The hooking was complete and the edges finished off so the foundation wouldn't ravel. While hooking considered a couple different ways to finish them ~ maybe make it so that elastic could be inserted and fit over the arm rest. Decided against that and decided to hand sew each on since there wouldn't be any need to remove them.
Oh, and since I only wanted hooking on top made sure the hooking would curve far enough over the top of the padded part and then used acrylic black paint for under the arm rest.
This is the underside of the arm rest. I was hoping there would be a plate which screwed into the padded top part so that the unhooked foundation would be hidden between the bottom plate and top. Nope, so onto plan 2 ~ hand sewing the piece on.
Since it would be an awkward position to sew and with my arthritic knuckles knew it would be painful so pulled out my trusty curved needle. If you don't own one or two of these do yourself a favor and buy some the next time you go to a place which sells sewing supplies, they come in a couple different sizes.
The first cover is pinned in place and chair ready to be turned on its side for me to sew in place.
The underside isn't so pretty gathered up like that but it works. And the painted underside was a good idea too even tho the linen probably wouldn't have shown up in normal view.
Another picture of the sewing as I go around the arm rest.
And here it is all done. You can't see the paint, can't see the underside and mama is happy ~ so glad that I took the time to do this. It didn't take long and it was a detour from what was planned but all done now.
Have a great evening everyone. Good grief..... tomorrow is Christmas eve. Where has this last whole year gone? Please be kind to one another.
Saundra


How clever you are Saundra! They look wonderful and your computer chair looks all the better with the three hooked pieces on it. Great idea! Wishing you and yours a Merry Christmas! Lori
ReplyDeleteWhat a great idea and executed so quickly. The perfect compliment to your chair pad.
ReplyDeleteMerry Christmas, dear friend.
Hugs :)
Lauren
Very clever and very nice. Isn't it great when a plan comes together !
ReplyDeleteWhat a cleaver idea Saundra, and it gives your old chair a new personality. It looks great. You've been a real busy girl.
ReplyDeleteI hope you have a Merry Christmas.
Hugs,
JB
Cool process! I am impressed by your ingenuity.
ReplyDeleteSo smart! Hooked projects can be useful in addition to being beautiful - and you just proved it!
ReplyDelete