Wednesday, August 20, 2014

Simply Vintage Quilts and Crafts

This is a new (to me) publication which I was gifted from a very generous friend.  It is a French magazine similar to our American Primitive Quilts and Projects except it is thicker......and tad more costly probably because it is a French magazine.

It is such a wonderful magazine that I just had to share it with my quilting, stitchery and hooking friends.  Here is the cover.  See that cute Quilt hanger to the top left?  The instructions are inside.
America's own Polly Minick even has a rug design inside.  And a wonderful and colorful piece it is.  She done us proud, right?
And the below applique stitchery is so cute that I'd like to live in a house just like it.  If only I could hook a piece to look that cute yet delicate.  Almost wants me to start stitchery again.

 
This is the cool mini quilt hanger pattern made out of a wire hanger (are they still around?) and with a little cardboard, glue and paint you've got an inexpensive primitive mini quilt hanger.
Love this woolen bluebird pincushion for not only the primitive design but the colors.  I'm thinking of making one and having a make do in something or on something....hmmm.

In this issue the photographers even visited several counties in Ohio, so as I was perusing the magazine wondered where those places were that Lauren visited.  It mentions Walnut Creek Hotel, Lehmans, Kidron, Picket Fence Country shop, One Vintage Lane and more.

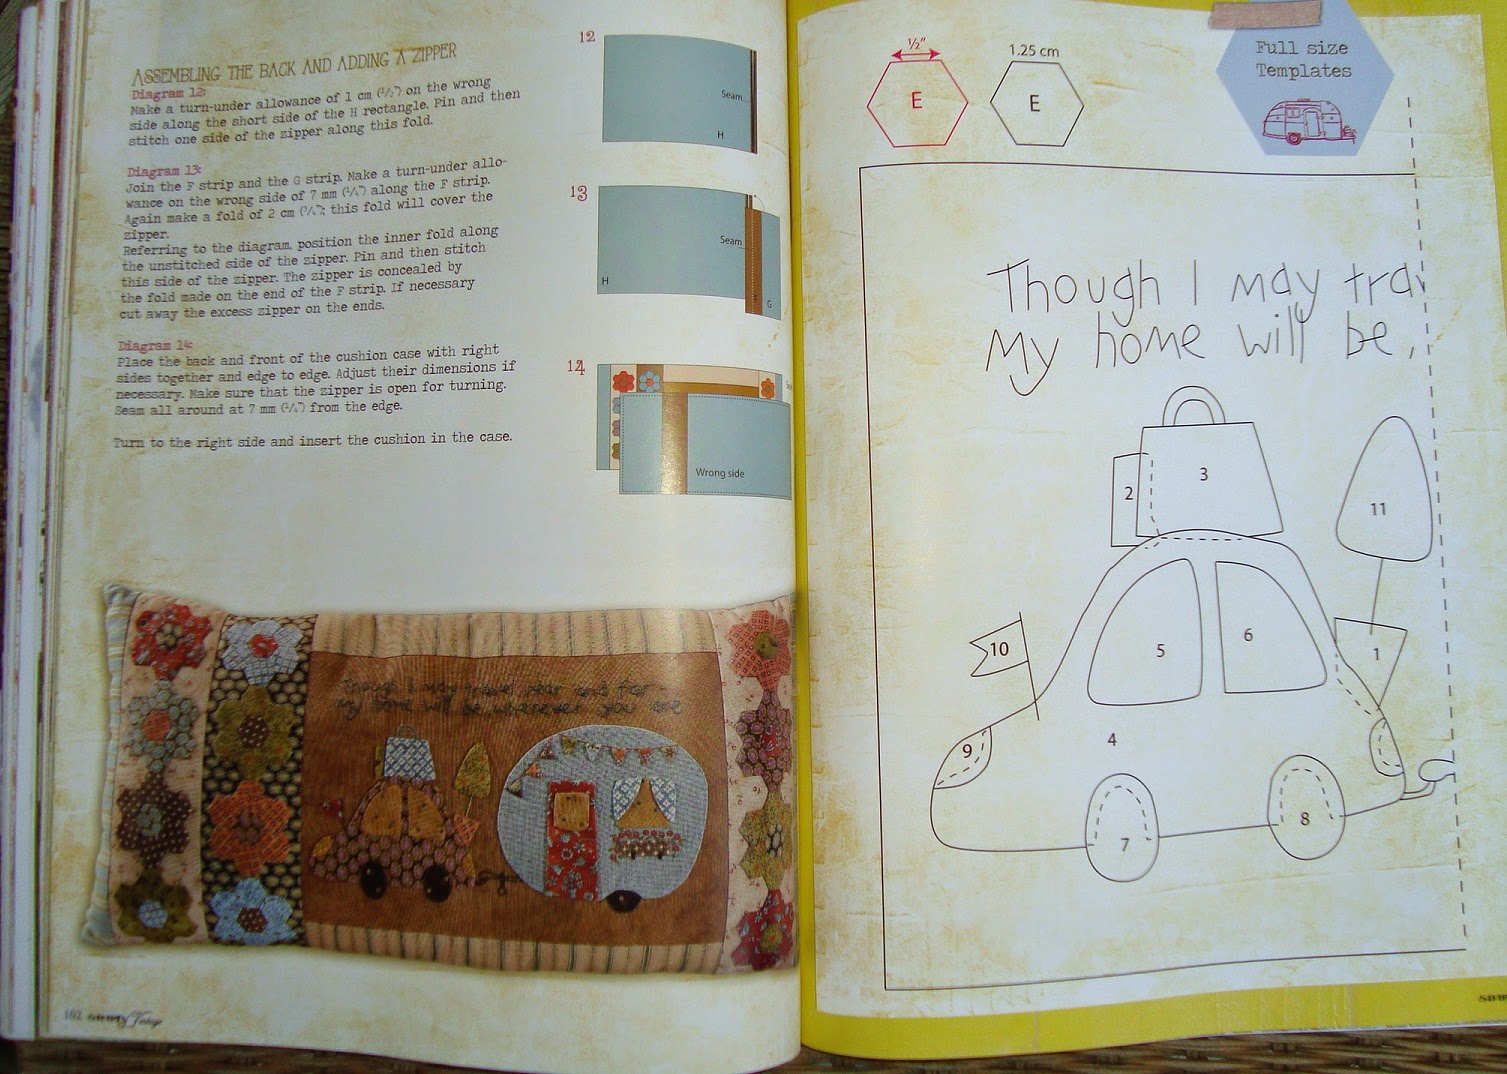
Lemme tell you that if I had a granddaughter I'd be making her this pillow.  Actually I think it is cute as the dickens and would use her as an excuse to make it and keep it here for her.  Look at the car and the camper...too cute.  Hey..... hooked piece?
This dresser scarf could easily be made into a cool rug hooking design and I liked the colors but the ruffle, which I like, might be a problem for me to figure out (maybe) in a hooked piece.
Well what a cool bag and needle punch!  The needle punch could easily be adapted into a primitive hooked mat too.
 The very last pages show credits as well as the remainder of the full size pattern inserts.
And since I love this magazine so much if you'd be interested in checking out the possibility of subscribing or buying just one issue, here is the info.  Just click and enlarge the picture for the info or for an email click HERE.  And for the web site click HERE.

 
Have a great evening everyone and hope you enjoyed previewing the magazine.
 
Saundra 


Tuesday, August 19, 2014

Rug Hooks Then and Now

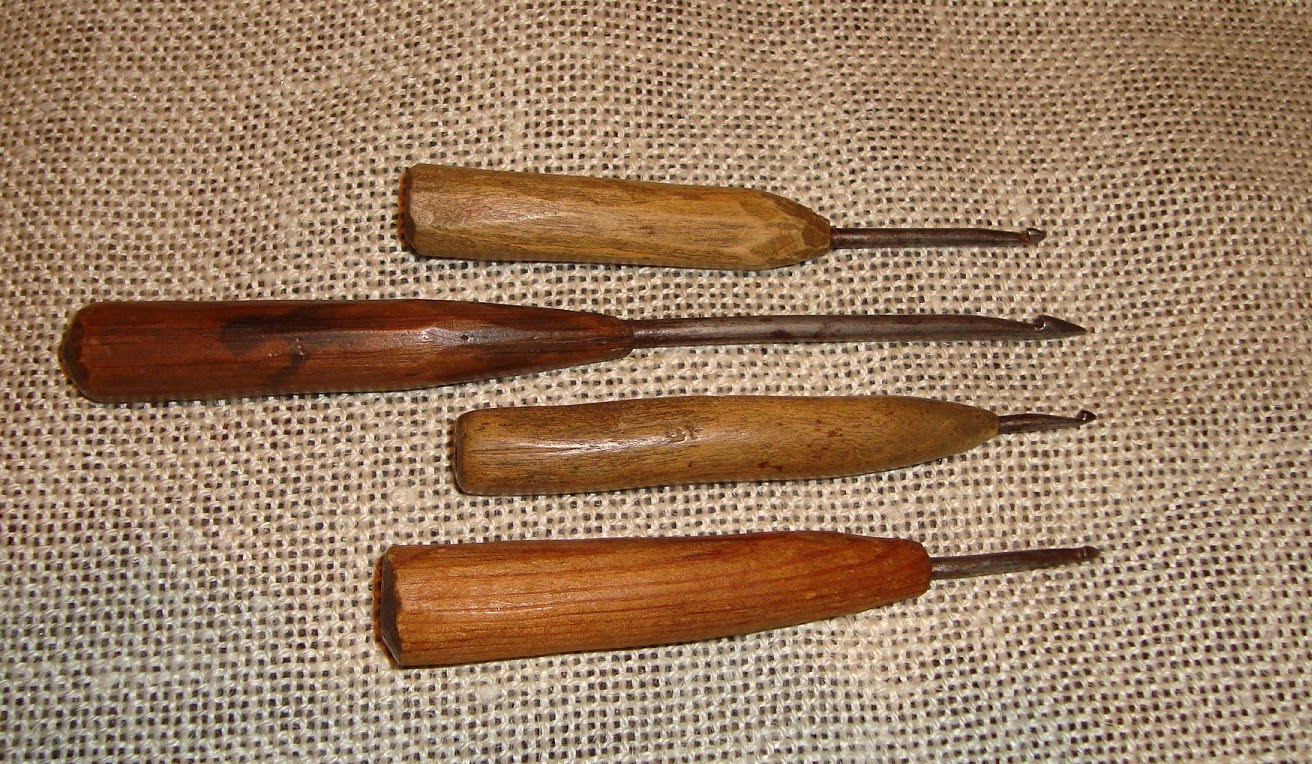
These are old rug hooks that I purchased at a local antique store.  They were made with chiseled or bent nails and inserted into a crudely carved piece of wood for the hooker to hold.  When I did shows I carried these with me to show those who had an interest in the process of rug hooking.  Thought it would be nice for them to see the tools the women used back then.
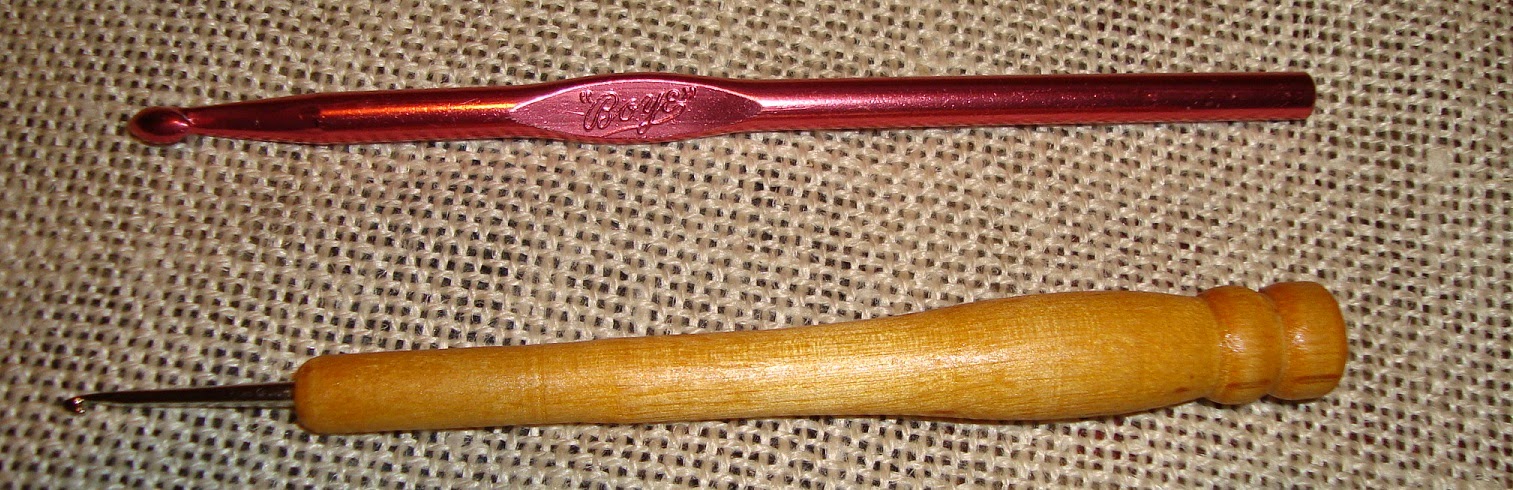
 I also took this latch hook, which I have no idea how to use, because the response from most people when seeing me hooking is...."I used to do that when I was in college".  That is when lesson #1 started ~ by explaining what I was doing was TRADITIONAL rug hooking not latch hook.
Below is the basic hook I first learned to hook with.  The hook is small but it would pull up a #8 strip just fine by holding the hook just right.  The price was right compared to the cost of today's hooks and it served the purpose well.
I had a friend who used a crochet hook and she was an experienced hooker and preferred to use that.  There are pencil hooks available with a more substantial grip on them but for the very new beginner, one could always buy a crochet hook and wrap duck take around the top for a better grip.  That would surely work until you discovered if you like the art/craft.  No way I could use a pencil hook as my old hands would eventually cramp up.
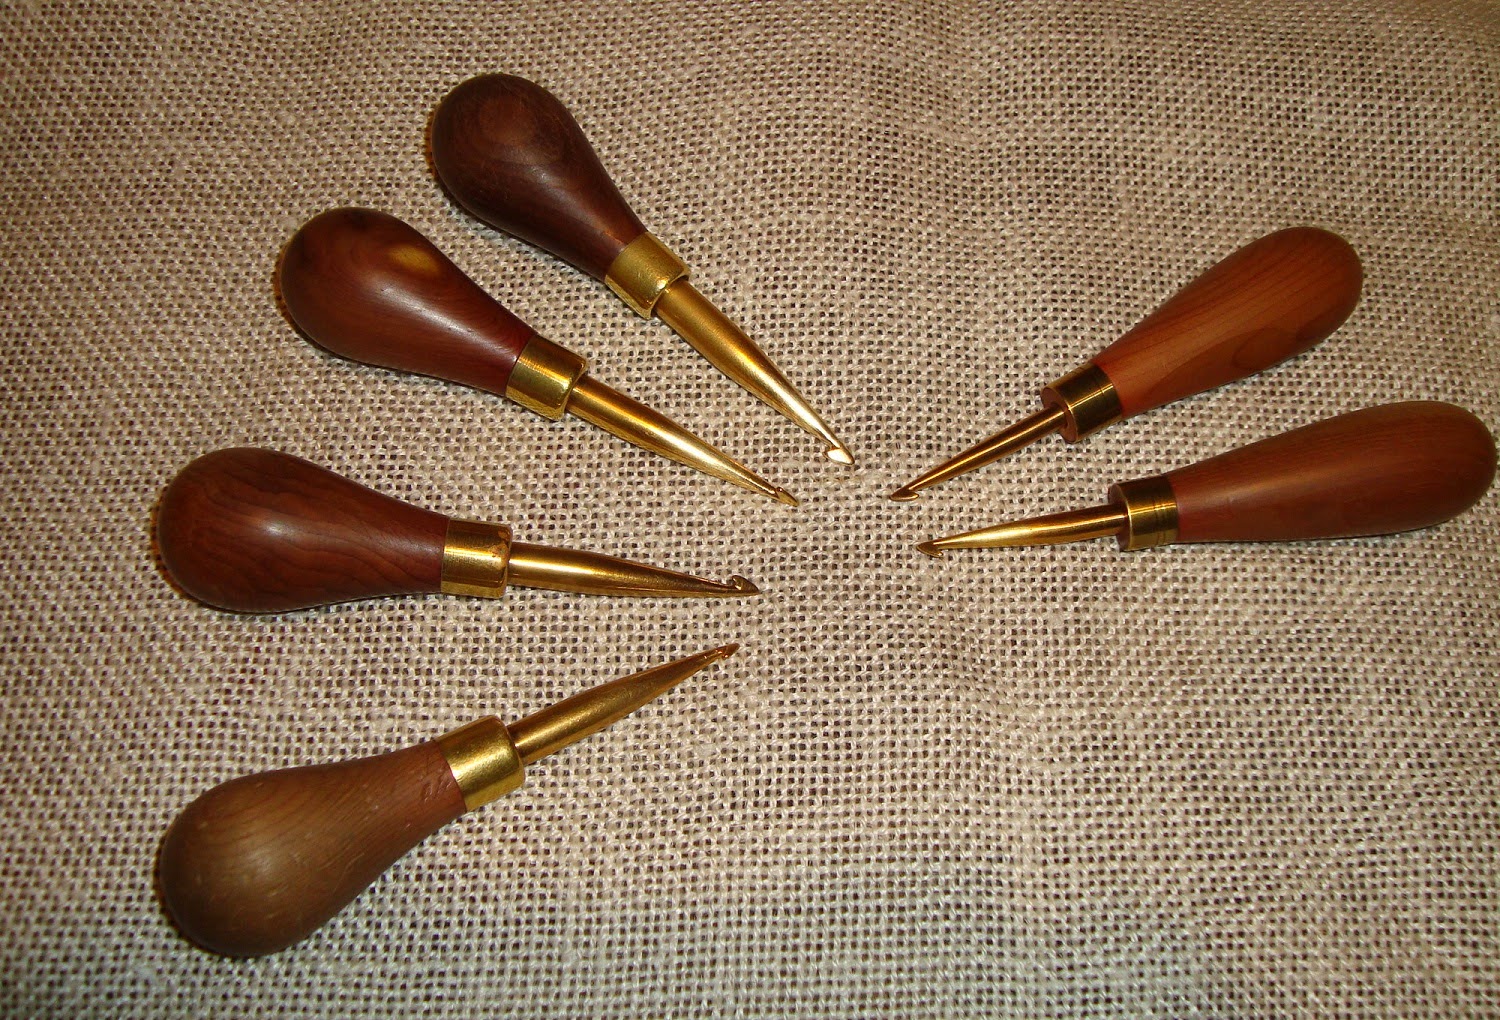
AH, my favorite hook of all is the Hartman hook, I love the ball in the palm of my hand, like the weight and the shank is thick so as to make a nice hole for the wide strips to pull thru the linen easily.  Yes they are costly, particularly for a newbie starting out at $35 plus shipping.  Or at least that is what I paid.  At first I purchased one (the bottom one on the left).  If you look closely you will see indentations.  When my girl Shadow was a pup she thought it was a toy and started chewing on it.  Thankfully the wood stayed intact and didn't splinter.  Immediately I went out too the garage, got myself a piece of very fine sandpaper, smoothed it down and oiled the wood.  It was then I decided to buy another ~ in case something should happen to the first I'd have another as a back up.  

But then I wanted to have a hook in each of the baskets where my different projects were started because goodness if I should go somewhere and not have my hook.  Yes, these are all mine.  The two to the right have an ergonomic thumb hold and as you can see is an elongated grip.  I thought it would be nice and good for my hands to have a change in grip.
And then I was at Cape May camp and my friend Cheri Reid was hooking fast and furious with a hook so of course I just had to have one too.  The one on the far left has a great flat surface and large hook for even a hand torn strip.  The others I purchased 'just because'.
Two other great tools to have are the gripper strip cleaner and loop lifter.  Ya know how when your loop needs to be adjusted and you put your hook in to fix it and the hook gets stuck?  Well the loop lifter works great.  I purchased the strip cleaner at a rug camp and I've had the loop lifter so many years can't remember where that was purchased so don't have a contact for either tool.  But the person from whom I purchased the loop lifter they also had gorgeous pencil type hooks in similar silver designs.
There is also a tool called the burling iron to help straighten out or lift your loops.  Yeah, I know, it doesn't look like an iron but that is its name.  And frankly, for the cost of this vs. just a plain pair of cheap tweezers, as a newbie I'd go for the tweezers.
Burling Iron for Rug Hooking
For you newbies just finding my blog, I've previously done tutorials on frames, foundation cloth as well.  All you need to do is go to the top left of my blog and type in what you are looking for in the search box.

Have a fantastic day and thanks for dropping by.  Comments are always welcome.  And if anyone has a topic which I haven't already covered (and you can't find on my blog) please feel free to write me and I'll see if I can help.

Saundra


Sunday, August 17, 2014

A Newbie's First Loops

The experience of a newbies first loops could make or break the desire to continue learning to hook.  Actually when I was the newbie it was this newbie's first hooking nightmare as I learned to hook on my own. 

For over a year it was trial and error with only basic printed instructions from a Rug Hooking Magazine.  Yes, it was a little help and impetus for me to begin hooking but I had no human instruction.  And didn't know anyone (at that time) locally from whom I could learn to hook properly.  The nightmare continued until I discovered what I was doing wrong and almost considered not taking up this wonderful art/craft.

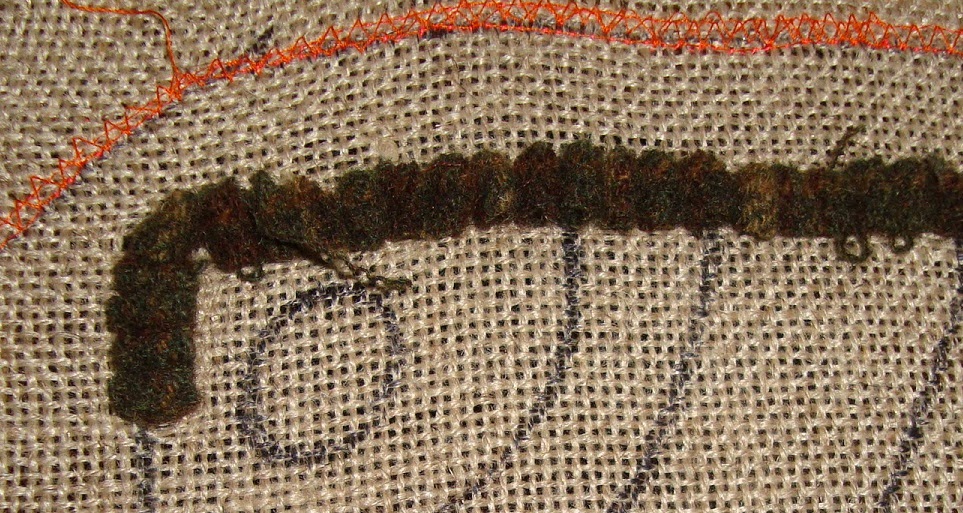
I'm demonstrating on a rug I'm presently hooking so ignore the top rows as it is the single "tail up" which is the focus.  So we know we start with the tail up.
The tail up and first loop were a piece of cake.  Here you can see first loop.
But then the fight began ~ I'd pull up the second loop and the first loop would drop down (aargh).
Then double work as I put my hook back in the first loop and lift it up and the second loop would drop a smidgen.  So I'd adjust that one and finally would have two level even loops.
That is until I pulled the third loop and the second would drop down.  Now, here is the reason why all the problems.  Notice how my hook is pulling the loop FORWARD (toward me) in the picture below?  I've exaggerated the angle to get my point because I didn't really pull my loop that much forward yet it was enough to let the back loop be vulnerable and loose enough to drop down. 
That is when the light bulb went off and realized I needed to press my hook and loop slightly backward and against the previous loop to apply enough pressure so it wouldn't fall down.  It is hard to see here because I've pulled the loop up slightly higher and backward against the loop.  But this simple action made my nightmare into an ongoing dreamy time hooking rugs.
Yes, it does require a slight downward adjustment to make the new loop even with the others pulled but it is far less trouble that the tug of war I had going on the other way.
 
Oh, and newbie Cheryl, thank you so much for your kind words from the earlier post.  I was going to respond to you that day but you have a 'No-REPLY' blogger problem.  If you'd like to learn how to fix that (something simple to fix) click HERE.  The information is toward the bottom of that post when you click.

Have a great evening everyone.

Saundra

Thursday, August 14, 2014

How to Make Sharp Corners on Rugs

For the life of me I can't remember if I've done a newbie lesson on this before or not but it seems vaguely familiar. 

AH HA!  Just decided to 'search' my own blog and noticed that I DID mention this in passing and it referred to this geometric which has since been fully hooked and bound.  Here is a picture where you can see  some of the blocks ended up with rounded edges and a few with crisp ones.  I started the rug, got bored and stuck it away for over 5 years.  In between time I learned how to make sharp, crisp corners.
Here is a picture of how the corner would look to hook along one side, turn and continue hooking down the other direction but between the same threads in that row.  In this photo at that angle it looks sorta okay.
Here is what it looks like from a topical view and you can see the corner has a curve.  Now, if that is the look you are trying to achieve that is great.
However, IF you wish to have a sharp edge at the four corners of your rug here is what you do.

Depending on the size strip you are working with and the foundation of choice it might be 1, 2, or 3 holes or maybe every other.  But whatever rhythm you develop as your style when it comes to the corner you need to hook to the end of that row, turn, and hook one row (hole) INSIDE and down the other direction. 

In the photos ABOVE I turned and continued hooking in the other direction between the same threads rather than in one thread inside.

In the photos BELOW I hooked a loop one thread BEYOND where I wanted my side hooking to continue. You can see the hole made to accommodate the new loop going downward.  That would be the row just inside and just between the next two threads inward.  Geez, I'm trying so hard to get the wording in different ways so I'm understood.
 Here you can see a nice sharp corner.
 And here that corner is again up close.
This example is good for geometrics, corners of rugs, and heck am sure many applications.  Again, it depends on the result you are looking for.  I've hooked mats where I DID want a curved corner or gentle curve around a motif but then it was planned and my corners were really curved.

Another thing too is touch the wool strip underneath and know which way it feels like under the foundation.  The corner is also determined by which way you twist the wool strip on your hook under the foundation.  Do it one way, hook another loop or two and if you don't like what you see then pull the loops out and twist the wool in the other direction and continue.  This is after all the only time you'd purposely twist a loop of wool under your foundation...... that would be the direction change.

Have a fantastic evening everyone.  Wonder if fall will arrive a little early this season since there has been unusual low humidity and cooler days earlier in the season.  Sure hope it doesn't mean lots of freezing rain and snow for the winter.

If anyone has questions or topics they'd like for me to cover on my blog, please write me and I'll see if I can find the answer to help.  Just remember that all of us were newbies once.  There were no people close to me when first I held a hook in my hand.  I'm happy to guide you on your way to having fun.  Believe me when I say that I'm not happy unless I'm hooking every day.

Have a great evening and please be kind to one another.  Life is far too short to not enjoy what time we have here with each other.

Saundra

Wednesday, August 13, 2014

It's That Time Again

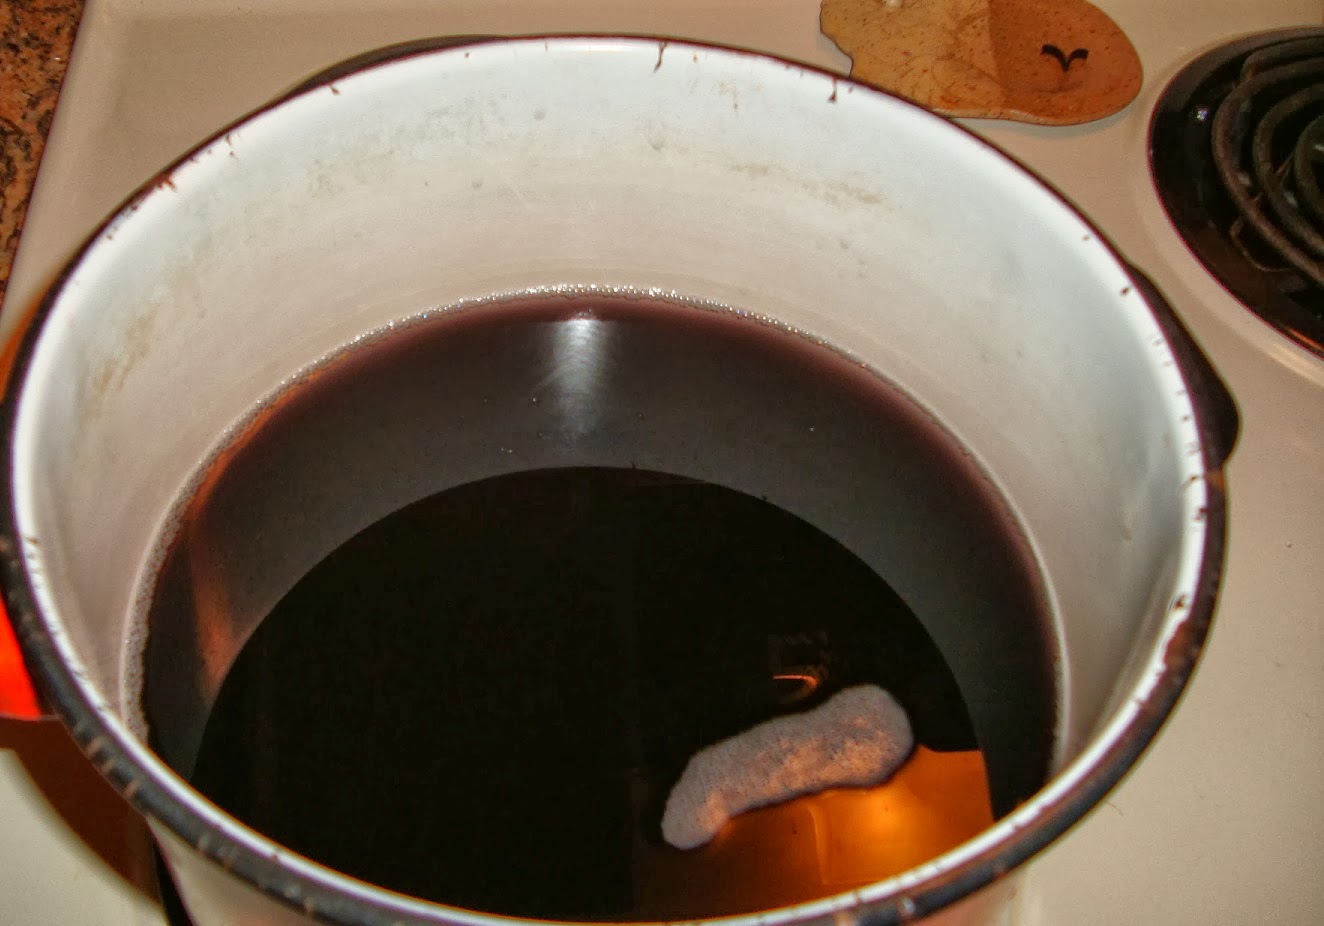
Since there are two rugs ready to be bound figured it was time for me to pre-wash the binding tape.  I've posted about this before but for those of you new to my blog thought this might be helpful.  If your rug were to ever get wet the tape WILL bleed into your rug unless you pre-wash it first.

So unroll a few yards ~ I usually roll out enough to bind the project(s) intended an more for another rug of undetermined dimensions.  Place binding tape in very warm soapy water and I usually let it soak for a while and occasionally will go massage it to help the bleeding process.  Here is was bled out of the black binding tape. 
After rinsing the binding tape I put it on the line to dry if weather is nice out; actually I would hold this task for a day when the weather WAS nice out.   To put it in the dryer would render lots of knots.
So hey, why not take advantage of this free method to get some dye to tone down those bright or white wools.

Have a great day and be kind to one another.

Saundra

Monday, August 11, 2014

Done But the Binding

I almost named my post The Fat Lady Sings but since it isn't bound yet couldn't honestly say it was completely done.  This is what my Mache' Jack-O-Lanterns look like now and am happier with it than the before.

Now.
Here's the before.
Some of the changes I made may be obvious to the viewer but just in case here they are:

~ used different orange wool on right Jack in various places
~ changed right eye on the right Jack
~ changed mouth on the right Jack
~ put a thin line above teeth on left Jack

I'm happier now and can concentrate better on my commission rug from which I took a mini-break.  Now I have two pieces which need binding and I'll take one with me to the doctor's office tomorrow to keep me occupied while sitting in the waiting room.  Since neither is a huge rug either would be convenient to carry in my basket.  If you are interested in purchasing the Mache' Jack-O-Lanterns pattern on linen (measures 14 1/2" x 25 1/2") write me HERE.

Have a great Monday and hope your whole week is magnifico!

Saundra

Saturday, August 9, 2014

Lessons for Newbies from an Oldie (who should know better)

Lesson number 1 is try to pick your colors before starting a rug to see if the colors will work.  Duh, I just went with one at a time and started with the jack on the far right first.  Since you should "Hook what is on top First" my next hooking task was the jack on the far left.  Well I was sorta happy with Jack to the right until hooking the other two. 
My intentions were to have 3 Jacks in 3 different shades of orange.  Since the two on the right were too close in value my knee jerk reaction was to pull out some of the jack on the far right.  Well I didn't like the mouth compared to the others anyway.  So this is where I am now, when it could have been done had I done my planning ahead of time. 
In looking at the before (first photo) perhaps all I needed to do was hook a thin 'corn row' of a darker row along the shape of the Jack on the right.  BUT, I didn't particularly like it's mouth anyway.  And it still looks like there is a darker value (lesson #2) strip of wool between the Jack on the right and the middle one. 

Okay, so CORN ROWING is where you hook a very thin strip of wool between two already hooked rows, sorta staggering between the rows like a farmer would plant corn.  I hooked the pumpkins in #8.5 so IF I do a corn row (as I did inside the mouths of two Jacks) it might be a #3 strip or take a #8 and snip in half.  Anything which will separate the colors.

Who knows what I'll end up with after the Fat Lady Sings, but stay tuned to see the wonders OR disasters of this design.  Frankly I think it is an adorable design which just needs a little tweaking.  Besides there needs to be a good representation of the design on my web site once it is done.

Have a great evening and a fantabulous Sunday.

Saundra

Friday, August 8, 2014

Mache Jacks and Future Lesson for Newbies

The seasoned followers can probably already figure out what the future lesson will be when they check the middle and right side Jacks next to each other. 
Actually there will be more changes on this design as the future pattern coming soon unfolds.  Seeing the project on the monitor helps me see the problems.  Yes this is my design in progress of vintage paper mache Jacks that were a part of my youth and wish I had some in my possession now. 

The commission piece still isn't done but I just needed a break to work on something fun so pulled a few loops on the Mache Jacks.  Oh, and I've a few patterns to draw so both projects will be put on hold for a little.  Hey.... gotta make money to pay for more wool and rug camps.  AND, let us not forget to pay for my boy Ben's food and healthcare. 

Saundra

Wednesday, August 6, 2014

Vintage Rug Show Time

As I've been busy working on the commission rug I've not hooked anything more on my Mache Jacks.  So to keep my blog active figured it was time for a little vintage rug eye candy.  This one I found just recently. 
This rug below holds me captive so stare at it long and hard each time I turn the page in the Kopp book and when I see it on Pinterest.  I've said I don't do color well ~ so perhaps it is that my eye doesn't choose colors well from my wool with the eye yet I know what I like when it is all together. 
This one has been replicated and offered before and it is on the long list of things I'd like to hook one day.
Wonder how old this design really is?  Was it an original in the mind and hand of the hooker or was it a stamped pattern sold from the back of the travelling wagon?  Perhaps that is a mystery never to be learned but which intrigues me.
Looks like the Bunny was the main focus of this hooker.  The primitive scrolls and changes in color of those scrolls are great as she used what she had.  And my favorite is the aged and faded wool for the border of this one ~ always my favorite background using the blotchy and faded look.
Okay guys have tried to provide a little eye candy to keep my blog alive so now it is time to do boring stuff like clean out my fish pond filters, then back to working on the commission.  Am hoping to take a break from the commission to finish the Mache Jacks maybe tomorrow. 

Have a great evening, here in the east we are supposed to have a cool front come thru with lower humidity.  YES!!!!!  My boy Rottie Ben and I will enjoy that.

Saundra

Tuesday, August 5, 2014

Hooking on the Deck

In the early evening a couple days ago I decided to do a little hooking on the deck near the fish pond.  Yes that would be a glass of either Cabernet or Pinot Noir you see there.  Very calming to be hooking with the sound of water trickling down the waterfall, fresh air, birds singing, ah what a life.  Deer will roam beyond the fence and I can watch them from my kitchen window or any room at the back of the house. 
The main reason I moved my hooking out there that day was the constant visitor to my back yard..... a red tail hawk.  They are beautiful and understand they need to eat too.  But it was getting near dusk when my bunny rabbits come out to feast and I was protecting them.  The red tail hawks have a couple young ones now and can hear their cries in the sky overhead.  Several times that day one would perch on the rail of the fence waiting for it's prey so I tried to deter that by staking my claim to my land and my critters.
 Here are a few of my fish who came to grab a nibble.  I'm sure a lot of fish are under the water fall where it is cooler, dark and safer.  When I purchased my goldfish (I've also had Koi), the owner of the garden center who sold the goldfish to me said the goldfish really didn't need to be fed at all, that there would be enough algae in the water to nourish them.  Plus that would take the work of keeping a clean pond easier for me.  Yet it is fun to watch the fish come swimming to the edge of the pond with open mouths so they get treats once in a while.
Another shot.
And here is a picture I just took but it is too hot to be out there this evening to hook.  So I'll enjoy the creature comforts of the A/C while I hook this afternoon.  However, I'll pay a visit to my kitchen to be sure no red tail hawk is perched on the fence waiting for it's dinner.
Have a great evening and hope you all have an enjoyable evening.  I managed to get my grass cut after 1 1/2 hours today ~ big yard.  Ben's backyard was the first to get done.  That would be the area around the deck and pond.

Saundra

Monday, August 4, 2014

A Pillow Finish With HEART!

Sondra, a blog follower of mine was kind enough to share her finish of a pillow she recently hooked.  It is a design by Maggie Bonanomi which she hooked in #9.5 wool strips.  I apologize to everyone for the photo being sideways.  This happens to me all the time when I turn my camera sideways.  Even if I use the Paint program to right it and save it, (which I also did to these photos) when I post it on my blog it is still sideways.  Oh well, you can still see a beautiful wide cut pillow.
Sondra saw my blog post of the primitive binding technique that I learned in a Betsy Reed rug class and you can read that same blog post HERE.  I first used it on a pillow and then later on a rug.  Here is the side view of that primitive binding technique Sondra used on her pillow.
And now the back of the pillow (love that mottled wool).
I fell in love with this primitive binding style when I saw Betsy's samples and told her I wanted to learn how to do that.  Well of course it is supposed to look like a primitive, almost to the point of an aged heirloom which has had repairs.  That is the look I loved since it made pieces look aged.  Naturally it is not a style which would be suitable for all hooked pieces but it sure does look perfect on Sondra's Heart Pillow.
 
Thank you Sondra for sharing.  And if anyone else has read something on my blog they tried, or purchased one of my patterns and wish to share their work I'd LOVE to receive a photo.
 
Have a great evening everyone.
 
Saundra


Sunday, August 3, 2014

Mache' Jacks are Back...

....be it ever so briefly.  Still not done but a little further along than when you saw it last.  I'm liking the two Jacks on the left much better than the first one hooked so feel pretty sure some loops will be pulled and changed when it is all hooked.  AND, the left eye (as you look at it) on the left pumpkin needs to be tweaked too.
But, I've started on my commission piece so not sure when an update will be posted of the Jacks or when I'll put the pattern listed on my web site since it is always best to have a finished piece to show as a sample.

And, last night I finally did get my Outlook mail working again.  Actually guess the process of 'repair' took a lot longer than I'd expected.  When after over 2 hours there was still no e-mail I thought it was long gone, lost forever.  Again just now it is still working so I'm a happy gal.

Have a great Sunday evening.

Saundra

Saturday, August 2, 2014

The GOOD, the BAD, and the UGLY

The GOOD and must say surprising thing that happened this week is that two ladies from Canada have ordered the Domestic Zoo pattern. 
Stranger yet is they don't even know each other.  I was sure that since the first gal said she was attending a camp in September had passed on her pattern intentions to a friend or someone else in the class who decided to order it also.  Nope; they don't know one another and each just liked the design so ordered it.  Also GOOD thing I had two patterns already drawn of this big guy.

The BAD is that my Windows Outlook 2013 e-mail program just stopped working on my Windows 7 program today.  Unlike Lauren it has nothing to do with my server but with Windows.  I have spent hours trying to read about and fix it myself.  I've done the Windows HELP thing and tried their recommendations on fixing this problem.  Thank God I've my iPad because on my PC I've lost my contacts, can't receive mail nor can I send e-mail.  Lauren, I feel your pain!!

The UGLY is my attitude at not only the windows program I purchased and worked not quite 2 months, my ugly attitude at myself for being such a computer illiterate, okay, let's add the words angry and frustrated. 

So I finally gave up tonight trying to fix it or keep in touch with the Windows help because I knew my blood pressure would end in a boiling point so stopped. 

Instead I've started a pot of soup as it is damp and dreary outside.  So my rest of evening plans are now to go sit and hook for a bit until Ben needs his walk.

Have a great evening everyone.

Saundra