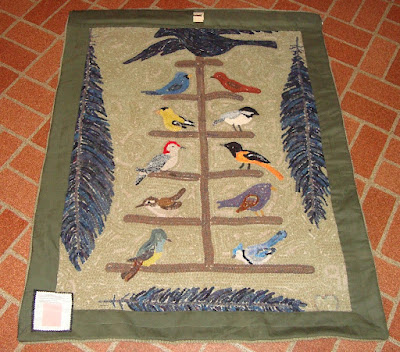
Thanks to a follower who asked the question "how did I hang my rugs" you will all benefit from the answer, I hope. In the beginning when I knew the rug or mat would go on a wall I would sew a sleeve on the back and insert a dowel. Here is one I hooked several years ago showing the dowel inserted and a ring to hang it. This happened to be an Elf Challenge piece which I'd hoped to sell at a show but still have it.
I did the same to the Rottweiler Memorial as well but didn't sew a ring, but rather hanging it in the middle of the dowel.
When the rug is heavier or wider I used a yard stick and cut it to size. Gossip's back has a sleeve and a yard stick with a sawtooth picture hanger nailed in the center.
In 2016 I did the same thing for my grandson's Favorite Sports rug. I hadn't purchased the yard stick at that time so inserted a pen so you could see the opening because of the busy binding. In case you're wondering I used doubled cotton for the binding on this and on Gossip above. And I chose it to correspond to the racing checkered flag and the beading on the front.
Here is a view of the front of the rug. That black and white beauty line was achieved by doing the 'beading technique'. For you newbies that is when you work with 2 different colors of wool and hook them alternately.
Once I used a carpet gripper strip but didn't like that nearly as much. The last several rugs hung I used flat head short straight pins. Of course I can do that since I have drywall not wood paneling or plaster walls. I took a photo of two hanging in the the living room and maybe if you click on it you can see the shiny pins. If I want to move any of the rugs and place them somewhere else it will only leave tiny pin pricks in the walls.
So there ya go, that's how I've hung my rugs. If anyone has any questions about anything, please feel free to ask. If you are a NO-Reply blogger I'll not be able to reply directly to you but if you send the message thru the 'EMAIL ME' location on the right side of the blog I will be able to respond and perhaps even do a blog post about it.
Follower Julia asked if I would show the pins I use and should have done that initially, but have attached a photo, thanks Julia. The one on the far left is what I use now but have used the shorter pin on the far right previously. Didn't like using that since the colors show up. The pin in the middle is what I use for sewing.
This is the information on the container and not sure if I purchased these at Walmart or a sewing center.
Follower Elaine says she uses 'map pins' a/k/a 'push pins'. I chose not to use them since the top is big and thought it would be distracting, albeit easier to use. I don't push the pins in but rather hammer them in with a mini hammer which, after checking at Lowes, they are really very cheap, click on the Lowes link. I'm sure Home Depot offers them too.
Happy hooking.


Lucky you to be able to hang your rugs with straight pins. Not so easy with plaster walls ;-(
ReplyDeleteThanks for sharing how you hang your rugs. I hang mine using pins. Its easy with drywall unlike Lauren with plaster walls. Janice
ReplyDeleteYou said you use short straight pins?? And they go in through the wool and enough in the wall to hold? Do you do the pins all around or just at the top? Not that I have any wall space to actually HANG a rug, but just in case ya know... ;-) ~Robin~
ReplyDeleteCan you show us a picture of the type of pins you used? How short are these short flat head pins? I'm wondering if tiny nails like they use in the back of framed pictures would work. They might be too short. I enlarged the photo but can see the type of pin you used.
ReplyDeleteHugs, Julia
Love an easy hang up!!!!
ReplyDeleteI use map pins,,,,,in staples,,or a office supply,,,,,They are like normal pins with the ball end but longer!!!
Perfect!!!the pins hide in the wool,,,,,
Thanks, for the clear information Saundra.
ReplyDeleteI've tried to use pins, but they always bent when I tried to put then into the wall. Too long? Too thin? No idea, but I'm adding these to my list of things to get next supply run. And map pins, since it's always good to have options. Thanks for the information.
ReplyDeleteGreat directions ! I use your straight pins too , & if the shinny top shows , I take a black sharpie to it & you can't see it . Sometimes I use several pins across the top , so they don't sag. When you hammier in the pins, do it gently so they don't bend .....
ReplyDelete