Since my design and size of the Sincerely Jane rug is suitable to me I'm way ahead of schedule as far as finishing. Seems to me it is only 3 months into the challenge so I can slide a little.
That said, it just might be that I decide to slack off and get way behind when I start my rug camp With Barb Carroll in two weeks. I'm sure I'll come home gung ho to work on that rug (which is a BIG secret) but will tell you it is an adaptation of a very famous antique design.... AH HA! Do I have your attention now???? You will just have to wait. TEE HEE..... I just love the tension in the room with hookers sitting on the edge of their seat anticipating the next breath or next picture of a rug or the smell of wet dyed wool.
But for now here is my SJ challenge rug.
I'm having problems deciding on colors or textures to make it interesting but still trying to stay true to the theme that Jane Stickle had with her quilt. I want the muted look but have tried using textures to give the look of calico or homespun cotton.
Initially my thought was to use a dark background because that makes everything pop and look exciting. But then got into the the whole Jane Stickle thing and decided to do a lighter and more mellow color for the sashing and background. Something to be said about our foremothers for sure. She made a beautiful piece of history.
Still uncertain about the border and truly feel comfortable in waiting until the rest is hooked before deciding. Besides, IF I want to make longer cone shapes I can always sew a piece a fabric along the outer edge so that I can hook further out into the linen. But since I don't know what I want or what the piece needs I'll just wait. However..... if any of you gals have thoughts and opinions I'd love to hear your ideas.
I love replicating antique adaptation rugs but also design my own. Looking at old rugs in Early American Life magazine was my inspiration to learn to hook.
Monday, May 2, 2011
Saturday, April 30, 2011
Home Tweet Home
With granma responsibilities over for the Easter vacation I was able to finish hooking the Karen Kahle pattern Home Tweet Home and finally post another segment on my blog. Amazing how much energy a 7 year old boy has. I was so anxious to share a picture of it that I took this picture even before it is trimmed and bound.
I was quite lucky to get this on e-bay for a song....along with enough of Karen's wool to hook the entire thing. And even tho some of the wool was cut more narrow that I prefer to hook with, I used the wool anyway. Hey, waste not want not is my mantra. And if you could see my wool room you would know that lack of wool is not an issue.
Hard to believe that when I started rug hooking there was absolutely no stash at all. And I am embarrassed to show anyone that room now because it looks like I am in the wool selling business.
So now I'll pull out my Sincerely Jane challenge rug and hook a couple more blocks on that until I decide on what else I'm going to hook. Since my least favorite thing to do is bind rugs, I'll let this Home Tweet Home rest a few days and then do my stitching around and trim in preparation of the binding.
I was quite lucky to get this on e-bay for a song....along with enough of Karen's wool to hook the entire thing. And even tho some of the wool was cut more narrow that I prefer to hook with, I used the wool anyway. Hey, waste not want not is my mantra. And if you could see my wool room you would know that lack of wool is not an issue.
Hard to believe that when I started rug hooking there was absolutely no stash at all. And I am embarrassed to show anyone that room now because it looks like I am in the wool selling business.
So now I'll pull out my Sincerely Jane challenge rug and hook a couple more blocks on that until I decide on what else I'm going to hook. Since my least favorite thing to do is bind rugs, I'll let this Home Tweet Home rest a few days and then do my stitching around and trim in preparation of the binding.
Sunday, April 24, 2011
More Sincerely Jane Challenge
I've been working alternately between two main rugs ~ Home Tweet Home and the Sincerely Jane challenge. Actually I do have another rug started but one I hook on only when I go somewhere to demonstrate. So since my dear grandson Zachary will be with me this next week during their Easter and Spring break thought I'd do two more blocks on the SJ and move it out of the living room to make room for my grandson. I'll still have one rug in progress in there but don't want to monopolize all the living space with my 'stuff'.
Here is the rug now. It has progressed so easily and without being bored that I probably should have (could have) taken on a larger endeavor. But definitely not the full size as some of the challengers have taken on.
Perhaps the time away from the SJ rug will give me a little time to reflect on my next move........ do I introduce new colors or repeat what I've used? From the picture I can see that if I follow a reverse of row one that I will have a green to the left of a green on the second row.... no can do, even tho they are different textures, they are still both green. And the haunting question is: what am I going to do with the border?
So I think it is good to put away the SJ piece for a few days and 'sleep on it'. Actually, I heard that term is appropriately used since having an unanswered question in the mind the answers sometimes come to a person in a dream subconsciously. So I'm hoping for some answers during REM sleep.
Here is the rug now. It has progressed so easily and without being bored that I probably should have (could have) taken on a larger endeavor. But definitely not the full size as some of the challengers have taken on.
Perhaps the time away from the SJ rug will give me a little time to reflect on my next move........ do I introduce new colors or repeat what I've used? From the picture I can see that if I follow a reverse of row one that I will have a green to the left of a green on the second row.... no can do, even tho they are different textures, they are still both green. And the haunting question is: what am I going to do with the border?
So I think it is good to put away the SJ piece for a few days and 'sleep on it'. Actually, I heard that term is appropriately used since having an unanswered question in the mind the answers sometimes come to a person in a dream subconsciously. So I'm hoping for some answers during REM sleep.
Thursday, April 21, 2011
Sincerely Jane Challenge Update
Thought I'd do a little more hooking on my Sincerely Jane challenge rug and put aside my Home Tweet Home for just a little bit. As I look at it guess it is time to start repeating some of the colors in the top row and put them in the 3rd row. One or two of the textures didn't hook up as nicely as I'd hoped so might introduce something else instead. I'm not that crazy about the texture in the 2nd box from left on top and have an alternate for row 3.
And I was sure that the block in the 2nd row, far right would turn out differently because before it was hooked it looked like a blue and brownish texture. However, it looks an awful lot like the color of the star in the middle of second row. But, I'm not going to pull them out and re-hook because I figure our foremothers 'made do' and so shall I.
I'm still uncertain as to what I'm going to do for the border. I'm truly looking forward to trying something but figure I should wait until I hook the rest of the block before I tackle that. Plus, I'm in a quandary as to what to do with my corners and perhaps as I hook my plan will be a little more obvious.
And I was sure that the block in the 2nd row, far right would turn out differently because before it was hooked it looked like a blue and brownish texture. However, it looks an awful lot like the color of the star in the middle of second row. But, I'm not going to pull them out and re-hook because I figure our foremothers 'made do' and so shall I.
I'm still uncertain as to what I'm going to do for the border. I'm truly looking forward to trying something but figure I should wait until I hook the rest of the block before I tackle that. Plus, I'm in a quandary as to what to do with my corners and perhaps as I hook my plan will be a little more obvious.
Sunday, April 17, 2011
Delaware Hook-in
Oh what a marvelous 3 days we had here at my home with gal pals hooking, laughing, checking out every one's wool, eating, drinking and basically just enjoying friendship. Even tho it was in my home, these gals spoiled me rotten; I was not allowed to lift a finger to anything as they cooked and cleaned up. Plus everyone brought me some goodies so I told them I was having another hook-in next week again.... we all had a good laugh at that.
This is the pattern I worked on and did get a little more accomplished on it but took a lot of time outs to chat, laugh and don't know about the rest of you but seems when I talk or listen to my pals I stop what I'm doing and look at them. Guess I am not good at multi-tasking by talking and hooking.
I had intended to take pictures of all the rugs we were working on but had so much fun that the time slipped by all too soon. The only partial rug is on my friend Shari's frame in the picture below.
On Thursday two of the gals went to the MD Shores rug show in Ocean City, MD while 3 of us stayed behind to hook. But the girls who did go took lots of pictures of the rugs to share with us and tantalized us with their purchases from the rug camp store.
So here we are all together; from left to right there is me and my dog Shadow, Shari, Deb, Mary and Char. We make quite a fun group and we will all be together in one month when we take a class in Ligonier, PA with the delightful and talented Barb Carroll.
This is the pattern I worked on and did get a little more accomplished on it but took a lot of time outs to chat, laugh and don't know about the rest of you but seems when I talk or listen to my pals I stop what I'm doing and look at them. Guess I am not good at multi-tasking by talking and hooking.
I had intended to take pictures of all the rugs we were working on but had so much fun that the time slipped by all too soon. The only partial rug is on my friend Shari's frame in the picture below.
So here we are all together; from left to right there is me and my dog Shadow, Shari, Deb, Mary and Char. We make quite a fun group and we will all be together in one month when we take a class in Ligonier, PA with the delightful and talented Barb Carroll.
Wednesday, April 13, 2011
In progress
This is a rug that I am working on when not hooking on my Sincerely Jane Challenge rug. It was a Home Tweet Home kit I picked up on e-bay several months which also included Karen Kahle's wool because the tags were still in the bags explaining what colors were to go where.
The birdhouse colors I changed up a little as the stripe appearance didn't appeal to me so went with more red. However, in person you can see some other colors which might give the appearance of a weathered birdhouse.
Since my hook-in with gal pals will start this afternoon, this is probably the one I will work on between chatting, laughing, eating and having a few glasses of wine. What is a hook in with pals without sharing a little of the grape in the afternoon.
The birdhouse colors I changed up a little as the stripe appearance didn't appeal to me so went with more red. However, in person you can see some other colors which might give the appearance of a weathered birdhouse.
Since my hook-in with gal pals will start this afternoon, this is probably the one I will work on between chatting, laughing, eating and having a few glasses of wine. What is a hook in with pals without sharing a little of the grape in the afternoon.
Monday, April 11, 2011
Another face lift for a rug
If you have been following my blog you know that I did a face lift for a rug that I was unhappy with and it was a 6 year old rug. And, I mentioned that same time there was another who needed a face lit too. Well, today I pulled that baby off the floor and made a face lift. Now, I must admit this photo is a little washed out as it was taken soon after being hooked and was outside on my back porch. But even in the house I knew it needed a little nip and tuck after it was hooked.
But hey, the rug is done, right? Just bind it and put it on the floor or the wall. Yet, every time I walked on it, by it, saw a picture of it, I knew that it had to be fixed.
Perhaps my motivation was that 4 rug hooker gal pals are coming here for a Saundra's Hook-in on Wednesday. Three of the four gals have walked on this rug for years and don't even think they will notice the change. But I will know and will be happier. I LOVED the pattern Harry ever since I saw it in an older issue of RHM. And I'm loving Harry even more now.
So here is how my Harry looks now. And, this photo was taken inside the house so it will be a little more mellow in appearance vs. washed out from the sunlight.
But hey, the rug is done, right? Just bind it and put it on the floor or the wall. Yet, every time I walked on it, by it, saw a picture of it, I knew that it had to be fixed.
Perhaps my motivation was that 4 rug hooker gal pals are coming here for a Saundra's Hook-in on Wednesday. Three of the four gals have walked on this rug for years and don't even think they will notice the change. But I will know and will be happier. I LOVED the pattern Harry ever since I saw it in an older issue of RHM. And I'm loving Harry even more now.
So here is how my Harry looks now. And, this photo was taken inside the house so it will be a little more mellow in appearance vs. washed out from the sunlight.
Oh yeah, baby... that's what I'm talking about. This is MUCH better!!!!! That dividing line between the border and background makes a huge difference. And when I got out my value finder before, the values were completely the same between the pink border and background. So now with this dividing line it makes everything stand out much more.
Saturday, April 9, 2011
Sincerely Jane Challenge Rug
I've hooked a couple more squares on my challenge piece. For those of you who are just now catching my blog for the first time, this is a challenge piece that some of us members of the Yahoo Rughookers are taking on. It is based on a quilt which was made by Jane Stickle in the 1800's and we have decided to do our version of it in hooked form.
Some people have taken on a humongous personal challenge as they are making the full size rug whereas I'm making one much smaller to suit me. I have chosen blocks which I felt could be hooked in #8 strips and am using #8.5 wool strips for the sashing.
It doesn't get boring because the colors change as do the individual block designs so it maintains its interest. Since I had started another hooked piece I am switching back and forth from rug to rug. The other piece I am currently hooking is Karen Kahle's Home Tweet Home.
Here is what Sincerely Jane rug looks like now.
Now I'm going to start repeating some of the same wool colors after this second row is complete and I am saving the border until all the blocks have been hooked so that maybe I'll have a better idea as to how I want to proceed with the border.
Some people have taken on a humongous personal challenge as they are making the full size rug whereas I'm making one much smaller to suit me. I have chosen blocks which I felt could be hooked in #8 strips and am using #8.5 wool strips for the sashing.
It doesn't get boring because the colors change as do the individual block designs so it maintains its interest. Since I had started another hooked piece I am switching back and forth from rug to rug. The other piece I am currently hooking is Karen Kahle's Home Tweet Home.
Here is what Sincerely Jane rug looks like now.
Now I'm going to start repeating some of the same wool colors after this second row is complete and I am saving the border until all the blocks have been hooked so that maybe I'll have a better idea as to how I want to proceed with the border.
Thursday, April 7, 2011
Rug Hooking Demo
On Monday I volunteered to do a traditional rug hooking demo at a nursing care facility in town. I was hoping that perhaps some of the seasoned ladies may have hooked sometime in their past but no one in the room had.
My goal was to just stimulate the minds of the ladies and to fill in a little space of time in their day with something fun. I took several smallish hooked pieces with various designs in the hopes it would provide some spark or twinkle to the eye and let each of them hold and feel the texture of the hooked items.
Here I am showing the women an antique hook, which is a nail embedded in a crudely carved piece of wood and a latch hook and explained that this was not the type of hook used for traditional rug hooking. Heck, I've no clue how in the world to even use a latch hook.
Below I am explaining how we 'outline and fill'. And tho my visit there was a quick synopsis of the process of rug hooking, it provided a little entertainment and communication to what might normally be a hum drum day for some of the residents of the facility.
My goal was to just stimulate the minds of the ladies and to fill in a little space of time in their day with something fun. I took several smallish hooked pieces with various designs in the hopes it would provide some spark or twinkle to the eye and let each of them hold and feel the texture of the hooked items.
Here I am showing the women an antique hook, which is a nail embedded in a crudely carved piece of wood and a latch hook and explained that this was not the type of hook used for traditional rug hooking. Heck, I've no clue how in the world to even use a latch hook.
Monday, April 4, 2011
Woodland Deer Rug
This is a rug I purchased from and hooked at the Woolley Fox; it and is an adaptation of an antique rug. Since I live on Woodland Drive and have deer roaming the acreage here it seemed only natural for me to hook this rug and display it in front of my fireplace in my home. Barb Carroll has a magnificent eye for color and I dearly love the results.
After I took a picture of the finished rug and sent it to a friend, she wrote back asking if I'd ever seen a picture of the original antique. I told her I hadn't, so she kindly sent me this page from an antique magazine.
Soon it will be time to go to Woolley Fox for another mini-workshop and I'm as excited as if it were my first time there. I already know what I'm going to hook and it is another antique adaptation which I will transfer to linen (it is old enough that there is no copyrite issue) but the design will remain a secret until after I return home from Barb's so I can share my progress with you.
After I took a picture of the finished rug and sent it to a friend, she wrote back asking if I'd ever seen a picture of the original antique. I told her I hadn't, so she kindly sent me this page from an antique magazine.
Soon it will be time to go to Woolley Fox for another mini-workshop and I'm as excited as if it were my first time there. I already know what I'm going to hook and it is another antique adaptation which I will transfer to linen (it is old enough that there is no copyrite issue) but the design will remain a secret until after I return home from Barb's so I can share my progress with you.
Thursday, March 31, 2011
Magdalena Eagle rug
Magdalena's Eagle rug has been hooked for a while but since I'm not fond of binding rugs (I'd rather hook'em) it sat around rolled up for a while. Finally I couldn't avoid the inevitable since I've gal pals coming here in April for a hook-in so figured I'd better bite the bullet and bind it.
The original Magdalena Eagle rug measured 30" x 42 1/2" and mine is a tad short measuring in at 27" x 39 1/2". And it does require some fudging when it comes time to hook if trying to stay fairly true to her color scheme. While I did a lot of hooking in #8.5 there were some areas where I had to reduce the size to #7 so I could wedge the colors in. But then I'm sure Magdalena used various cuts and used what he had.
I will put a label on the back of this rug, just as I did my Domestic Zoo and the Dog and Birds, indicating the original size and the size of the reproduction. That way people will not be mistaken that the rug is the same as the original hooked by Magdalena.
The picture of the rug shows up as lighter and sorta washed out whereas in person it is darker. But with the walking on the rugs after they are displayed, that will mellow these great pieces just fine.
Perhaps I'll take a break from Magdalena rugs for a while. My intentions were to have 3 Magdalena rugs in one particular room in the house. I haven't put the other two out yet because I wanted them to age at the same rate. And, even now that the Eagle is bound won't put it out because it will go for a show-n-tell at Cape May in September. I have a dog and don't want dog hair all over it before I take it to the rug show. So all 3 of them will have their grandstand showing in my home when I return from rug camp.
The original Magdalena Eagle rug measured 30" x 42 1/2" and mine is a tad short measuring in at 27" x 39 1/2". And it does require some fudging when it comes time to hook if trying to stay fairly true to her color scheme. While I did a lot of hooking in #8.5 there were some areas where I had to reduce the size to #7 so I could wedge the colors in. But then I'm sure Magdalena used various cuts and used what he had.
I will put a label on the back of this rug, just as I did my Domestic Zoo and the Dog and Birds, indicating the original size and the size of the reproduction. That way people will not be mistaken that the rug is the same as the original hooked by Magdalena.
The picture of the rug shows up as lighter and sorta washed out whereas in person it is darker. But with the walking on the rugs after they are displayed, that will mellow these great pieces just fine.
Perhaps I'll take a break from Magdalena rugs for a while. My intentions were to have 3 Magdalena rugs in one particular room in the house. I haven't put the other two out yet because I wanted them to age at the same rate. And, even now that the Eagle is bound won't put it out because it will go for a show-n-tell at Cape May in September. I have a dog and don't want dog hair all over it before I take it to the rug show. So all 3 of them will have their grandstand showing in my home when I return from rug camp.
Wednesday, March 30, 2011
It's Spring?
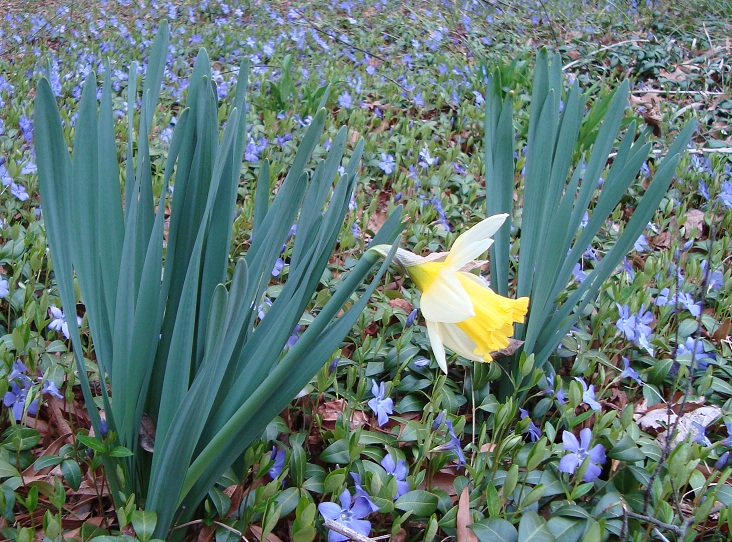
The calender tells us that spring has arrived, Pauxatauney Phil made his prediction, my yard is showing signs it is spring, or close to it..... but, the temperatures are below records for this time of year in Delaware. Here you can see the periwinkle and one daffodil in this group that survived the nighttime frigid temperatures of late.
I'm waiting for bird activity in my many birdhouses which I have spread around this woodland wonderland. I've even tried to entice birds with a little painting of an ivy around the front of this one... no takers yet. But then this is too far from my house to watch the activity while hooking. So it could be there will be occupants there soon.
I do not know how many birdhouses I have in my yard but know there are many and my many bird feeders keep me busy. My register receipts can testify to the fact that I have many birds calling for the black oil sunflower seeds that I willingly provide sustenance for. Oh, and let us not forget the squirrels who take more than their fair share.
I can see a birdhouse which needs repair, but perhaps the future resident will like it's modern entry and exit design. Sure will make it easier for the little ones to learn to fly out rather than up and out.
And then I like this bird house. I used to have an unrepairable cuckoo clock in the center of that heart but that finally disintegrated after several years so put this birdhouse for a new occupant with spacial living accommodations.
And of course spring would not be spring without the pollen spread by bumble bees. Here is a cloth bumblebee I made (you can see it on my web site) and it is carrying it's own bee skep with Sweet Annie to help pollenate my big woodland wonderland.
I'm waiting for bird activity in my many birdhouses which I have spread around this woodland wonderland. I've even tried to entice birds with a little painting of an ivy around the front of this one... no takers yet. But then this is too far from my house to watch the activity while hooking. So it could be there will be occupants there soon.
I can see a birdhouse which needs repair, but perhaps the future resident will like it's modern entry and exit design. Sure will make it easier for the little ones to learn to fly out rather than up and out.
And then I like this bird house. I used to have an unrepairable cuckoo clock in the center of that heart but that finally disintegrated after several years so put this birdhouse for a new occupant with spacial living accommodations.
And of course spring would not be spring without the pollen spread by bumble bees. Here is a cloth bumblebee I made (you can see it on my web site) and it is carrying it's own bee skep with Sweet Annie to help pollenate my big woodland wonderland.
OH! That green birdhouse in the above picture with the vintage door knob was purchased at Cape May, NJ and was made with pieces of the Chalefont Hotel. I attend rug camp each September at the Chalefont hotel so this is a wonderful reminder of my time there. Each day when I look at it brings back fond memories of hooking with my pals and walking the beach.
Tuesday, March 29, 2011
Rugs can get facelifts too
Have you ever hooked a rug and it bugs you every time you walk by it because you know it needs something done to it to make it better? But, since the rug has been hooked and walked on for years and you have new things to hook you just don't bother doing anything about it? Well that has happened to me.
This is a pattern by Karen Kahle which I loved and since I was sold by the colors she had in the pattern I tried to hook fairly close to her color palate, that plus the fact I was still timid in doing my own color planning and figured why not just follow her
colors. So here is how I hooked it and I was happy...... for a while. As you can see the value in the background and border are too close. The rug really needed a beauty line or dividing line between the border and the background. But hey, it was done and I'd moved on to many other rugs and had more patterns on the frames.
But then I realized I'd never be truly happy unless I put that line in. So I got some #6 wool strips and cornrowed a green that would work between the border and background. Voila.... mama was happy. Well, at least happier.
Actually there still is something I'd like to change in the rug but not sure that will be done. I'd like to change the color of the white rabbit and would make it a little darker, not as dark as the rabbit to the left nor quite as dark as the background so it gets lost. Hmm, come to think of it maybe it is okay like this after all.
And, the photos were taken with two different cameras, as well as one being on my back porch in natural light and one inside the house with a flash. So there is a difference in photo color presentation as well.
Now, I have another rug which was hooked in 2005 which needs a similar face lift and perhaps one day I'll take care of that one too.
This is a pattern by Karen Kahle which I loved and since I was sold by the colors she had in the pattern I tried to hook fairly close to her color palate, that plus the fact I was still timid in doing my own color planning and figured why not just follow her
colors. So here is how I hooked it and I was happy...... for a while. As you can see the value in the background and border are too close. The rug really needed a beauty line or dividing line between the border and the background. But hey, it was done and I'd moved on to many other rugs and had more patterns on the frames.
But then I realized I'd never be truly happy unless I put that line in. So I got some #6 wool strips and cornrowed a green that would work between the border and background. Voila.... mama was happy. Well, at least happier.
Actually there still is something I'd like to change in the rug but not sure that will be done. I'd like to change the color of the white rabbit and would make it a little darker, not as dark as the rabbit to the left nor quite as dark as the background so it gets lost. Hmm, come to think of it maybe it is okay like this after all.
And, the photos were taken with two different cameras, as well as one being on my back porch in natural light and one inside the house with a flash. So there is a difference in photo color presentation as well.
Now, I have another rug which was hooked in 2005 which needs a similar face lift and perhaps one day I'll take care of that one too.
Sunday, March 27, 2011
Backing
Since I do mostly wide cut hooking my favorite type of backing to use is primitive natural linen. I have used burlap, monks cloth, hairless linen and rug warp.
Burlap is not a favorite of mine because it is scratchy and too brittle for my liking.
Even tho it is soft, I do not like hairless linen because when I've purchased yardage of it and went to pull a thread to cut on the straight of grain the thread kept pulling apart and I chased down that same thread all across the width of the linen. And that was not a random event because it occurred every time I pulled a thread from either direction anywhere on the yardage. So I figured that if the fibers were so weak to tease easily apart then I did not want my hard work to go into a rug for the floor which would disintegrate before my eyes. I still have some left and will only use it for mats and something which will not get much use.
Monks cloth I don't like for a couple reasons. For one, my hook would aways get caught between the small threads that make up the weave and then I'd have to pull the hook out and cautiously insert hook again. Another issue is the cotton seems to stretch to much for me, I find myself packing too tighly and the rug won't lay flat; so didn't go back to using that either.
I have used rug warp and liked it....not as much as linen, but I really don't have anything bad to say about it. I hear all the time that rug warp is for fine cut; and so it may be, but I have successfully used an #8 cut to hook the rug you see below. Sorry I didn't take a picture inside before I sold it because it looks all washed out in the natural sunlight on my back deck.
So I know from personal experience that rug warp can be used with an #8 cut. Now, I use a Hartman hook which has a nice thick shank which aids in pulling wider loops thru backing easier. So perhaps the hook is part of the key to sucess.
Burlap is not a favorite of mine because it is scratchy and too brittle for my liking.
Even tho it is soft, I do not like hairless linen because when I've purchased yardage of it and went to pull a thread to cut on the straight of grain the thread kept pulling apart and I chased down that same thread all across the width of the linen. And that was not a random event because it occurred every time I pulled a thread from either direction anywhere on the yardage. So I figured that if the fibers were so weak to tease easily apart then I did not want my hard work to go into a rug for the floor which would disintegrate before my eyes. I still have some left and will only use it for mats and something which will not get much use.
Monks cloth I don't like for a couple reasons. For one, my hook would aways get caught between the small threads that make up the weave and then I'd have to pull the hook out and cautiously insert hook again. Another issue is the cotton seems to stretch to much for me, I find myself packing too tighly and the rug won't lay flat; so didn't go back to using that either.
I have used rug warp and liked it....not as much as linen, but I really don't have anything bad to say about it. I hear all the time that rug warp is for fine cut; and so it may be, but I have successfully used an #8 cut to hook the rug you see below. Sorry I didn't take a picture inside before I sold it because it looks all washed out in the natural sunlight on my back deck.
So I know from personal experience that rug warp can be used with an #8 cut. Now, I use a Hartman hook which has a nice thick shank which aids in pulling wider loops thru backing easier. So perhaps the hook is part of the key to sucess.
Saturday, March 26, 2011
Black Binding dye results
This is the small amount of wool I used in this experiment. It probably amounts to 1/4 yard all together.
Well I'm rather surprised by the results. I can see a definite change in the tan pieces I dyed and minor results in the piece I was sure would absorb more of the dye.
For the heck of it I went in search to see if I had any more of the grey tweed wool so I could definitely see if there had been a change. And there had been. But strange that even in this picture it looks different than the shot above. Maybe this is the reverse side of the piece above, dunno. But the piece of wool did absorb some of the dye and it does have a purple cast to it.
But hey, it was available color without having to buy dye. I suspect that if I had washed a larger quantity of black binding there would have been more dye to absorb but I only rinsed what I needed for the next two things I need to bind.
Well I'm rather surprised by the results. I can see a definite change in the tan pieces I dyed and minor results in the piece I was sure would absorb more of the dye.
For the heck of it I went in search to see if I had any more of the grey tweed wool so I could definitely see if there had been a change. And there had been. But strange that even in this picture it looks different than the shot above. Maybe this is the reverse side of the piece above, dunno. But the piece of wool did absorb some of the dye and it does have a purple cast to it.
But hey, it was available color without having to buy dye. I suspect that if I had washed a larger quantity of black binding there would have been more dye to absorb but I only rinsed what I needed for the next two things I need to bind.
Friday, March 25, 2011
Black Binding Tape
Soon I'll be binding another chair pad as well as my Magdalena Eagle rug (finally). For those of you who read my previous posting about binding a round chair pad, you may recall that I mentioned that I had not washed the binding tape which, had I done so would have make it lay more smoothly when I gathered the inside edge.
Frankly, I'm guilty of not washing the black binding anyway, particularly when I have a primitive black background or border. Even tho I know that if the rug got wet it would bleed I still didn't when there was the primitive black border.
So since my Magdalena Eagle rug isn't primitive black around the perimeter and since I am soon going to bind another round piece I decided to soak a length of black binding in just regular warm water.
As you can see my black binding is still black and it is somewhat softer and will gather more nicely on my round piece when I gather it to fit.
And, just look at what leached out of that binding in only about 10 minutes. Imagine what damage it would have done to my lighter wool in the rug had it gotten wet.
Later today I plan to find a small piece of wool to put in that dye pot as I can always use more primitive black. It will be interesting to see what I end up with because this dye has a purplish cast to it. So the wool probably won't come out as black but rather purple grey. So I'll decide what wools to pick and perhaps will pick a couple just to see what turns what color. Should be another interesting dyeing without dye project.
Frankly, I'm guilty of not washing the black binding anyway, particularly when I have a primitive black background or border. Even tho I know that if the rug got wet it would bleed I still didn't when there was the primitive black border.
So since my Magdalena Eagle rug isn't primitive black around the perimeter and since I am soon going to bind another round piece I decided to soak a length of black binding in just regular warm water.
As you can see my black binding is still black and it is somewhat softer and will gather more nicely on my round piece when I gather it to fit.
And, just look at what leached out of that binding in only about 10 minutes. Imagine what damage it would have done to my lighter wool in the rug had it gotten wet.
Later today I plan to find a small piece of wool to put in that dye pot as I can always use more primitive black. It will be interesting to see what I end up with because this dye has a purplish cast to it. So the wool probably won't come out as black but rather purple grey. So I'll decide what wools to pick and perhaps will pick a couple just to see what turns what color. Should be another interesting dyeing without dye project.
Sunday, March 20, 2011
Snippet Dyeing Results
Yesterday after I'd put the off-white wool sprinkled with snippets in to soak I pulled out another piece of wool but chose a pink piece of wool. This one I filled with longer pieces of wool strips, yarn and more lavender.
Here is again, a picture of the off-white piece of wool I sprinkled with snippets in yesterday's picture.
And below you can see that the bleeding of the red family wools have influenced the results of the white piece of wool which is on the right side. That piece also had more orange, gold and salmon colored snippets. I was surprised that the lavender placed on the pink piece of wool didn't make much of a showing. But then you just don't know what is going to be a great bleeder until you try it.
And when I flipped those two pieces of wool over it is obvious to the eye that the part of the wool on the bottom was that part which was exposed in the pot and has a more even dye effect. You can also see where the tied sections were.
This was fun to do again and will make adding pieces of this into a flower more interesting.
Here is again, a picture of the off-white piece of wool I sprinkled with snippets in yesterday's picture.
And below you can see that the bleeding of the red family wools have influenced the results of the white piece of wool which is on the right side. That piece also had more orange, gold and salmon colored snippets. I was surprised that the lavender placed on the pink piece of wool didn't make much of a showing. But then you just don't know what is going to be a great bleeder until you try it.
And when I flipped those two pieces of wool over it is obvious to the eye that the part of the wool on the bottom was that part which was exposed in the pot and has a more even dye effect. You can also see where the tied sections were.
Saturday, March 19, 2011
Dyeing with Snippets
Previously, Linda asked me if I'd ever dyed using snippets and it has been quite a while so thought I'd do it again to demonstrate the results. Here you can see that I have a small piece of off-white wool and it looks like a wool pizza sprinkled with various colors of snippets.
I then rolled it up just as I'd done when I did the marbleized wool.
To add more color to the exposed wool I tied it with various colors of wool strips which will also bleed onto the wool. After I post this I will go do another piece of wool but this time will use a colored piece as the base and sprinkle it with various colors. I'm sure the colored piece of wool will be much more desirable to hook as flowers but just wanted to demonstrate the difference. Right now the roll that I have pictured is soaking and will soon add the colored piece of wool in the same pot. Check back to see the results.
Friday, March 18, 2011
Sincerely Jane makes an appearance
Yikes, this blog thing is a real commitment and feel like I'm not living up to my end by providing a learning experience to newbies or information to oldies like me. I've been busy, life happens and now that warm weather is upon us (which is a GOOD thing) it also requires grass cutting and other extra curricular activities other than hooking and dyeing.
I have hooked the first row of my design and think the rest will be a lot more of a challenge. I'll want to use some of the same colors but won't want them next to one another, nor will I want them in the very next row. I've tried to keep the colors in a medium value and not brights yet. But now don't think it would be a good time to introduce brights since the first row is rather generic and a dull palate.
When I started this project I really did want to try and hook it as Jane did with her quilt, particularly with the light background and sashing. Also her color palate wasn't really bright. Yes, she has some gorgeous red calico fabrics which I was really looking forward to hooking (red) but then the other colors in her calico neutralized it a bit. So now the work begins for me. I'm so afraid of picking colors that won't be compatible with the colors above, below or beside the other hooked squares. I guess that is why this is called a "CHALLENGE".
I'm sure that I'll break a few rules along the way and I just might reverse hook some colors after it is all hooked to try and make a good family with all the square's colors.
I have hooked the first row of my design and think the rest will be a lot more of a challenge. I'll want to use some of the same colors but won't want them next to one another, nor will I want them in the very next row. I've tried to keep the colors in a medium value and not brights yet. But now don't think it would be a good time to introduce brights since the first row is rather generic and a dull palate.
When I started this project I really did want to try and hook it as Jane did with her quilt, particularly with the light background and sashing. Also her color palate wasn't really bright. Yes, she has some gorgeous red calico fabrics which I was really looking forward to hooking (red) but then the other colors in her calico neutralized it a bit. So now the work begins for me. I'm so afraid of picking colors that won't be compatible with the colors above, below or beside the other hooked squares. I guess that is why this is called a "CHALLENGE".
I'm sure that I'll break a few rules along the way and I just might reverse hook some colors after it is all hooked to try and make a good family with all the square's colors.
Sunday, March 13, 2011
Playing in the Dye Pots
This past September I purchased a wonderful fat quarter of hand dyed wool from Kris Miller. My intentions were to immediately come home and try to dye some using that color as my standard. Well, life got in the way and it is now 6 months since purchasing that pretty yellow-green wool.
What lit the fire under my dye pot was my hooker friend Shari who said she was making more of a yellow-green for a rug she was working on. So she inspired me to dust off my dye pots and finally try to duplicate the green before I weakened and used the piece up in a project.
So with about 1/3 yard of two different pieces of wool I used 1/16 t. bronze, 1/16 t. olive green and 1/32 nugget gold dye in 1 cup boiling water. This is the pot shortly after submersing the wool.
I simmered the pot for maybe an hour until most of the dye had been absorbed and put in a heaping teaspoon of citric acid. Then, letting the pot of water cool down on it's own for a while the wool was rinsed, spun dry and dried in low heat until dry. While I am pleased with the final results it doesn't really match the same wonderful color of wool I purchased from Kris.
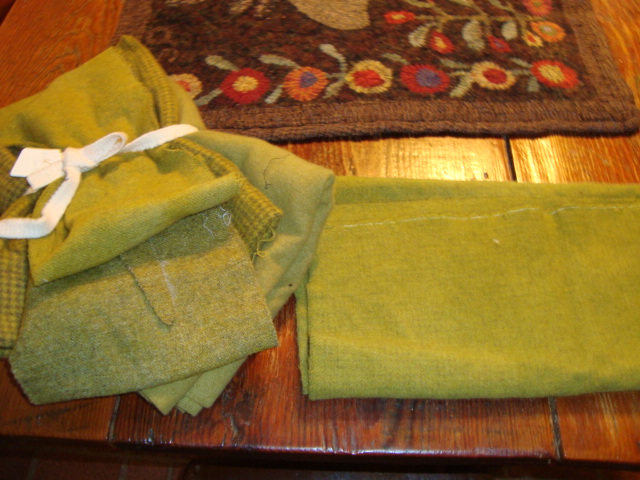
Then I realized that about 2 years ago I had pulled some wools to hook a Karen Kahle rug and just might have another variation of a similar green..... upstairs I went and pulled the basket off the shelf which has the pattern and wools selected to hook the pattern. So while my dye job today wasn't successful in duplicating the exact same color, you can see that the wool I had coveted and was holding for a special Karen Kahle design is closer. And thankfully when I did that dye job a few years ago I put a tag on it which tells me how I can reproduce this one again.. YIPPEE. It is Emma Lou's #50 Brick Gold ~ I think. har har har....... just under my note of #50 Brick Gold I have 3 question marks. So guess I won't know what those question marks mean until I try Emma Lou's recipe once again. But I've plenty of yellow-green to last me for a while.
What lit the fire under my dye pot was my hooker friend Shari who said she was making more of a yellow-green for a rug she was working on. So she inspired me to dust off my dye pots and finally try to duplicate the green before I weakened and used the piece up in a project.
So with about 1/3 yard of two different pieces of wool I used 1/16 t. bronze, 1/16 t. olive green and 1/32 nugget gold dye in 1 cup boiling water. This is the pot shortly after submersing the wool.
I simmered the pot for maybe an hour until most of the dye had been absorbed and put in a heaping teaspoon of citric acid. Then, letting the pot of water cool down on it's own for a while the wool was rinsed, spun dry and dried in low heat until dry. While I am pleased with the final results it doesn't really match the same wonderful color of wool I purchased from Kris.
Then I realized that about 2 years ago I had pulled some wools to hook a Karen Kahle rug and just might have another variation of a similar green..... upstairs I went and pulled the basket off the shelf which has the pattern and wools selected to hook the pattern. So while my dye job today wasn't successful in duplicating the exact same color, you can see that the wool I had coveted and was holding for a special Karen Kahle design is closer. And thankfully when I did that dye job a few years ago I put a tag on it which tells me how I can reproduce this one again.. YIPPEE. It is Emma Lou's #50 Brick Gold ~ I think. har har har....... just under my note of #50 Brick Gold I have 3 question marks. So guess I won't know what those question marks mean until I try Emma Lou's recipe once again. But I've plenty of yellow-green to last me for a while.
Subscribe to:
Posts (Atom)