Thought I'd start off first with an adaptation of an E.S. Frost Rug that I hooked. While perusing photos came across it and remember how much I liked the colors and blotches of different colors in the background.
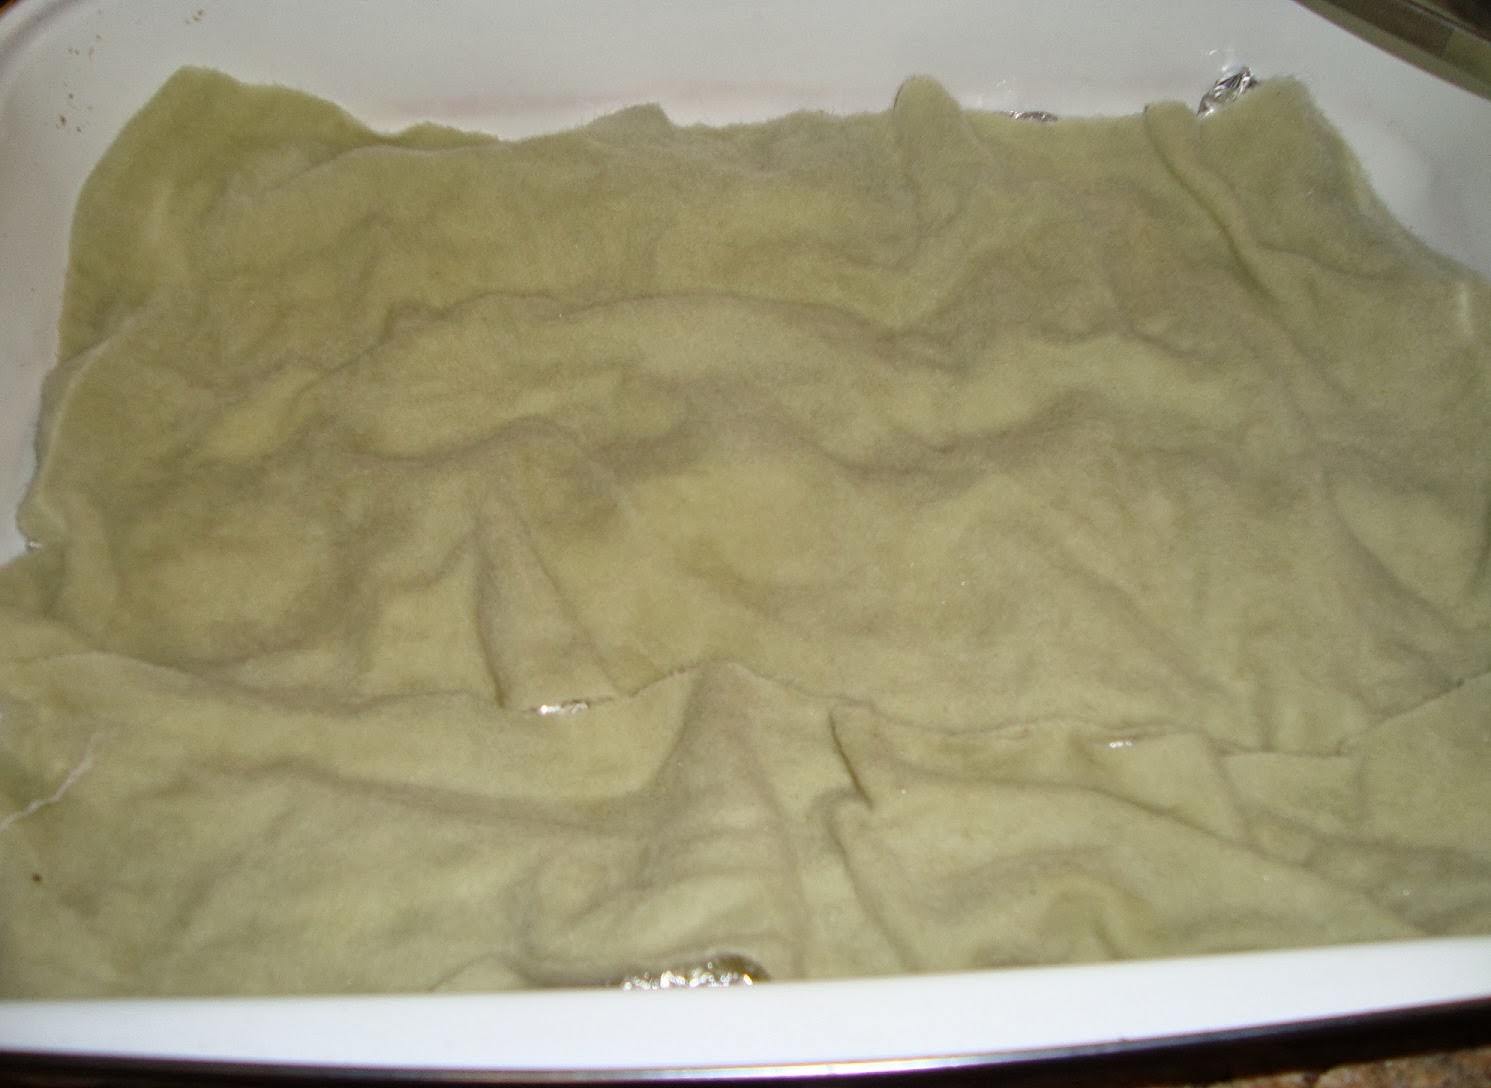
After doing the faux paisley dyeing yesterday there was a little red dye left so thought I'd use it up. Actually, I had to add a little more of the Egyptian Red dye because what was left wouldn't have been enough to dye the wool I grabbed. Soaking here are parts of a skirt (or maybe a jacket?) and a wool pocket.
And this is what it looked like after being over dyed with the red. Now it can be used with that white toned down.
HEAR YE, HEAR YE.............
My friends Lynne Fowler and Eric Sandberg are starting a hooking group in Onancock, Virginia. It will be held the second Monday of each month at Ker Place. There is no cost, but the Museum would appreciate it if one would join or make a donation. Please bring a lunch.
Also, beginners are welcome but there will not be any formal class however, they will take beginning supplies. If you are a newbie you can learn by just watching what other hookers do. A great way to be exposed to different rug hooking equipment also, not to mention getting away to be with other rug hookers.
Lynne asked that I post this on my blog to spread the word. So if you are local to the area or are up for a drive the second Monday of each month, you will be welcomed with open arms.
WHEN: 2nd Monday of each month
WHERE: Ker Place, 69 Market St., Onancock, VA
TIME: 10 a.m. - 4 (flexible)
LUNCH: bring your own
If you have questions, Please contact Lynne Fowler at: lynnevfowler@gmail.com
Thanks for dropping by to visit, comments and questions are always welcome. Just remember that if you don't provide your e-mail address on your profile I will not be able to reply to you.
Saundra
I love replicating antique adaptation rugs but also design my own. Looking at old rugs in Early American Life magazine was my inspiration to learn to hook.
Sunday, December 15, 2013
Saturday, December 14, 2013
Faux Paisley Dye Results
I've been a very busy girl today and haven't pulled a loop or done any binding on finished hooked pieces. Between working on the paisley dye project, working on my grandson's handmade wig and mustache for him to be Einstein at school, AND making homemade vegetable soup there's been no play time for me.
Please don't get me wrong, I'm having a BLAST helping my grandson with this endeavor and is a story I'll share later....anyway...back to paisley.
Joan Moshimer's instructions wrote that she used Dorr's Mint wool as the base wool since it was a pale grayed-green helping to soften the colors. At first I'd considered ordering a yard but figured there must be something in my stash that I could use even if it was in pieces. And pieces it was.
Also I chose a variety of greens since I wasn't sure exactly what Dorr's looked like in person. Besides, it might be nice to have different looks since you already saw the various antique paisley colors available that Deb purchased.
Joan chose Cushing dyes of Egyptian Red, Gold and Aquagreen as her dyes. She used FOUR pieces each 10" x 18" (to fit a large flat pan). The wool I chose might have been a smidgen longer or smaller in length but wider, but approximated the amount. And then soaked in water with a little detergent for a while.
After pre-soaking the wool pieces in detergent squeeze them out and put them in a solution of 4 cups warm water mixed with 4 TBS vinegar. The vinegar will help absorb color quickly.
Then mix:
NOTE TO NEWBIES: You can see a piece of my nose mask on the far right, which I use when my dyes are opened and until they are dissolved ~ better safe than sorry. AND, a little hint is to put some water into your measuring cup, swirl it around and dump it out before putting your power dye in and it will prevent some of the particles from floating around.
Then into the flat baking pan put a sheet of aluminum foil lightly crumpled.
Next Joan squeezed out the first piece and laid it over the foil.
Using dye solution A spoon splotches of it all over so only small areas of original mint color remain. It looks white here because of the flash but it is mint green.
Then with dye solution "B" Joan spooned on to cover the remaining mint color here and there even onto the red, using much less of B than A.
Next, Joan's instructions say that solution C is spooned on here and there using even less than B. My colors seem to be very limited here I know. But also in her article it says the bottom wool will be the darkest since all the color will drain down. Being timid I was a little conservative in my colors and guessed the top would drain down.
This repeats, laying each subsequent layer over the previous. FINALLY pour over about 4 cups of water/vinegar mixture, cover and bake at 300 degrees for 1 hour.
And these are the results, this without a flash and can now see that I was a little stingy with my red dye. BUT, this was my first try.
And this with a flash. Think I was scared of this since I was putting red over green fearful of getting a brown. Ive more mint green so perhaps one day I'll try it again.
But this will be good to use for flowers, part of a sunset, tulips? Hey, mistakes can always be used for something even if it didn't turn out to be for the project you intended.
I'm very envious (jealous) of my gal pal who can color by eye. I'm sure that Lynne is chuckling right now if she is reading my blog and I'll get a response from her by tomorrow for sure. UPDATE: Lynne did write me and said that SHE was envious because she's been wanting to try this recipe but hasn't done so yet. However, she is planning to experiment one day soon.
Have a great evening everyone and now I've go to go back and stir my homemade vegetable soup. Have a great weekend and remember to be kind to one another.
Saundra
Please don't get me wrong, I'm having a BLAST helping my grandson with this endeavor and is a story I'll share later....anyway...back to paisley.
Joan Moshimer's instructions wrote that she used Dorr's Mint wool as the base wool since it was a pale grayed-green helping to soften the colors. At first I'd considered ordering a yard but figured there must be something in my stash that I could use even if it was in pieces. And pieces it was.
Also I chose a variety of greens since I wasn't sure exactly what Dorr's looked like in person. Besides, it might be nice to have different looks since you already saw the various antique paisley colors available that Deb purchased.
Joan chose Cushing dyes of Egyptian Red, Gold and Aquagreen as her dyes. She used FOUR pieces each 10" x 18" (to fit a large flat pan). The wool I chose might have been a smidgen longer or smaller in length but wider, but approximated the amount. And then soaked in water with a little detergent for a while.
After pre-soaking the wool pieces in detergent squeeze them out and put them in a solution of 4 cups warm water mixed with 4 TBS vinegar. The vinegar will help absorb color quickly.
Then mix:
- A. 1/4" tsp. plus 1/8 tsp. EGYPTIAN RED in 3 cups boiling water.
- B. 1/8 tsp. GOLD in 2 cups boiling water.
- C. 1/16 tsp. AQUAGREEN in 2 cups boiling water.
NOTE TO NEWBIES: You can see a piece of my nose mask on the far right, which I use when my dyes are opened and until they are dissolved ~ better safe than sorry. AND, a little hint is to put some water into your measuring cup, swirl it around and dump it out before putting your power dye in and it will prevent some of the particles from floating around.
Then into the flat baking pan put a sheet of aluminum foil lightly crumpled.
Next Joan squeezed out the first piece and laid it over the foil.
Using dye solution A spoon splotches of it all over so only small areas of original mint color remain. It looks white here because of the flash but it is mint green.
Then with dye solution "B" Joan spooned on to cover the remaining mint color here and there even onto the red, using much less of B than A.
Next, Joan's instructions say that solution C is spooned on here and there using even less than B. My colors seem to be very limited here I know. But also in her article it says the bottom wool will be the darkest since all the color will drain down. Being timid I was a little conservative in my colors and guessed the top would drain down.
This repeats, laying each subsequent layer over the previous. FINALLY pour over about 4 cups of water/vinegar mixture, cover and bake at 300 degrees for 1 hour.
And these are the results, this without a flash and can now see that I was a little stingy with my red dye. BUT, this was my first try.
And this with a flash. Think I was scared of this since I was putting red over green fearful of getting a brown. Ive more mint green so perhaps one day I'll try it again.
But this will be good to use for flowers, part of a sunset, tulips? Hey, mistakes can always be used for something even if it didn't turn out to be for the project you intended.
I'm very envious (jealous) of my gal pal who can color by eye. I'm sure that Lynne is chuckling right now if she is reading my blog and I'll get a response from her by tomorrow for sure. UPDATE: Lynne did write me and said that SHE was envious because she's been wanting to try this recipe but hasn't done so yet. However, she is planning to experiment one day soon.
Have a great evening everyone and now I've go to go back and stir my homemade vegetable soup. Have a great weekend and remember to be kind to one another.
Saundra
Friday, December 13, 2013
Antique Paisley
Have you ever hooked antique paisley shawl strips in one of your pieces? I have and it did add a nice look to the piece. Even at my local thrift shop just once I had the opportunity to pick up a piece of paisley and was very surprised to find it there. It is old and fragile and mine didn't fare too well when trying to hook it.
However, I purchased a nice piece from Kris Miller at camp once and hooked well. You may wish to contact Kris to see is she has any paisley for sale if you are interested in trying it. Seems to me it was like $10 or $12 for a small piece about the size of the ones rolled up in the picture above. When hooking with real paisley you need to cut the strips wider and it will curl, which is exactly what you want it to do.
My friend Deb went bonkers over antique paisley and was on the hunt to purchase as much for as good a price as she could. For any of you who have checked, you realize paisley is expensive. Yet my dear friend Deb gifted me with strips from all the various colored paisley she purchased. In the picture below, all of the paisley is her gift to me except for those two little pieces to the far right. That would be a small piece of the fragile paisley I pick up at the local thrift shop but as mentioned, is too fragile to hook with.
And this is a rug that Deb hooked with Barb Carroll called Hildafern (a Woolley Fox design). All the leaves in this rug were hooked with paisley. As you can tell she has quite a selection of colors.
So this weekend I intend to try something new with the dye equipment. One of the hand outs that Betsy Reed gave the class was an article by Joan Moshimer on "How to Dye Paisley".
No, it isn't over dying the already beautiful antique paisley, it is trying to achieve a faux paisley look. Well of course it won't look like real paisley, but I'm going to give it a try and will post everything in stages for you to see what I do. I just might end up with a mess because if complimentary colors are used in equal quantities it could be that I'll end up with a gray mess. But hey, it's been a while since I've pulled out my dye equipment and want to play a little. Besides, the heat will be nice with these sub freezing temperatures here.
Have a great evening, try and stay warm and be kind to one another.
Saundra
However, I purchased a nice piece from Kris Miller at camp once and hooked well. You may wish to contact Kris to see is she has any paisley for sale if you are interested in trying it. Seems to me it was like $10 or $12 for a small piece about the size of the ones rolled up in the picture above. When hooking with real paisley you need to cut the strips wider and it will curl, which is exactly what you want it to do.
My friend Deb went bonkers over antique paisley and was on the hunt to purchase as much for as good a price as she could. For any of you who have checked, you realize paisley is expensive. Yet my dear friend Deb gifted me with strips from all the various colored paisley she purchased. In the picture below, all of the paisley is her gift to me except for those two little pieces to the far right. That would be a small piece of the fragile paisley I pick up at the local thrift shop but as mentioned, is too fragile to hook with.
And this is a rug that Deb hooked with Barb Carroll called Hildafern (a Woolley Fox design). All the leaves in this rug were hooked with paisley. As you can tell she has quite a selection of colors.
So this weekend I intend to try something new with the dye equipment. One of the hand outs that Betsy Reed gave the class was an article by Joan Moshimer on "How to Dye Paisley".
No, it isn't over dying the already beautiful antique paisley, it is trying to achieve a faux paisley look. Well of course it won't look like real paisley, but I'm going to give it a try and will post everything in stages for you to see what I do. I just might end up with a mess because if complimentary colors are used in equal quantities it could be that I'll end up with a gray mess. But hey, it's been a while since I've pulled out my dye equipment and want to play a little. Besides, the heat will be nice with these sub freezing temperatures here.
Have a great evening, try and stay warm and be kind to one another.
Saundra
Wednesday, December 11, 2013
Pillow Wannabe
Back on my frame is Hearts and Swags, an antique adaptation that I started at Betsy Reed's class this past November. It was put aside once coming home from camp so that Long Island Farm could be finished as well as my girl Shadow's profile. So I'm back having fun doing the hand torn hooking, which is all new to me.
One thing I've noticed with the hand torn is that it tends to grow a little once you make that first snippet. Perhaps it is the angle of the tip of the scissor's position which causes the direction of the rip, but my torn strips aren't consistent. Maybe this adds to the primitive look, and for sure it doesn't cause any wear and tear on a cutter since I'm not using one. Also must say that it hasn't hurt my hand by either the ripping or the pulling loops. Yet, this is a rather smallish piece (20 x 20) plus the fact I stepped away from it for a while to hook the other rugs.
This piece is going to be a pillow, it will be my first hooked pillow and I'll not hook the backside but will use the patchwork technique Betsy taught us in class.
Have a great evening folks, Hard to believe it is just two weeks away from Christmas. Please be kind to one another as you find a parking space at the mall, stand in line at the register, etc. 'Tis the season where patience and time are short so kindness needs to be stronger. LUV ya'll.
Saundra (and Ben)
One thing I've noticed with the hand torn is that it tends to grow a little once you make that first snippet. Perhaps it is the angle of the tip of the scissor's position which causes the direction of the rip, but my torn strips aren't consistent. Maybe this adds to the primitive look, and for sure it doesn't cause any wear and tear on a cutter since I'm not using one. Also must say that it hasn't hurt my hand by either the ripping or the pulling loops. Yet, this is a rather smallish piece (20 x 20) plus the fact I stepped away from it for a while to hook the other rugs.
This piece is going to be a pillow, it will be my first hooked pillow and I'll not hook the backside but will use the patchwork technique Betsy taught us in class.
Have a great evening folks, Hard to believe it is just two weeks away from Christmas. Please be kind to one another as you find a parking space at the mall, stand in line at the register, etc. 'Tis the season where patience and time are short so kindness needs to be stronger. LUV ya'll.
Saundra (and Ben)
Tuesday, December 10, 2013
Talking about Rug Hooking Frames
Okay newbies..... you asked for it. Now it's time to talk about frames. Just like most of you I started out with little money spent on equipment until finding out if rug hooking was something I wanted to continue. And, just like with cutters, there were fewer options available then than now.
My very first frame was a stitchery hoop but not the nice one which would sit in your lap that quilters use. Mine was just the hoop with a short expandable screw. It was rather difficult to do a two-handed task when you need one to hold the hoop. So I placed the side of the hoop against my midriff and pressed the other side up against a table. Not fun and hooking was slow not only because it was a new task but also the awkwardness of the hoop.
So when I decided to purchase my first used Bliss cutter I asked the teacher what kind of frame she would recommend. At that time the supposed crème de la crème was the Puritan frame. Since she was reducing her teaching and students, she happened to have a used Puritan frame with floor stand for sale. Now I was set. This is a picture of a Puritan frame.
I couldn't stand the frame because mine didn't tilt and rotate. Perhaps other ones could, but not mine and I didn't know how to go about making it rotate. So in the attic it went when I discovered there was something new called a 'sit-upon'. I've since sold the Puritan.
As I didn't know any USA sit-upon manufacturers I purchased one from Quilters Woodwork in Canada. I love it, still use it when I go to camps. That one goes with me to the sleeping room and another floor frame stays set up in the class room.
Now there are several good quality frames and here is a picture of one offered by Searsport. Notice the narrow paddle.
You don't really sit on it but rather your thighs hold it secure and I was able to prop my feet up on the coffee table and hook forever. The frame tilted and rotated as it was on a swivel ball and I was in heaven. If only I'd gotten a bigger frame so that I wouldn't have to move my rug as much.
And I did. I purchased the larger 12 x 16 solid oak frame from Rughooking101. You will notice the paddle is somewhat larger and it would be nice if they could narrow that down a smidgen, but it is a very good frame which I also continue to use.
Then later got lucky and purchased Rughooking 101's floor stand used from another hooker. So now I had the sit-upon or could put the frame on the floor stand.
Now you're thinking, "what does she do with all those frames?" I do honestly use them all. Not all at the same time tho. My Townsend is used when I hook a large rug and it was fabulous when I hooked Wee Folk. Sure wish I'd had it when I hooked Domestic Zoo.
When I go to a rug camp I usually take two frames; my snapdragon on the floor stand for the classroom and then I take a sit-upon to use in the hotel room to hook at night. And, when my gal pals stop by for a hook-in they can use one of my frames and they don't have to worry about bringing one.
But, I have also had 3 rugs going at the same time and had all three on 3 different frames so they were ready to go when my mood changed.
I'm sure you're also wondering...... IF I could only afford one frame which would I own? Hands down it would be the Snapdragon whether on a floor stand or sit-upon. AND, you could buy both and use the top on either the stand or sit-upon.
Have a great evening everyone.
Saundra
My very first frame was a stitchery hoop but not the nice one which would sit in your lap that quilters use. Mine was just the hoop with a short expandable screw. It was rather difficult to do a two-handed task when you need one to hold the hoop. So I placed the side of the hoop against my midriff and pressed the other side up against a table. Not fun and hooking was slow not only because it was a new task but also the awkwardness of the hoop.
So when I decided to purchase my first used Bliss cutter I asked the teacher what kind of frame she would recommend. At that time the supposed crème de la crème was the Puritan frame. Since she was reducing her teaching and students, she happened to have a used Puritan frame with floor stand for sale. Now I was set. This is a picture of a Puritan frame.
I couldn't stand the frame because mine didn't tilt and rotate. Perhaps other ones could, but not mine and I didn't know how to go about making it rotate. So in the attic it went when I discovered there was something new called a 'sit-upon'. I've since sold the Puritan.
As I didn't know any USA sit-upon manufacturers I purchased one from Quilters Woodwork in Canada. I love it, still use it when I go to camps. That one goes with me to the sleeping room and another floor frame stays set up in the class room.
Now there are several good quality frames and here is a picture of one offered by Searsport. Notice the narrow paddle.
And I did. I purchased the larger 12 x 16 solid oak frame from Rughooking101. You will notice the paddle is somewhat larger and it would be nice if they could narrow that down a smidgen, but it is a very good frame which I also continue to use.
Then later got lucky and purchased Rughooking 101's floor stand used from another hooker. So now I had the sit-upon or could put the frame on the floor stand.
And then the Snapdragon was born. Oh boy does it keep your backing tight! And yes....sigh...... I also have one of those as well as the Townsend Orbiter. I'm having trouble with either my computer or Blogger as I'm unable to post the other pictures. But if you follow the link you can see what the Snapdragon looks like. Must say here tho, since there are some small magnets it is not a frame for anyone who may have a pacemaker installed.
When I first got a frame with gripper strips it was dicey at first until I learned how to move my arms and hands around the prickly strips. If you already have gripper strips and having that issue, here are some things you can do to keep from getting scratched:
~ cut a pair of socks open at the toe area, make a small hole for the thumb and a larger area for the four fingers. Voila, a hooking arm protector.
~ probably won't work on the snapdragon, but other gripper frames you could buy 4 paint rollers (cardboard inside not plastic), cut down one side and slide over grippers.
~ you could also either make or buy an elastic stretched gripper cover which some hookers make and sell.
When I first got a frame with gripper strips it was dicey at first until I learned how to move my arms and hands around the prickly strips. If you already have gripper strips and having that issue, here are some things you can do to keep from getting scratched:
~ cut a pair of socks open at the toe area, make a small hole for the thumb and a larger area for the four fingers. Voila, a hooking arm protector.
~ probably won't work on the snapdragon, but other gripper frames you could buy 4 paint rollers (cardboard inside not plastic), cut down one side and slide over grippers.
~ you could also either make or buy an elastic stretched gripper cover which some hookers make and sell.
When I go to a rug camp I usually take two frames; my snapdragon on the floor stand for the classroom and then I take a sit-upon to use in the hotel room to hook at night. And, when my gal pals stop by for a hook-in they can use one of my frames and they don't have to worry about bringing one.
But, I have also had 3 rugs going at the same time and had all three on 3 different frames so they were ready to go when my mood changed.
I'm sure you're also wondering...... IF I could only afford one frame which would I own? Hands down it would be the Snapdragon whether on a floor stand or sit-upon. AND, you could buy both and use the top on either the stand or sit-upon.
Have a great evening everyone.
Saundra
Monday, December 9, 2013
Having Fun and Hooking Letters
It is such fun to hook something that is fun and no stress. No, my Long Island Farm isn't completely bound yet and Shadow hasn't been steamed yet. I just needed to play and have fun working on the Antique Hearts and Swags design started with Betsy in November. No, don't have a picture to share of that just yet but will do that tomorrow.
For the newbies I already talked about cutters and still owe an episode about frames but that would require a lot of work and already it is after 5 p.m. However, there is another topic someone has asked me to cover and that is about hooking letters.
No I'm not an expert and normally don't follow the rules anyway. Usually I just hook my letters in the same size wool strips that I'm using for the rest of the rug. After the letters are hooked then I do a row of background around the letters to secure them in place. Once hooked in don't normally pull them out and hook using a different size. Here is the Crow Sampler by Ali Strebel that I hooked and the letters are in #8. I did take some creative licence by carrying the circle border all the way around.
Another rug I hooked with letters is Stop and Smell the Roses by Karen Kahle, again hooked in #8. I really need to tone down that white rabbit on the right and say that every time I post a picture somewhere.
I've heard or read where some hookers will use a thinner wool strip to hook the letters, then hook around those letters with background. After which they pull out the letters and hook in the designated color using a slightly wider strip. Hey, I don't care much for ripping out already hooked loops despite what I previously did with my poor Shadow memorial.
My girlfriend Shari hooked this antique adaptation and took the lettering to another level by outlining her letters with yet another color other than background.
For the newbies I already talked about cutters and still owe an episode about frames but that would require a lot of work and already it is after 5 p.m. However, there is another topic someone has asked me to cover and that is about hooking letters.
No I'm not an expert and normally don't follow the rules anyway. Usually I just hook my letters in the same size wool strips that I'm using for the rest of the rug. After the letters are hooked then I do a row of background around the letters to secure them in place. Once hooked in don't normally pull them out and hook using a different size. Here is the Crow Sampler by Ali Strebel that I hooked and the letters are in #8. I did take some creative licence by carrying the circle border all the way around.
Another rug I hooked with letters is Stop and Smell the Roses by Karen Kahle, again hooked in #8. I really need to tone down that white rabbit on the right and say that every time I post a picture somewhere.
I've heard or read where some hookers will use a thinner wool strip to hook the letters, then hook around those letters with background. After which they pull out the letters and hook in the designated color using a slightly wider strip. Hey, I don't care much for ripping out already hooked loops despite what I previously did with my poor Shadow memorial.
My girlfriend Shari hooked this antique adaptation and took the lettering to another level by outlining her letters with yet another color other than background.
Shari hooked the letters in a red #8.5 wool strips and then outlined them in a #6 wool strip. UH, I don't think I'd want to do that......once is enough already. But Shari made quite a great statement in her rug and the words don't get lost.
Letters? Hey, you can hook a flower stem, right? That is nothing more than hooking on the line (or inside the lines) whether it be on the straight of grain or an angle. So if you can hook a flower stem you can hook a letter. Unless you're doing something special, all you have to do is hook the letters at the same height as you are the rest of your piece.
Have a great evening everyone. And again, please be kind to one another. Today at the grocery store I had two items and was in a rather long line where the people in front of me had half or full carts full. It is a small store so at this time only one register was open. The gentleman in front of me told me to go ahead of him. I thanked him and said that chivalry isn't dead, and that his momma would be pleased at the great job she did in raising him.
Saundra
Saturday, December 7, 2013
Finally Finished ! ! ! !
Thank goodness I finally finished pulling the last loops on Shadow JUST NOW! Many times I was tempted to post a current picture but knew I'd rip out, hook again and question my decisions even after that. So this time my intentions were to just fill in the neck area the best I could and call it quits. When she is steamed, bound and hung I'm sure that all I'll see is the beauty in her eyes, remember her spirit and her neck won't even be noticed.
Should I make changes? Yes. Am I going to? No... Uh, or at least I don't think so. But now that I'm looking at her on the computer certainly do notice things that should be better. Oh my but she has been exhausting. Shadow was started at Cape May in September and it is now 3 months later. It has never taken me that long to do such a small hooked piece. However, other rugs have been hooked and started since Shadow. Shadow was hooked in #8 strips and before steaming she measures 19 x 23 (for you my sweet Lauren).
While I should be doing back flips I'm feeling like she still isn't done right. SHEESH, enough already Saundra.
Think it is time to take my big boy Ben out for a walk and get some fresh air.
Have a good evening everyone.
Saundra
Should I make changes? Yes. Am I going to? No... Uh, or at least I don't think so. But now that I'm looking at her on the computer certainly do notice things that should be better. Oh my but she has been exhausting. Shadow was started at Cape May in September and it is now 3 months later. It has never taken me that long to do such a small hooked piece. However, other rugs have been hooked and started since Shadow. Shadow was hooked in #8 strips and before steaming she measures 19 x 23 (for you my sweet Lauren).
While I should be doing back flips I'm feeling like she still isn't done right. SHEESH, enough already Saundra.
Think it is time to take my big boy Ben out for a walk and get some fresh air.
Have a good evening everyone.
Saundra
Friday, December 6, 2013
Talking Turkey about Cutters
One of my followers has asked if I would compare cutters and frames, so today I'll talk about cutters. Like many of you, when I first started hooking I used a rotary cutter. Since I wasn't sure if rug hooking would be something I'd continue to want to do didn't desire to spend a lot of money investing in tools at first.
When I did decide to purchase a cutter the Townsend wasn't even born yet. The options were Bliss, Fraser, Rigby and I had heard the word Bolivar, a Canadian cutter, but also heard it was expensive and with an extensive waiting list. The waiting list was enough to thwart any ideas for that cutter if the cost wasn't.
As I pondered my decision the Bolivar was eliminated but couldn't decide which of the other three I wanted. My thoughts were that having one with suction cups would be great and could put it on a table top ~ plus it was a wee bit cheaper than the Fraser. So the Bliss was my choice and I purchased it used from a hooking teacher reducing her stash.
But then a friend had a Fraser 500-1 and I could see how fast the strips came out of that cutter compared to mine. Once I had a little more disposable income I purchased a Fraser 500 and did like it better. Besides, now I had two cutters and could have different size strips on each.
Oh, but then the Townsend was born. And a happy birth it was and cheers were heard around the hooking world (yeah, I know I'm getting rather dramatic here aren't I?) While there was a long hesitation on putting out that money at first, I decided to purchase the Townsend cutter and 3 cartridges. I got the #6 for free (my choice) and purchased #7, #8, #8.5. Later I decided to purchse the #9 and just recently treated myself to the #10 (1/2"). I just LOVE my Townsend!!!
Prices of cutters and blades are different now than then so I'll give you today's known cost:
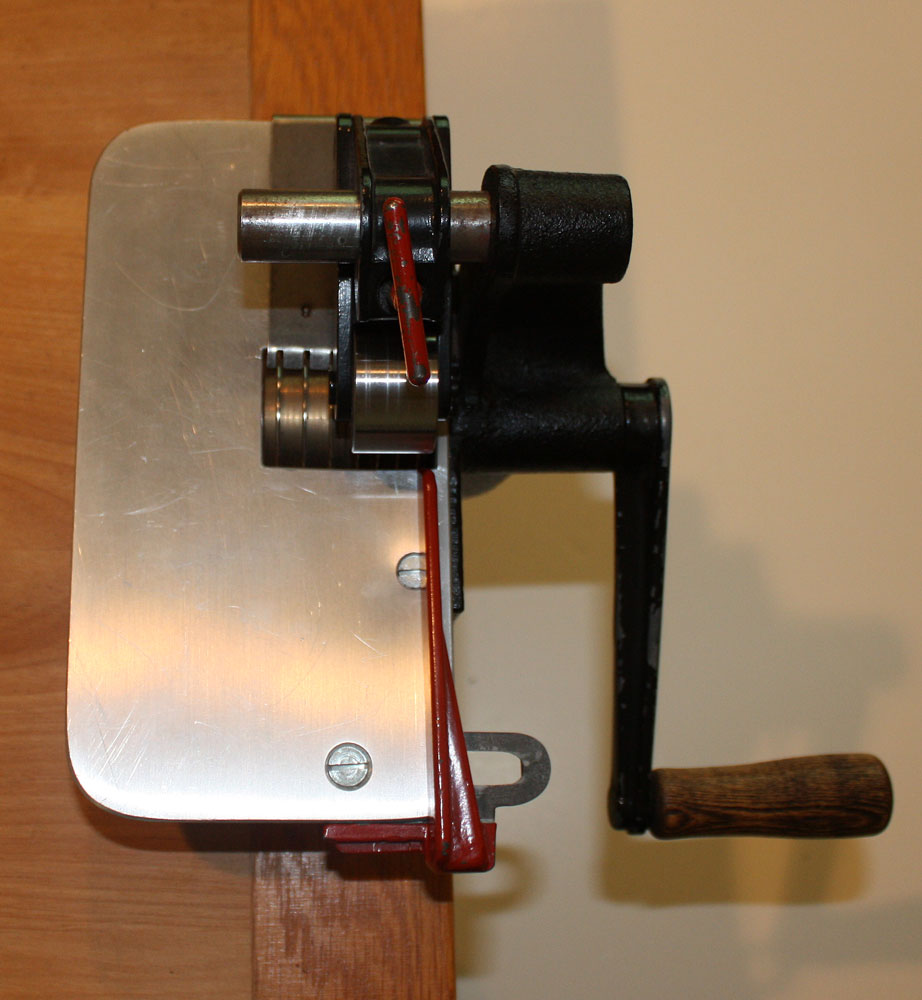
Bliss ~ Manufactured by Harry M. Fraser Company, has suction cups to mount on table. It takes more cranks to cut the same length of wool than the Fraser 500-1 but does not require attaching to a table or other object. Cost is $300 new from Harry Fraser and sometimes you can get them used either from Fraser, e-bay or other hookers who are upgrading to a Townsend. Blades cost $37.50 and are interchangeable with the Fraser 500-1.
Fraser 500-1 ~ Olso manufactured by Harry Fraser Company requires attaching to a table side. OR you could do what I did and buy a cheapo unpainted stool from AC Moore or Michael's and then it can be placed on top of a table instead of teetering on the edge. It takes fewer cranks of the handle to go thru that strip of wool than the Bliss. Cost new from Fraser is $340 and the blades are $37.50. Again these can be purchased used on eBay or hookers who are upgrading.
Downside to these cutters is that changing blades requires to loosen and remove the blade and loosen the tension of a knob either on top or under the particular cutter. Then replacing the blade with the desired size and tightening the bolt and tightening the tension again until it cuts properly.
I would like to add that Fraser gives EXCELLENT service and I still own one of each and it is on those cutters that I have my small blades attached. Since I rarely use anything small just didn't want to spend the money for a Townsend cartridge for anything under #6 so kept my dependable Bliss and Fraser, just for small cuts IF I needed them for eyes or flower centers.
The Rigby requires "fingers" to go with the cutter. I don't know what the new price is for this cutter. I owned one briefly and sold it as soon as possible. Frankly I didn't have much luck getting service from the manufacturer but perhaps that issue was something of the past. While I've heard people who like this cutter, it is not one I would tell my best friend to buy.
The Bolivar Cutter has 3 types of cutters. The Standard has 3 fixed blades (you get to choose the sizes) and the entire unit rotates around in a circle until your cut size appears. There is a Model 5 which you can interchange blades, and also offer a single blade option. You can check out their web site at the link just above. The cost of the Standard is $600 plus shipping from Canada. If you check out their web site you can see the complex pricing schedule depending on which model suits you best and for what price.
Then there is the lovely Townsend frame which is now being manufactured by Beeline-Townsend. The cost of the cutter body new is $540 and comes with one cartridge (your choice of size), a cutter caddy, hex wrench and brush . Additional cutter cartridges are $156 each.
I cannot think of any down side to owning a Townsend cutter. If you have ever changed blades in a Bliss, Fraser or Rigby, the first time you change a blade on a Townsend you will be sold. All you do is slide over the black top section, pull out the whole cartridge, insert the new cartridge and close the black top lever.... VOILA!!!!!!
No, I don't work or get any commission for this, I am just one happy hooker using the Townsend cutter. I hope that I've been able to answer some questions for you.
Have a great evening.
Saundra
When I did decide to purchase a cutter the Townsend wasn't even born yet. The options were Bliss, Fraser, Rigby and I had heard the word Bolivar, a Canadian cutter, but also heard it was expensive and with an extensive waiting list. The waiting list was enough to thwart any ideas for that cutter if the cost wasn't.
As I pondered my decision the Bolivar was eliminated but couldn't decide which of the other three I wanted. My thoughts were that having one with suction cups would be great and could put it on a table top ~ plus it was a wee bit cheaper than the Fraser. So the Bliss was my choice and I purchased it used from a hooking teacher reducing her stash.
But then a friend had a Fraser 500-1 and I could see how fast the strips came out of that cutter compared to mine. Once I had a little more disposable income I purchased a Fraser 500 and did like it better. Besides, now I had two cutters and could have different size strips on each.
Oh, but then the Townsend was born. And a happy birth it was and cheers were heard around the hooking world (yeah, I know I'm getting rather dramatic here aren't I?) While there was a long hesitation on putting out that money at first, I decided to purchase the Townsend cutter and 3 cartridges. I got the #6 for free (my choice) and purchased #7, #8, #8.5. Later I decided to purchse the #9 and just recently treated myself to the #10 (1/2"). I just LOVE my Townsend!!!
Prices of cutters and blades are different now than then so I'll give you today's known cost:
Bliss ~ Manufactured by Harry M. Fraser Company, has suction cups to mount on table. It takes more cranks to cut the same length of wool than the Fraser 500-1 but does not require attaching to a table or other object. Cost is $300 new from Harry Fraser and sometimes you can get them used either from Fraser, e-bay or other hookers who are upgrading to a Townsend. Blades cost $37.50 and are interchangeable with the Fraser 500-1.
Downside to these cutters is that changing blades requires to loosen and remove the blade and loosen the tension of a knob either on top or under the particular cutter. Then replacing the blade with the desired size and tightening the bolt and tightening the tension again until it cuts properly.
I would like to add that Fraser gives EXCELLENT service and I still own one of each and it is on those cutters that I have my small blades attached. Since I rarely use anything small just didn't want to spend the money for a Townsend cartridge for anything under #6 so kept my dependable Bliss and Fraser, just for small cuts IF I needed them for eyes or flower centers.
The Bolivar Cutter has 3 types of cutters. The Standard has 3 fixed blades (you get to choose the sizes) and the entire unit rotates around in a circle until your cut size appears. There is a Model 5 which you can interchange blades, and also offer a single blade option. You can check out their web site at the link just above. The cost of the Standard is $600 plus shipping from Canada. If you check out their web site you can see the complex pricing schedule depending on which model suits you best and for what price.
No, I don't work or get any commission for this, I am just one happy hooker using the Townsend cutter. I hope that I've been able to answer some questions for you.
Have a great evening.
Saundra
Thursday, December 5, 2013
Long Island Farm Binding
This will be my final posting on the binding of Long Island Farm (design by Lucille Festa) even tho I'm only 1/4 of the way finished....but at least one side is done. This is what it looks like since the final loops were pulled. If you recall I'd considered having the fence on the left look as tho it was going down the back of the hill. Well I tried it and didn't like it so pulled out the loops and made it more symmetrical.
Someone did comment about the mitered corners being done neatly. One secret is having the pointed corner sheared off as shown here.
Next you fold down the corner like this.
Then fold the two sides inward until they meet in the center. After which you pin and stitch. You would basically do the same thing with the binding tape.
This is what the edge looks like with the variegated colored yarn which covers the very edge of the backing and the colors work well with the colors used in the rug.
I'm doing an update because I had a request to see the back of the rug with the binding. Since Long Island Farm isn't completely bound I will show a portion of the one side which is at least whipped with the yarn but still isn't stitched down on the inside portion of the binding tape. Here is that picture.
But here is a picture of the back of a rug "Henny Penny" by Woolley Fox, which is completely bound. By the way, that design is on sale half off (check specials) until they are sold. By the way, this little mat was rolled up so that is why you see wrinkles in the binding tape. Since I have it for sale it doesn't get used and keep them rolled up. But perhaps they need to come out of hiding and displayed on my chests or harvest table once in a while to get aired out. I just LOVE Henny Penny!
Glenda has asked if I would write more about different cutters and frames since she doesn't live near other hookers or know of any shop where she might otherwise be informed. I'll probably do one post on cutters and the next day talk about frames. Thanks to all who have questions because this is how I know what you have an interest in.
Have a great evening everyone; and please be kind to one another. This is the season which finds people's patience level being tested. If standing in a long line, take a deep breath and maybe even crack a joke which might get a chuckle from someone and even neutralize situation.
Saundra
Wednesday, December 4, 2013
Seems Christmas Came Early at My House
Good heavens but there were a lot of presents delivered for me today and it feels like Christmas here at my house. One fun package was the giveaway I won from the blog Primitives by the Light of the Moon (thank you Ginger). Look at all the goodies that came in this one giveaway; there is the beautifully needle punched bird which has a hanger for a tree or to place on a hanging angel doll, a kit that includes wool cut outs and antique quilt piece plus calico back fabric, also swatches of fulled wool that could be used for wool applique. WHOO HOO!
And this is another kit that Ginger offers and one that I recently made. As you can see I've put it to good use already but pulled out some pins so you could see the design better. The wool flower cut outs were so perfectly cut that it appears they are metal form pressed out but that is very unlikely since it would be so costly. I'd say Ginger has two precise pair of hands which does all this perfected cutting.
Next package was a birthday gift to myself which arrived the day before my B'day. Yup, a new cartridge for my Townsend cutter.... a #10. I purchased the cartridge from Searsport and it was shipped to me directly from Beeline and bypassing a trip to Searsport (thanks Beeline and Searsport). I didn't think I'd ever get a cartridge that big but since I'm loving the torn strips figured that having the #10 would take a lot less effort. However, the piece that was started with Betsy with the torn strips WILL continue to be the torn strips. That awaits in the wings while I continue slowly to pull loops on Shadow girl.
And speaking of Betsy....... my wool order also arrived today. It hasn't been washed yet but that will happen in the next couple days for sure. There's no rush since I've got two rugs on the burner at the same time now anyway.
The bottom wool is the wool I fell in love with at camp and knew more was needed for my stash. It is called Donkey Cabbage. And, I just read that the sale is extended until TODAY. So don't walk, but RUN to the web site and place your order. Here is the link to Heavens to Betsy's blog which will give you the coupon code.
Sorry there's no newbie news tonight as I've not accomplished a thing more on the binding. Uh, remember..... binding is not my favorite thing so it sits in the wings.
Have a great evening everyone and warm fuzzy bear hugs to everyone.
Saundra
And this is another kit that Ginger offers and one that I recently made. As you can see I've put it to good use already but pulled out some pins so you could see the design better. The wool flower cut outs were so perfectly cut that it appears they are metal form pressed out but that is very unlikely since it would be so costly. I'd say Ginger has two precise pair of hands which does all this perfected cutting.
Next package was a birthday gift to myself which arrived the day before my B'day. Yup, a new cartridge for my Townsend cutter.... a #10. I purchased the cartridge from Searsport and it was shipped to me directly from Beeline and bypassing a trip to Searsport (thanks Beeline and Searsport). I didn't think I'd ever get a cartridge that big but since I'm loving the torn strips figured that having the #10 would take a lot less effort. However, the piece that was started with Betsy with the torn strips WILL continue to be the torn strips. That awaits in the wings while I continue slowly to pull loops on Shadow girl.
And speaking of Betsy....... my wool order also arrived today. It hasn't been washed yet but that will happen in the next couple days for sure. There's no rush since I've got two rugs on the burner at the same time now anyway.
The bottom wool is the wool I fell in love with at camp and knew more was needed for my stash. It is called Donkey Cabbage. And, I just read that the sale is extended until TODAY. So don't walk, but RUN to the web site and place your order. Here is the link to Heavens to Betsy's blog which will give you the coupon code.
Sorry there's no newbie news tonight as I've not accomplished a thing more on the binding. Uh, remember..... binding is not my favorite thing so it sits in the wings.
Have a great evening everyone and warm fuzzy bear hugs to everyone.
Saundra
Tuesday, December 3, 2013
Binding Long Island Farm #2
I've been rather busy cutting grass (uh, mowing the leaves) and yes raking some too but suffice it to say most of my time today has been spent doing less desirable tasks than hooking or finishing rugs.
BUT, not to let you newbies down, here is the next installment of binding my Long Island Farm rug using the cotton rug binding method.
If you read the previous post you saw that I did some sewing around the perimeter of the design 1" or so beyond the last hooked row. After which I trimmed the excess off.
Then I mitre the corners of the foundation (backing) so it will lay flat. Yes, just a primitive stitch, but it works well enough and the stitches will be hidden with the binding tape.
Then I use a wool yarn to whip stitch the edge closest to the last hooked row. I start with a little rug tape extended a little beyond the corner. Since it looks better with mitred corners that is where I like to start. Some people like to start on the side of the rug. But each rug hooker has his or her desired style. This picture looks like the variegated wool yarn is pink but it appears red in real light.
This not the only way to bind a rug and it is also not the only way I HAVE BOUND a rug.
Have a great evening and if any newbies have questions they'd like me to talk about, please feel free to write me at saundra125@comcast.net.
BUT, not to let you newbies down, here is the next installment of binding my Long Island Farm rug using the cotton rug binding method.
If you read the previous post you saw that I did some sewing around the perimeter of the design 1" or so beyond the last hooked row. After which I trimmed the excess off.
Then I mitre the corners of the foundation (backing) so it will lay flat. Yes, just a primitive stitch, but it works well enough and the stitches will be hidden with the binding tape.
Then I use a wool yarn to whip stitch the edge closest to the last hooked row. I start with a little rug tape extended a little beyond the corner. Since it looks better with mitred corners that is where I like to start. Some people like to start on the side of the rug. But each rug hooker has his or her desired style. This picture looks like the variegated wool yarn is pink but it appears red in real light.
This not the only way to bind a rug and it is also not the only way I HAVE BOUND a rug.
Have a great evening and if any newbies have questions they'd like me to talk about, please feel free to write me at saundra125@comcast.net.
Monday, December 2, 2013
Beginning Binding Long Island Farm Rug #1
During the course of my blog postings I've shown various ways to bind a rug and this would be a repeat for those of you who have followed me for a while. However, for you newbies just beginning to read my blog this will show how to do one type of binding using a combination of cotton twill binding tape and yarn.
After steam pressing the rug front and back and letting it rest over night, I then measure out 1 1/8" away from the last row of hooking all the way around. I also mark the point of the corner off to reduce bulk at each of the corners.
Next I do two rows of straight stitching all the way around; the first row is ON the drawn line and the second row would be just inside the previous sewn line but in about 1/4".
Then I do a zig zag stitch to secure those threads between the two rows of straight stitching.
This is what it looks like after all the stitching. Next I trip off the excess close but not encroaching on the stitched area. Notice the flat corners which will reduce bulk on the corner when binding.
Some may think it is Overkill? I don't think so. Since many an hour was spent hooking this rug using good wool and good linen foundation, the last thing I want to happen is the teasing out of the rug along the perimeter. And want you to know I have seen it happen when people just trim their linen thinking that since it is covered with a binding or whipped with wool that the ends are safe.
Don't believe a word of it. I have a beautifully hooked rug given to me by a dear friend who is no longer here. Just by my picking it up by the sides noticed that one side was coming apart. So now I don't feel as tho I can even hang her rug unless it is securely attached some how so the weight of the rug wouldn't stretch the linen foundation and tease out the top portion of the rug.
Frankly I do not like the binding part. But I love my rugs and know that finishing a project (binding in this case) is something to take seriously and do it properly. I do the same thing for my small mats and purses I make.
Have a marvelous Monday everyone.
Saundra
After steam pressing the rug front and back and letting it rest over night, I then measure out 1 1/8" away from the last row of hooking all the way around. I also mark the point of the corner off to reduce bulk at each of the corners.
Next I do two rows of straight stitching all the way around; the first row is ON the drawn line and the second row would be just inside the previous sewn line but in about 1/4".
Then I do a zig zag stitch to secure those threads between the two rows of straight stitching.
This is what it looks like after all the stitching. Next I trip off the excess close but not encroaching on the stitched area. Notice the flat corners which will reduce bulk on the corner when binding.
Some may think it is Overkill? I don't think so. Since many an hour was spent hooking this rug using good wool and good linen foundation, the last thing I want to happen is the teasing out of the rug along the perimeter. And want you to know I have seen it happen when people just trim their linen thinking that since it is covered with a binding or whipped with wool that the ends are safe.
Don't believe a word of it. I have a beautifully hooked rug given to me by a dear friend who is no longer here. Just by my picking it up by the sides noticed that one side was coming apart. So now I don't feel as tho I can even hang her rug unless it is securely attached some how so the weight of the rug wouldn't stretch the linen foundation and tease out the top portion of the rug.
Frankly I do not like the binding part. But I love my rugs and know that finishing a project (binding in this case) is something to take seriously and do it properly. I do the same thing for my small mats and purses I make.
Have a marvelous Monday everyone.
Saundra
Sunday, December 1, 2013
DECEMBER'S Stitchery and Quilt Applique'
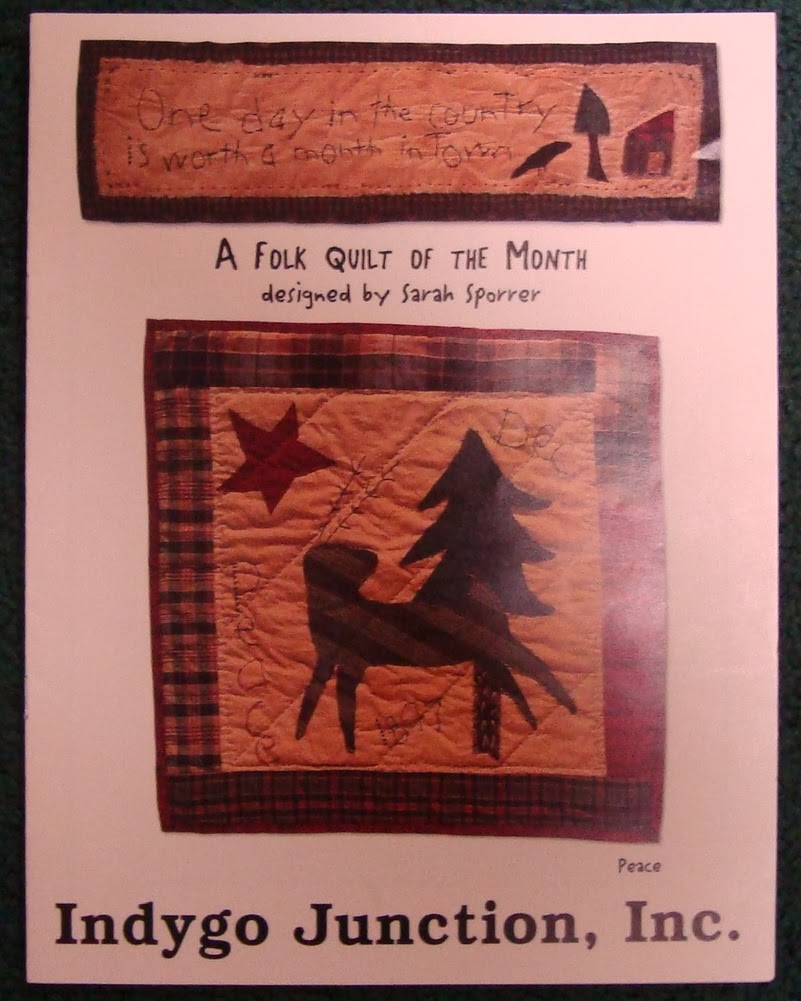
Yup, the first of December is here and so it is time for this month's project that I made back in 1998. All the other blocks were done in 1997 but this one was completed after moving into the house. So it is this December quilt applique that I chose to do for the home just in time for the holidays. This wasn't a pattern of the 12 month series.
The booklet below is the pattern that, had I followed all 12 designs, would have normally been the quilt block to be shown. Since I'm no longer interested in quilt applique, perhaps this is a design that I'll hook instead. Uh, for next year.
And here is the Stitchery for the month of December.
Sorry that I don't have any revelations for you newbies, but I've been busy doing other things so haven't gotten any further on the rug binding for Long Island Farm beyond trimming the linen. Matter of fact I've not even hooking as much as I'd like.
Hours yesterday and today I've spent on the computer listing my Gail Wilson doll kits and patterns on e-bay. Since I don't have an interest in making dolls it seemed appropriate to offer them for sale on e-bay.
Hope you have a great Sunday.
Saundra
The booklet below is the pattern that, had I followed all 12 designs, would have normally been the quilt block to be shown. Since I'm no longer interested in quilt applique, perhaps this is a design that I'll hook instead. Uh, for next year.
And here is the Stitchery for the month of December.
Sorry that I don't have any revelations for you newbies, but I've been busy doing other things so haven't gotten any further on the rug binding for Long Island Farm beyond trimming the linen. Matter of fact I've not even hooking as much as I'd like.
Hours yesterday and today I've spent on the computer listing my Gail Wilson doll kits and patterns on e-bay. Since I don't have an interest in making dolls it seemed appropriate to offer them for sale on e-bay.
Hope you have a great Sunday.
Saundra
Subscribe to:
Posts (Atom)