Add tiny polka dots to that list. A loyal follower of my blog asked me how to hook dots and circles so just hooked some samples. But first, you can see how I executed my examples in this rug which I named Olde Gals. See the gal with the tiny polka dots in the green dress? Those were made with linen threads from foundation backing using a slip knot. Yup.
Here is a close up of that dress on the gal from the left. I will show you how that was done a little further down on this post.
I used a nickel and dime to draw circles and used #8 cut wool just to give you a perspective here.
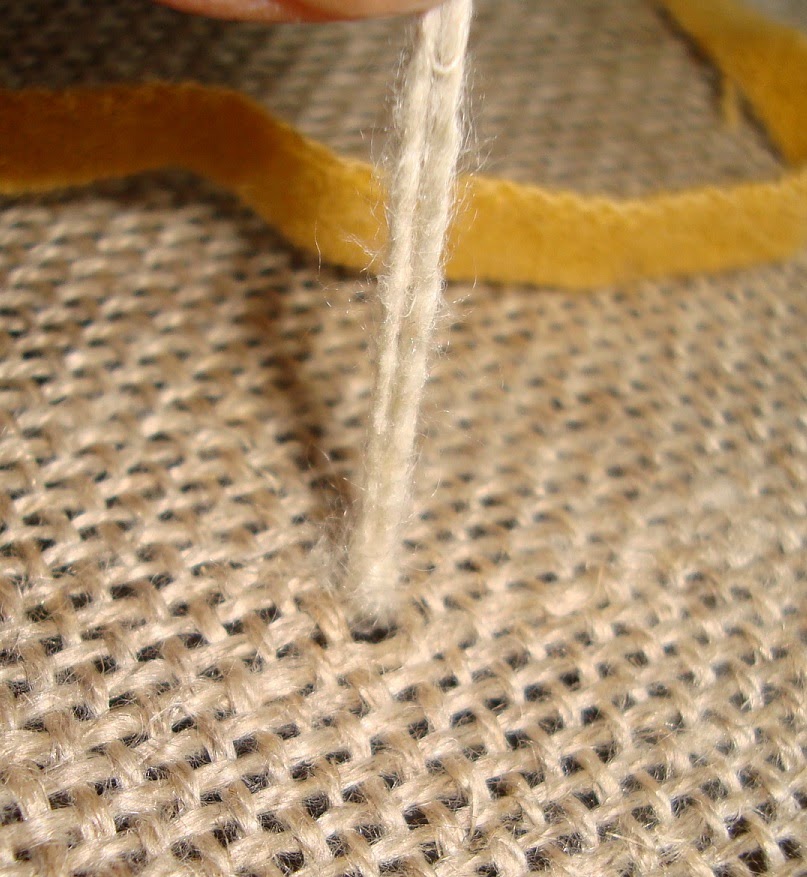
This yellow wool is #8 cut and the white string is from a cut away end of linen backing saved to use for dots OR sparkle in the eye of a small animal. You can use this technique for both..
First thing you do is pull up a loop.
Then one thread away from that loop you pull the two tails thru the loop.
Then tug it to be sure it is a good 'slip knot'. Keep the linen threads high, about an inch above the other hooking so they don't fall below; remember they can always be trimmed later.
Then you hook around it and fill in the rest of the dress, or the sky if you are making far away night stars.
Then there are three ways I use to do the hooked dots. And it depends on what is being hooked nearby that determines which way I go. Using #8 yellow strip I start with a tail up, pull a loop and pull up a tail on the other side. This works fine but you could go a step further if you want to really enclose that dot.
Again using #8 yellow strip on the other side I pull a tail up and pull a tail up on the other side. Yes..... breaking rule of 'crossing over'. In rug classes teachers will appropriately tell you to NOT cross over. Teachers are correct and I'm sure you have seen stitchery which looks horrid underneath and it is the same with some hooking project.
The underside of any needlework project should look as tidy underneath as it does on top. Yes, that section which is crossed over will wear faster because it is thicker and takes more of a beating when you walk on it. But if it is a wall hanging or in a low walking area, what the 'hey'. So break a rule ~ it's only a dot.
Then hook around the flower center dot (or whatever) and trim down the tails...which I didn't do here in this picture. To the right of that one is another way to hook dots. That is where you start with the tail, pull a loop and pull up the tail in the same hole where the other tail was and cut.
This is a different angle so you can see the tails are in the same hole.
Then I hooked a random rogue dot to the top left. It is a tight hooked circle where basically each loop is cattycorner from the previous loop. That looks like there are 4 loops and two tails in the same hole to accomplish that one. So that hooked circle would be way smaller than a dime.
It is great when people ask me questions because I was a newbie too once. Even now I'm learning; in disclosure, I'm not a certified teacher, I'm only sharing what I know. But am more than happy to share what I know for those of you just starting out.
Enjoy your Saturday evening and early Easter Sunrise.
Saundra


Very good way to do circles and nice tutorial. I don't care if mine are perfect, so i just make them as I go;)
ReplyDeleteDebbie
Thanks for the info. I have such a hard time with hooking circles. This will really help.
ReplyDeleteYou are such a sweetie taking the time to share your knowledge.
Hugs :)
Lauren
I appreciate that you share with us. Thanks and I hope you have a blessed Easter.
ReplyDeleteAlways appreciate what you share. Easter Blessings to you and Ben.
ReplyDeleteThank you for the tips on making circles....it is very helpful. Have a Happy Easter & enjoy some chocolates !
ReplyDeleteThanks for the great tips Saundra, I somehow missed this post.
ReplyDeleteHugs,
JB